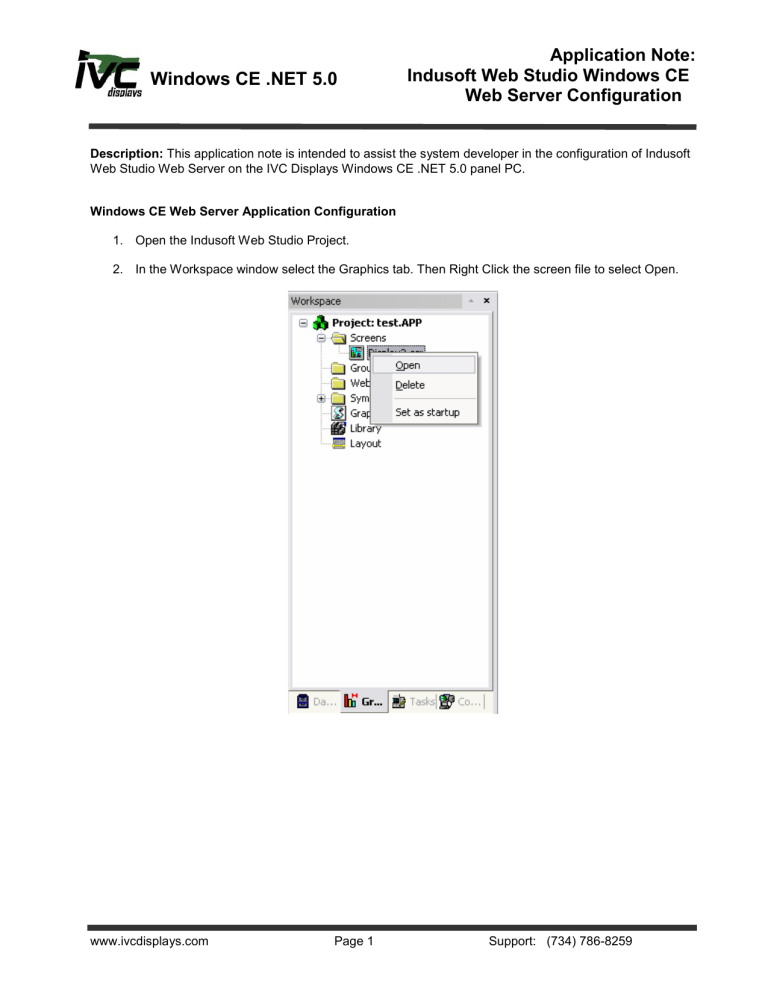
Windows CE .NET 5.0 Application Note: Indusoft Web Studio Windows CE Web Server Configuration Description: This application note is intended to assist the system developer in the configuration of Indusoft Web Studio Web Server on the IVC Displays Windows CE .NET 5.0 panel PC. Windows CE Web Server Application Configuration 1. Open the Indusoft Web Studio Project. 2. In the Workspace window select the Graphics tab. Then Right Click the screen file to select Open. www.ivcdisplays.com Page 1 Support: (734) 786-8259 Windows CE .NET 5.0 Application Note: Indusoft Web Studio Windows CE Web Server Configuration 3. Select File>Save AS HTML. 4. Do this for each screen file. 5. Use the File → Save Screen Group as HTML menu option to save screen groups ( *.sg ) as HTML and make them available for the Web Thin Clients. www.ivcdisplays.com Page 2 Support: (734) 786-8259 Windows CE .NET 5.0 Application Note: Indusoft Web Studio Windows CE Web Server Configuration 6. In the Workspace window select the Task tab. Then open the Startup Script. 7. Add this VBScript to the Startup Script. If ($AppIsRunning("CET Web Server")=0) Then $WinExec($GetAppPath() & "Web\CEWebServer.exe" , 7) Note: This script will execute CEWebServer.exe only if it is not already running. 8. From Windows Explorer copy Program Files\InduSoft Web Studio v6.1\Redist\Wince 4.0\Armv4I\CEWebServer.exe to the projects Web folder. 9. From the Indusoft Web Studio Tool Bar select Project>Settings. www.ivcdisplays.com Page 3 Support: (734) 786-8259 Windows CE .NET 5.0 Application Note: Indusoft Web Studio Windows CE Web Server Configuration 10. Select the Web Tab and enter the Windows CE panel PC IP Address as the Data Server IP Address. 11. Following the instructions in the Application_Note_Installing_Indusoft_Web_Studio_WinCE.pdf to upload and start the application to the Windows CE panel PC. 12. On the Web Thin Client PC you must register ISSymbils.dll Note: The maximum number of Web Thin Client stations connected simultaneously to the server depends on the settings of the license installed on the server. The user does not have to install any license on the Web Thin Client stations. www.ivcdisplays.com Page 4 Support: (734) 786-8259 Windows CE .NET 5.0 Application Note: Indusoft Web Studio Windows CE Web Server Configuration Installing the ISSymbol Control You can also install the ISSymbol control manually in the Web Thin Client station. The procedure to install ISSymbol in each operating system is described below: Windows NT/2000/XP/Vista: 1. Copy the following files… o o \InduSoft Web Studio v6.1\Bin\ISSymbolReg.exe \InduSoft Web Studio v6.1\Bin\ISSymbolVM.cab …and paste them into any directory of the Web Thin Client station. Make sure that both files are stored in the same directory. 2. Run ISSymbolReg.exe to register the ISSymbol control in the Web Thin Client station. Windows CE: 1. Copy the following files… o \InduSoft Web Studio v6.1\Redist\<OS Version>\<Processor Type>\Bin\ISSymbolCE.ocx o \InduSoft Web Studio v6.1\Redist\<OS Version>\<Processor Type>\Bin\IndHTTP.dll …and paste them into any directory of the Windows CE device. Make sure that both files are stored in the same directory. For Windows CE .NET 5.0 select WinCE 4.0. For IVC Displays Windows CE panel PCs select ARMV4I <Processor Type>. 2. Execute the following command from the Windows CE command prompt: regsvrce.exe "\<ISSymbolPath>\ISSymbolCE.ocx" For example: regsvrce.exe "\Storage Card\ISSymbolCE.ocx" 3. Save the registry settings to keep ISSymbolCE.ocx registered when you reboot the Windows CE device. www.ivcdisplays.com Page 5 Support: (734) 786-8259 Windows CE .NET 5.0 Application Note: Indusoft Web Studio Windows CE Web Server Configuration Windows CE PocketPC: 1. Copy the following files… o \InduSoft Web Studio v6.1\Redist\<OS Version>\<Processor Type>\Bin\IndHTTP.dll o \InduSoft Web Studio v6.1\Redist\<OS Version>\<Processor Type>\Bin\ISSymbolCE.ocx o \InduSoft Web Studio v6.1\Redist\<OS Version>\<Processor Type>\Bin\RegSvrCE.exe …and paste them into any directory of the PocketPC device. Make sure that both files are stored in the same directory. 2. Execute the RegSvrCE.exe program on the PocketPC device. To register ISSymbolCE.ocx, do the following: 1. Select the \<ISSymbol Path>\ISSymbolCE.ocx file. 2. Select the Register option. 3. Click OK. Connecting to the Windows CE Web Server 1 Any Web Thin Client on the same network as the Windows CE panel PC may run Internet Explorer and enter the IP address of the Windows CE panel PC followed by the startup screen and access the application screens through the LAN. 2 Before the HTML screen will open the user must enter a valid user name and password. Comments: Do not place CEServer.exe into NORFLASH/Startup. The Execution Environment will install the application in NORFLASH/Startup and crash because there is not enough memory. Save the registry with CECP to save changes to Windows CE. Address any comments or questions to [email protected]. www.ivcdisplays.com Page 6 Support: (734) 786-8259
