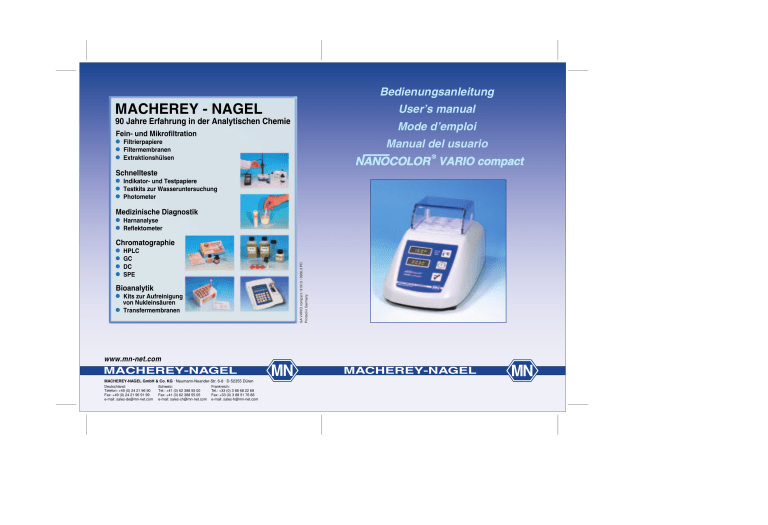
Bedienungsanleitung MACHEREY - NAGEL User’s manual 90 Jahre Erfahrung in der Analytischen Chemie Mode d’emploi Fein- und Mikrofiltration ⓦ Filtrierpapiere ⓦ Filtermembranen ⓦ Extraktionshülsen Manual del usuario VARIO compact Schnellteste ⓦ Indikator- und Testpapiere ⓦ Testkits zur Wasseruntersuchung ⓦ Photometer Medizinische Diagnostik ⓦ Harnanalyse ⓦ Reflektometer Chromatographie HPLC GC DC SPE GA VARIO compact / 91913 / 0950.3 PD Printed in Germany ⓦ ⓦ ⓦ ⓦ Bioanalytik ⓦ Kits zur Aufreinigung von Nukleinsäuren ⓦ Transfermembranen www.mn-net.com MACHEREY-NAGEL MACHEREY-NAGEL GmbH & Co. KG · Neumann-Neander-Str. 6-8 · D-52355 Düren Deutschland: Telefon: +49 (0) 24 21 96 90 Fax: +49 (0) 24 21 96 91 99 e-mail: [email protected] Schweiz: Tel.: +41 (0) 62 388 55 00 Fax: +41 (0) 62 388 55 05 e-mail: [email protected] Frankreich: Tel.: +33 (0) 3 88 68 22 68 Fax: +33 (0) 3 88 51 76 88 e-mail: [email protected] MN MACHEREY-NAGEL MN INHALTSVERZEICHNIS 1. 2. 2.1 2.2 2.3 2.4 2.5 3. Technische Daten Bedienung Geräteaufstellung Inbetriebnahme Programmauswahl Programmabbruch Programmierung Anzeigen und Fehlermeldungen 4 5 5 5 5 6 6 7 CONTENTS 1. 2. 2.1 2.2 2.3 2.4 2.5 3. Technical Data Operation Placement of instrument Operation instructions Programme selection Interruption of programmes Programming Displays and Troubleshooting 8 9 9 9 9 10 10 11 SOMMAIRE 1. 2. 2.1 2.2 2.3 2.4 2.5 3. Données techniques Fonctionnement Installation Instructions opératoires Sélection du programme / démarrage Interruption du programme de chauffe Programmation Messages d’erreur 12 13 13 13 13 14 14 15 CONTENIDO 1. 2. 2.1 2.2 2.3 2.4 2.5 3. Datos técnicos Funcionamiento Emplazamiento del aparato Puesta en marcha Selección de programas Interrupción de programas Programación Indicaciones en pantalla e indicaciones de error 16 17 17 17 17 18 18 19 3 1. Technische Daten Typ: Programmierbarer Thermoblock für den chemischanalytischen Aufschluss mit 12 Bohrungen für Rundküvetten 16 mm AD (Außendurchmesser) Anzeige: 2 LED-Displays, Zeichenhöhe 6 mm Temperatur- und Restzeitanzeige Bedienung: Folienabgedeckte Symboltasten mit Eingabebestätigung Temperaturbereich: 30 - 160 °C (Schrittweite 1 °C) Temperaturen: 5 vorprogrammierte Temperaturen 70 / 100 / 120 / 148 / 160 °C 4 weitere freie Programmplätze für Temperaturen Temperaturbereich: 30 – 160 °C (Schrittweite 1 °C) Aufheizzeit: von 20 °C auf 160 °C innerhalb von 10 Minuten Heizzeiten: 4 vorprogrammierte Heizzeiten ½ h, 1:00 h, 2:00 h, cont. 5 weitere freie Programmplätze für Heizzeiten Zeitbereich: 0:01 h - 99:59 h (Schrittweite 0:01 h) Sicherheit: Austauschbare Sicherheitsabdeckung als Berührungsschutz Integrierte Schutzhaube Übertemperaturschutz Schnittstelle: Bidirektionale serielle RS 232 Anschlussmöglichkeit für NANOCOLOR® T-Set (Art.-Nr.: 919 917) (Möglichkeit der vollautomatischen Kalibrierung und Erstellung eines Prüfzertifikates für die Prüfmittelüberwachung gemäß DWA – A 704) Update über PC Stromversorgung: 110 - 230 V ~, 50/60 Hz Leistungsaufnahme: 125 / 250 VA Abmessungen: 155 x 250 x 140 mm Gewicht: ca. 1,8 kg Prüfzeichen: CE Garantie: 2 Jahre Konformitätserklärung: Dieses Gerät entspricht den folgenden Richtlinien: -89/336 EWG vom 03.05.1989 (einschließlich Änderungsrichtlinie 92/31/EWG) – EMV Richtlinie 4 2. Bedienung 2.1 Geräteaufstellung Thermoblock bei Raumtemperatur auf eine gerade und trockene Unterlage stellen. 2.2 Inbetriebnahme Thermoblock mit dem Stromnetz verbinden. Gerät mit dem auf der Geräterückseite befindlichen Netzschalter einschalten. Nach dem Einschalten initialisiert sich das Gerät, es folgt ein Signalton, im oberen Display erscheint kurzzeitig die Versionsnummer (z.B.: r 1.01), danach erscheinen auf allen Displays die unteren Segmente, der Thermoblock befindet sich im Sleep-Modus. 2.3 Programmauswahl X - Taste Aufruf einer vorprogrammierten Temperatur. Die zuletzt verwendete Temperatur wird immer zuerst angezeigt. Die Taste arbeitet im TippRollmodus. Es werden nur programmierte Temperaturen angezeigt. Die Temperaturwerte werden immer von der kleinsten zur größten geordnet angezeigt. Y - Taste Aufruf einer vorprogrammierten Zeit. Die zuletzt verwendete Zeit wird immer zuerst angezeigt. Die Taste arbeitet im Tipp-Rollmodus. Es werden nur programmierte Zeiten angezeigt. Die Zeitwerte werden immer von der kürzesten zur längsten geordnet angezeigt W - Taste Die Betätigung der W - Taste startet das ausgewählte Programm. Im Display blinken während der Aufheizphase die WAIT-LED und die gewählte Temperatur. Nach Erreichen der gewünschten Programmtemperatur erfolgt ein Signalton, die RUN-LED blinkt und die gewählte Zeit läuft ab. Nach Beendigung des Programmserfolgt für 60 s ein periodischer Signalton und im Zeitdisplay erscheint „End“. Wenn innerhalb von 5 s nach Programmwahl die W - Taste nicht betätigt wird, kehrt das Programm in den Sleep-Modus zurück. Wenn die Ist-Temperatur des Thermoblocks höher ist als die gewählte Temperatur, wird das Programm nicht gestartet. Im oberen Display erscheint „HIGH“, der Thermoblock muss zunächst abkühlen. Während der Aufheizphase kann durch Drücken der X - Taste die aktuelle Temperatur angezeigt werden. 5 2.4 Programmabbruch Ein laufendes Programm kann jederzeit abgebrochen werden. Ein Programmabbruch wird durch Drücken der W - Taste ausgelöst. Im Display erscheint „StOP“. Innerhalb von 5 s muss dann durch nochmaliges Drücken der W - Taste der Abbruch bestätigt werden, ansonsten läuft das Programm normal weiter. 2.5 Programmierung 1. 2. 3. 4. 5. 6. 7. 8. 9. 10. 11. 6 Zusätzlich zu den vorprogrammierten Temperaturen und Heizzeiten können 4 weitere Temperaturen und 5 weitere Heizzeiten einprogrammiert werden. Vor einer Programmierung müssen alle laufenden Programme beendet sein. Thermoblock am Hauptschalter ausschalten. Mit gedrückter W - Taste den Thermoblock einschalten. W - Taste so lange gedrückt halten, bis ein langezogener Signalton zu hören ist und das Temperaturdisplay blinkt. Mit der X - Taste einen freien Speicheplatz anwählen, erkennbar an der Anzeige [ _ _ _°]. Es kann auch eine bereits gespeicherte Temperatur geändert werden. Mit der W - Taste bestätigen. Die erste Ziffer blinkt. Gewünschte Ziffer mit X - und Y - Tasten im Rollmodus anwählen ( X= Ziffer rauf, Y= Ziffer runter) und mit W - Taste bestätigen. Die zweite Ziffer blinkt, mit X - und Y -Tasten anwählen und mit W -Taste bestätigen. Die dritte Ziffer blinkt, mit X - und Y - Tasten anwählen und mit W - Taste bestätigen. Bei falscher Eingabe kann der Programmiervorgang durch nochmaliges Drücken der W - Taste wiederholt werden. Umschalten zwischen Zeit und Temperatur erfolgt jeweils mit der X und Y - Taste. Die Eingabe der Zeit erfolgt analog zur Temperatureingabe. Durch Eingabe von X = 000 oder Y = 00:00 wird der jeweilige Speicherplatz gelöscht. Die Programmierung wird durch Ausschalten des Gerätes abgeschlossen Ausschalten des periodischen Signaltons nach Ablauf eines Heizprogrammes Mit gedrückter Y -Taste den Thermoblock einschalten. In der oberen Anzeige erscheint [bu22], in der unteren Anzeige [On]. Im unteren Display kann mit der Y - Taste der periodische Signalton nach Ablauf eines Heizprogrammes ausgeschaltet werden. Am Ende eines Heizprogrammes ertönen dann nur noch 2 lange Signaltöne. 3. Anzeigen und Fehlermeldungen HIGH: gewählte Temperatur < aktuelle Temperatur des Thermoblocks - s. Kap. 2.3. StOP: Beginn eines Programmabbruchs - s. Kap. 2.4. Err1, Err2 und Err3: Interne Fehler: Thermoblock ausschalten und wieder einschalten, wird der Fehler wieder angezeigt, kontaktieren Sie MACHEREY-NAGEL. Err4: Temperaturabweichung > 4 °C - Mit W - Taste bestätigen und Programm neu starten. Err5 und Err6: Fehler Thermofühler - Mit W - Taste bestätigen und Programm neu starten, wird der Fehler wieder angezeigt, kontaktieren Sie MACHEREYNAGEL. Err7: Fehler Heizelement - Thermoblock ausschalten und wieder einschalten, wird der Fehler wieder angezeigt, kontaktieren Sie MACHEREYNAGEL. Err8: Die automatische Übertemperatursicherung wird aktiviert. Nach der Aktivierung den Thermoblock ausschalten und abkühlen lassen. Danach den Block wieder einschalten, die Übertemperatursicherung wird automatisch zurückgesetzt. Falls der Fehler häufiger auftritt, kontaktieren Sie MACHEREY-NAGEL. Err9: Fehler T-Set – Stecker abziehen und wieder einstecken, wird der Fehler wieder angezeigt, kontaktieren Sie MACHEREY-NAGEL. 7 1. Technical Data Type: programmable heating block for chemical-analytical digestions with 12 holes for test tubes with 16 mm OD (outer diameter) Display: 2 LEDs, 6 mm character height display shows temperature and remaining heating time Operation: foil-covered symbol keys with input acknowledgment Temperature range: 30 - 160°C (1°C increments) Temperatures: 5 preprogrammed temperatures: 70 / 100 / 120 / 148 / 160°C 4 free memory locations for individual temperature settings temperature range: 30 - 160 °C (1 °C increments) Warm-up time: from 20°C to 160°C within 10 minutes Heating times: 4 preprogrammed heating times: ½ h, 1:00 h, 2:00 h, cont. 5 free memory locations for individual time settings time range: 0:01 - 99:59 h (0:01 h increments) Safety: exchangeable safety cover as protection against contact integrated protective covering protection against excess temperature Interface: bidirectional serial RS 232 NANOCOLOR® T-Set allows connection of (Cat. No.: 919 917) (possibility of fully automatic calibration and preparation of a test certificate for instrument control and monitoring) Update via PC Power supply: 110 - 230 V ~, -50/60 Hz Power consumption: 125 / 250 VA Dimensions 155 x 250 x 140 mm Weight: approx. 1.8 kg Marking: CE Warranty: 2 years Declaration of conformity: This instrument conforms to the following directives: -89/336/EC of 03.05 1989 (including Amendment Directive 92/31/EC) - EMC Directive 8 2. Operation 2.1 Placement of instrument Heating block must be set on a level and dry surface at room temperature. 2.2 Operation instructions Connect the heating block to the mains. Switch on the instrument with the power switch located on the back side. After powering on, the instrument is initialised, a signal tone sounds and the version number (e.g. r 1.01) briefly appears in the upper display. After that, the underline characters appear on both displays, the heating block is in sleep mode. 2.3 Programme selection X - key Selection of a preprogrammed temperature. The last used temperature is always displayed first. The key operates in tip-scroll mode. Only programmed temperatures are displayed. The temperature values are always displayed in low-to-high order. Y - key Selection of a preprogrammed time. The last used time is always displayed first. The key operates in tip-scroll mode. Only programmed times are displayed. The time values are always displayed in short-tolong order. W - key Pressing the W - key starts the selected programme. During the warm-up phase, the WAIT-LED and the selected temperature are flashing in the display. When the desired programme temperature is reached, the RUN-LED starts flashing and the selected time starts to run. When the programme terminates, a signal tone sounds for 60 sec and “End” appears in the time display. If the W- key is not pressed within 5 sec after the programme selection, the programme returns into sleep mode. If the actual temperature of the heating block exceeds the selected temperature, the programme is not started. “HIGH” appears in the upper display; the heating block must cool down first. During the warmup phase, the current temperature can be displayed by pressing the X - key. 9 2.4 Interruption of programmes A running programme can be stopped at all times. A programme stop is triggered by pressing the W - key. “StOP“ appears in the display. The stop must be confirmed within 5 sec by again pressing the W - key, otherwise the programme continues to run. 2.5 Programming In addition to the preprogrammed temperatures and heating times, another 4 temperatures and another 5 heating times can be programmed. Prior to programming all active programmes must have terminated. 1. Switch off heating block with the main switch. 2. While pressing and holding down the W - key, switch on the heating block. Hold down the W - key until a long signal tone is heard and the temperature display is flashing. 3. Select a free temperature setting with the W - key. This is indicated by [ _ _ _° ].Also a user-defined temperature can be changed. 4. Confirm with the W - key. 5. The first digit flashes. Select desired digit with X - and Y - keys in scroll mode ( X = digit up, Y = digit down) and confirm with W - key. 6. The second digit flashes, select with X - and Y - keys and confirm with W - key. 7. The third digit flashes, select with X - and Y - keys and confirm with W - key In case of incorrect input the programming cycle can be repeated by again pressing the W - key. 8. The X - and Y - keys are used to toggle between time and temperature. 9. The time is input in the same way as the temperature. 10. The relevant memory location is cleared by inputting X = 000 or Y = 00:00. 11. Programming is terminated by switching off the instrument. 10 Switching off the periodic signal tone after termination of a heating programme Switch on the heating block while pressing and holding down the Y - key. In the upper display the following appears: [bu22]. In the lower display, the Y - key can be used to deactivate the periodic signal tone upon termination of a heating programme. At the end of a heating programme, only 2 long signal tones will then be heard. 3. Displays and Troubleshooting HIGH: Selected temperature < actual temperature of the heating block - see chapter 2.3. StOP: Initiation of a programme stop - see chapter 2.4. Err1, Err2 and Err3: Internal error - switch off the heating block, then switch on the block again, if error is displayed again, contact MACHEREY-NAGEL. Err4: Temperature deviation > 4 °C - confirm with W - key and restart programme. Err5 and Err6: Error thermo sensor - confirm with W - key and restart programme, if error is displayed again, contact MACHEREY-NAGEL. Err7: Error heating element - switch off the heating block, then switch on the block again, if error is displayed again, contact MACHEREY-NAGEL. Err8: The automatic overtemperature protection is activated. After activation, switch off the heating block and allow to cool down. Then switch on the block again, the overtemperature protection is automatically reset. If this error happens frequently, contact MACHEREY-NAGEL. Err9: Error T-Set – Pull out the plug and plug it in again, if error is displayed again, contact MACHEREY-NAGEL. 11 1. Données techniques Type : Affichage: Utilisation : Gamme de températures: Températures de chauffe: Bloc chauffant préprogrammé et programmable pour les minéralisations oxydatives, avec 12 logements pour tube de réaction en verre (cuves rondes) de 16 mm DE (diamètre extérieur) 2 LED, hauteur 6 mm Affichage de la température et du temps restant Touches plastifiées avec symboles 30 - 160 °C (intervalles de 1 °C) 5 températures préprogrammées 70 / 100 / 120 / 148 / 160 °C 4 températures programmables Gamme de températures: 30 à 160 °C (intervalles de 1 °C) Durée de montée en température: de 20 °C à 160 °C en 10 minutes Durées de chauffe: 4 durées de chauffe préprogrammées ½ heure, 1:00 heure, 2:00 heures, continu. 5 durées de chauffe programmables Gamme de durées de chauffe: 0:01 h à 99:59 h (intervalles de 0:01 h) Dispositif de sécurité: Couvercle protecteur de sécurité amovible Unité chauffante recouverte de PTFE dispositif anti-surchauffe Interface: sérielle bidirectionelle RS 232 Connexion au NANOCOLOR® T-Set (Art. n° 919 917) (contrôle des températures et calibration entièrement automatique avec édition d’un certificat de contrôle conformément à la DWA-A704 relative aux équipements de mesure) Secteur : 110 - 230 V ~, 50/60 Hz Puissance consommée : 125 / 250 VA Dimensions : 155 x 250 x 140 mm Poids : environ 1,8 kg Marquage : CE Garantie : 2 ans Déclaration de conformité: Cet appareil est conforme aux directives suivantes: - 89/336 CEE du 03.05.1989 (y compris la modification de la directive 92/31/CEE) - Directive CDM 12 2. Fonctionnement 2.1 Installation Le bloc chauffant doit être installé sur un plan de travail sec et stable et être utilisé à température ambiante. 2.2 Instructions opératoires Raccorder le bloc chauffant au secteur. Allumer l’appareil grâce à l’interrupteur situé au dos de l’appareil. Après la mise en marche, l’appareil s’initialise, un signal acoustique se fait entendre, le numéro de la version (par ex. r 1.01) apparaît brièvement dans la partie supérieure de l’écran, le bloc chauffant se met en mode veille. 2.3 Sélection du programme / démarrage X Touche Appel d’une température pré-programmée. La dernière température utilisée est affichée en premier. La touche permet de faire défiler les différentes températures présélectionnées (seules les températures programmées sont affichées). Les températures sont toujours affichées par ordre croissant. Y Touche Appel d’une durée pré-programmée. La dernière durée utilisée est affichée en premier. La touche permet de faire défiler les différentes durées pré-programmées (seules les durées programmées sont affichées). Les durées sont toujours affichées par ordre croissant, de la plus courte à la plus longue. W Touche La touche OK permet de démarrer le programme sélectionné. Pendant la montée en température, “WAIT” clignote et la température choisie est affichée. Dès que la température choisie est atteinte, “RUN” s’allume et le compte à rebours commence. La fin du programme est signalée par des bips sonores pendant 60 s, l’affichage indique alors “End“. 5 s après avoir choisi le programme, la touche W doit être pressée. Ce délai passé, le programme se met en mode veille. Si la température réelle du bloc chauffant est supérieure à la température choisie, l’affichage indique „HIGH“ et le programme ne démarre pas. Le bloc chauffant doit d’abord refroidir. Pendant que le bloc chauffant monte en température, cette dernière peut être affichée en pressant la touche X. 13 2.4 Interruption du programme de chauffe Il est possible d’interrompre un programme à tout moment. L’interruption est déclenchée en appuyant sur la touche W „StOP“ apparaît à l’écran. Si l’interruption n’est pas confirmée en appuyant une nouvelle fois la touche W dans les 5 secondes qui suivent, l’appareil poursuit le programme en cours. 2.5 Programmation 1. 2. 3. 4. 5. 6. 7. 8. 9. 10. 11. 14 4 températures et 5 durées de chauffe supplémentaires peuvent être programmées en plus des températures et durées de chauffe déjà préprogrammées. Avant toute programmation, tous les programmes en cours doivent être interrompus. Eteindre le bloc chauffant avec l’interrupteur au dos de l’appareil. Presser la touche W tout en allumant le bloc chauffant. Tenir la touche W en-clenchée jusqu’à ce qu’un signal acoustique prolongé retentisse et que l’écran de température clignote. Choisir un emplacement mémoire libre avec la touche W. Place libre repérée grâce à l’affichage: [ _ _ _° ]. Il est aussi possible de modifier une température déjà mémorisée. Confirmer avec la touche W. Le premier chiffre clignote. Sélectionner le chiffre souhaité avec les touches X et Y en mode déroulant ( X = chiffre supérieur, Y = chiffre inférieur) et confirmer avec la touche W. Le second chiffre clignote, sélectionner avec les touches X et Y et confirmer avec la touche . Le troisième chiffre clignote, sélectionner avec les touches X et Y et confirmer avec la touche W. En cas d’erreur de saisie, le processus de programmation peut être répété en appuyant encore une fois sur la touche W. Le passage de la durée à la température se fait grâce à la touche X et Y. La programmation de la durée se fait de la même manière que celle de la température. En entrant X = 000 ou Y = 00:00, la place de mémoire est effacée. La programmation se termine en éteignant l’appareil. Couper le signal acoustique à la fin du programme de chauffe Allumer le bloc chauffant en tenant la touche Y enclenchée. [bu22] apparaît en haut de l’écran. Puis, il est possible de couper le signal acoustique indiquant la fin du programme de chauffe en appuyant sur la touche Y . A la fin du programme de chauffe, seuls 2 longs signaux retentissent. 3. Messages d’erreur HIGH: température sélectionnée < température actuelle du bloc – voir chapitre 2.3 StOP: Début d‘interruption du programme – voir chapitre 2.4 Err1, Err2 et Err3: Erreur interne - éteindre le bloc chauffant, puis le remettre en marche. Si l’erreur s’affiche à nouveau, contacter MACHEREY-NAGEL. Err4: Ecart de température 4 °C - Confirmer avec la touche W et redémarrer. Err5 et Err6: Erreur de la sonde thermique - Confirmer avec la touche W et redémarrer. Si l’erreur s’affiche à nouveau, contacter MACHEREY-NAGEL. Err7: Erreur de l‘élément de chauffe (surchauffe) - éteindre le bloc chauffant, puis le remettre en marche. Si l’erreur s’affiche à nouveau, contacter MACHEREY-NAGEL. Err8: La sécurité anti-surchauffe est activée. Dès lors, éteindre le bloc chauffant et laisser refroidir. Puis remettre le bloc chauffant en marche, la sécurité anti-surchauffe est désactivée automatiquement. Si l’erreur s’affiche fréquemment, contacter MACHEREY-NAGEL. Err9: Erreur T-Set – débrancher et rebrancher la fiche d’alimentation. Si l’erreur s’affiche à nouveau, contacter MACHEREY-NAGEL. 15 1. Datos técnicos Tipo de aparato: Bloque digestor programable para las áreas de química y análisis con 12 posiciones para tubos de fondo redondo de 16 mm Ø ext. Display: 2 displays LED de 6 mm de altura Visualización de temperatura y tiempo restante Operación: A través de teclado de membrana: 2 teclas con símbolos, tecla W Rango de temperatura: 30 - 160°C (incrementos de 1°C) Temperaturas: Tiempo de calentamiento: Tiempos de digestión: Dispositivos de seguridad: 5 temperaturas programadas por defecto 70 / 100 / 120 / 148 / 160°C Espacio de memoria adicional para programar 4 temperaturas Rango de temperatura: 30 -160°C (incrementos de 1°C) de 20°C a 160°C en 10 minutos 4 tiempos de digestión programados por defecto ½ h, 1:00 h, 2:00 h, operación continua Espacio de memoria adicional para programar 5 tiempos de digestión Rango de tiempo: 0:01 h - 99:59 h (incrementos de 0:01 h) Revestimiento de PTFE contra quemaduras, recambiable Pantalla de protección integrada Interruptor de protección contra sobrecalentamiento Interfaz RS 232: Conexión para el T-Set (Código 919 917) (posibilidad de calibración automática y generación de un certificado de control de equipos de inspección y ensayo según la normativa alemana DWA - A704) Actualización Voltaje: 110 - 230 V - 50/60 Hz Consumo de potencia: 125 / 250 VA Medidas: 155 x 250 x 140 mm Peso: aprox. 1,8 kg Homologación: CE Garantía: 2 años Declaración de conformidad: Este aparato ha sido fabricado en conformidad con las siguientes normas: Directiva de compatibilidad electromagnética 89/336 CEE del 03-05-1989 (inclusive modificación 92/31/CEE) 16 2. Funcionamiento 2.1 Emplazamiento del aparato Colocar el aparato sobre una superficie plana y seca, a temperatura ambiente. 2.2 Puesta en marcha Conectar el bloque digestor a la red eléctrica. Encender el aparato pulsando el interruptor que se encuentra en la parte trasera. Al ser encendido, el aparato se inicializa automáticamente: primero emite una señal acústica y en el display superior se muestra brevemente el número de versión (p.ej. r 1.01), después se iluminan los segmentos inferiores en ambos displays. Ahora el bloque se encuentra en modo de ahorro de energía. 2.3 Selección de programas X Tecla Permite seleccionar una temperatura previamente programada. La primera temperatura que se muestra es siempre la que se empleó para la última digestión. La tecla funciona mostrando el valor subsiguiente cada vez que es pulsada. Sólo se muestran las temperaturas programadas. Los valores de temperatura son mostrados siempre en orden ascendente. Y Tecla Permite seleccionar un tiempo previamente programado. El primer tiempo que se muestra es siempre el que se empleó para la última digestión. La tecla funciona mostrando el valor subsiguiente cada vez que es pulsada. Sólo se muestran los tiempos programados. Los valores de tiempo son mostrados siempre en orden ascendente. W Tecla Al pulsar la tecla OK, se inicia el programa seleccionado. Durante la fase de calentamiento parpadean en el display el diodo WAIT y el valor de temperatura seleccionado. Cuando el aparato alcanza la temperatura programada, el diodo RUN parpadea indicando que el tiempo de digestión seleccionado empieza a transcurrir. Al finalizar el programa el aparato emite una señal acústica durante 30 segundos y en el display de tiempo aparece la palabra „End“. Si después de seleccionar un programa no se pulsa en los siguientes 5 segundos la tecla W, el aparato regresará al modo de ahorro de energía. Cuando la temperatura actual del bloque digestor es más alta que la temperatura seleccionada, el programa no se inicia. En el display superior aparece entonces la palabra „HIGH“ indicando que el bloque debe enfriarse primero. Durante la fase de calentamiento el usuario puede ver la temperatura actual pulsando la tecla X. 17 2.4 Interrupción de programas El usuario puede igualmente interrumpir en cualquier momento el programa que esté en funcionamiento. Para interrumpir un programa debe pulsarse la tecla W . En el display aparece la palabra „StOP“, y la tecla W deberá ser pulsada nuevamente en los siguientes 5 minutos para confirmar la interrupción, ya que de lo contrario el programa seguirá funcionando. 2.5 Programación Además de las temperaturas y tiempos de digestión programados por defecto, el usuario tiene la posibilidad de programar 4 temperaturas y 5 tiempos adicionales. Antes de cualquier programación deberán cerrarse todos los programas que estén en funcionamiento. 1. Desconectar el bloque digestor de la red eléctrica mediante el interruptor principal. 2. Activar el bloque digestor pulsando la tecla W . Mantener la tecla todo el tiempo pulsada hasta que se escuche una señal acústica larga y el display de temperatura parpadee. 3. Seleccionar con la tecla X una posición de memoria libre. Éstas son indicadas en el display de la siguiente manera: [ _ _ _° ]. También puede modificarse una temperatura previamente programada. 4. Para aceptar pulsar la tecla W . 5. La primera posición parpadea. Introducir el dígito deseado con las teclas X (= incrementar) y Y (= disminuir). Aceptar con la tecla W . 6. La segunda posición parpadea. Introducir el dígito deseado con las teclas X y Y . Aceptar con la tecla W . 7. La tercera posición parpadea. Introducir el dígito deseado con las teclas X y Y . Aceptar con la tecla W . Si se ha introducido un dígito equivocado, puede pulsarse nuevamente la tecla W para repetir la programación. 8. El cambio de programación de tiempo a temperatura y viceversa se realiza pulsando las teclas X y Y respectivamente. 9. La programación de tiempo se realiza de la misma manera que la de temperatura. 10. Para borrar datos de una posición de memoria, bien sea de temperatura o tiempo, deberán introducirse los valores X = 000 y Y = 00:00 respectivamente. 11. Al desactivar el aparato los cambios realizados quedan almacenados en la memoria. 18 Supresión de la señal acústica periódica emitida al terminar un programa de digestión Pulsar la tecla Y para activar el bloque digestor. En el display superior aparece la indicación [bu22]. En el display inferior puede suprimirse la señal acústica periódica con la tecla Y . Ahora cada vez que finalice un programa de digestión se emitirán sólo 2 señales acústicas largas. 3. Indicaciones en pantalla e indicaciones de error HIGH: La temperatura actual del bloque es mayor que la temperatura seleccionada - ver capítulo 2.3 StOP: Interrupción de programa - ver capítulo 2.4 Err1, Err2 and Err3: Error interno - desconecte el bloque calefactor y conéctelo de nuevo, si el error sigue apareciendo contacte con su distribuidor MACHEREYNAGEL. Err4: Desviación de temperatura > 4 °C / Aceptar con la tecla W y reinicializar programa. Err5 y Err6: Error – sensor de temperatura - confirmar con la tecla W y reiniciar el programa, si el error sigue apareciendo contacte con su distribuidor MACHEREY-NAGEL. Err7: Error del elemento calefactor - desconecte el bloque calefactor y conéctelo de nuevo, si el error sigue apareciendo contacte con su distribuidor MACHEREY-NAGEL. Err8: El interruptor automático de protección contra sobretemperatura se ha activado. Una vez activado, desconectar el bloque digestor y esperar a que se enfríe. Conectar nuevamente el bloque. El interruptor de proteccióncontra sobretemperatura vuelve automáticamente a su posición inicial. Si este error aparece con frecuencia, contacte con su distribuidor MACHEREY-NAGEL. Err9: Error del T-Set - Desenchufar el aparato y volverlo a enchufar, si el errorsigue apareciendo contacte con su distribuidor MACHEREY-NAGEL. 19 Bedienungsanleitung MACHEREY - NAGEL User’s manual 90 Jahre Erfahrung in der Analytischen Chemie Mode d’emploi Fein- und Mikrofiltration ⓦ Filtrierpapiere ⓦ Filtermembranen ⓦ Extraktionshülsen Manual del usuario VARIO compact Schnellteste ⓦ Indikator- und Testpapiere ⓦ Testkits zur Wasseruntersuchung ⓦ Photometer Medizinische Diagnostik ⓦ Harnanalyse ⓦ Reflektometer Chromatographie HPLC GC DC SPE GA VARIO compact / 91913 / 0950.3 PD Printed in Germany ⓦ ⓦ ⓦ ⓦ Bioanalytik ⓦ Kits zur Aufreinigung von Nukleinsäuren ⓦ Transfermembranen www.mn-net.com MACHEREY-NAGEL MACHEREY-NAGEL GmbH & Co. KG · Neumann-Neander-Str. 6-8 · D-52355 Düren Deutschland: Telefon: +49 (0) 24 21 96 90 Fax: +49 (0) 24 21 96 91 99 e-mail: [email protected] Schweiz: Tel.: +41 (0) 62 388 55 00 Fax: +41 (0) 62 388 55 05 e-mail: [email protected] Frankreich: Tel.: +33 (0) 3 88 68 22 68 Fax: +33 (0) 3 88 51 76 88 e-mail: [email protected] MN MACHEREY-NAGEL MN
