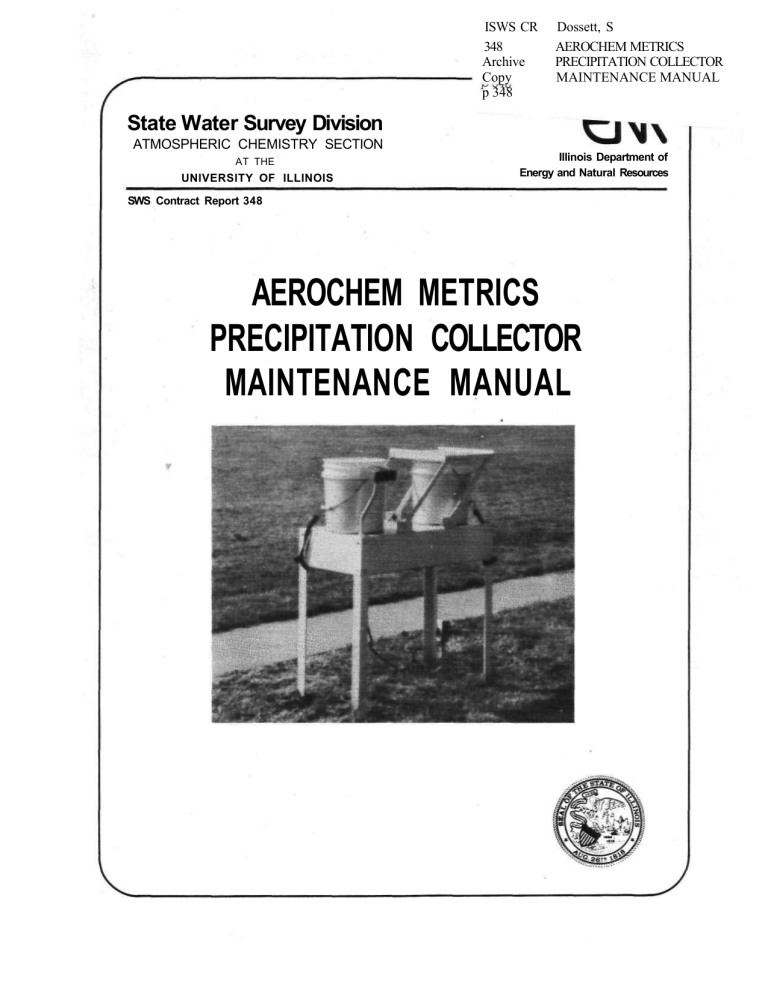
ISWS CR 348 Archive Copy p 348 Dossett, S AEROCHEM METRICS PRECIPITATION COLLECTOR MAINTENANCE MANUAL State Water Survey Division ATMOSPHERIC CHEMISTRY SECTION AT THE UNIVERSITY OF ILLINOIS Illinois Department of Energy and Natural Resources SWS Contract Report 348 AEROCHEM METRICS PRECIPITATION COLLECTOR MAINTENANCE MANUAL SWS Contract Report 348 AEROCHEM METRICS PRECIPITATION COLLECTOR MAINTENANCE MANUAL Prepared By Scott Dossett1 Central Analytical Laboratory Atmospheric Chemistry Section Illinois State Water Survey 605 E. Springfield Avenue P.O. Box 5050, Station A Champaign, IL 61820 September, 1984 Prepared under the contract with Colorado State University for the National Atmospheric Deposition Program. This report has not yet been reviewed and approved by NADP/NTN. Revision No. 0 Date: Sept. 5, 1984 TABLE OF CONTENTS SECTION TITLE PAGE 1. INTRODUCTION 1-1 2. PARTS REFERENCE LIST 2-1 3. PICTORIAL GUIDE TO PARTS 3-1 4. TROUBLE SHOOTING 4-1 4.1. Sensor Unit 4.2. Motor Box Unit 4.3. Clutch Unit 4.4. Flow Charts 4-1 4-2 4-4 4-7 COMPONENT REPLACEMENT AND ROUTINE SERVICING 5-1 5. -ii- Revision No. 0 Date: Sept. 5, 1984 1. INTRODUCTION The Aerochem Metrics wet/dry collector is a fairly simple device which has proven to be reliable and efficient for capturing rainfall. This guide is intended to address trouble shooting and repair of the major collector components, namely the motor box, sensor, and clutch units. Simple or site specific repairs such as battery checking, 110VAC power supply, and instrument mounting are not discussed since they are best diagnosed and corrected by site personnel. Section 5 describes some routine maintenance procedures. Part 2 of that section prescribes weekly checks which are essential to obtain the high quality wet-deposition only chemistry required by the modern research community. PLEASE READ THIS SECTION. IF YOU EXPERIENCE A COLLECTOR MALFUNCTION (1) Please inform the CAL; call 217/333-0249, especially when replacement parts are needed or if sample quality has been affected. (2) Briefly describe the malfunction and indicate when it first occurred on the Field Observer Report Form of the sample affected. Continue to do this for each weekly sample until the malfunction is eliminated. Pay particular attention to how the wet-side bucket was exposed. Recall that when the sampler is operating correctly, the wet-side bucket should only be open during rain, snow, etc. Example: "Sensor heater went out on Thursday: wet-side bucket remains open for several hours after the rain stops." Refer to the NADP Instruction Manual for Site Operations for a description of sample types. 1-1 Revision No. 0 Date: Sept. 5, 1984 2. PARTS REFERENCE LIST This list identifies parts by name and assigns part numbers that are used in conjunction with the "Pictorial Guide to Parts" section which follows. Also, all part numbers are cross-referenced to a corresponding photo number. Some part numbers are referenced in the "Trouble Shooting" section of this text; others are included so that this additional detail can be referenced in future communications. (These numbers are not manufacturer's order or part numbers.) P a r t Name P a r t No. P h o t o No. 1 2 3 4 5 6 7 8 9 10 11 12 13 14 15 16 17 18 19 20 21 22 23 24 25 26 1 1 1 1 1 1 and and 3 and 3 3 3 3 3 3 3 and and 4 4 4 4 4 5 5 sensor unit collector main frame sensor screws sampling bucket holder sensor grid sensor plate motor box screws sampling bucket holder screws motor box unit clutch arm unit clutch arm machine bolt counterweight(s) Waldes ring push rod counter weight rod lid drive arms lid tension springs 110V AC power cord event recorder terminal sensor unit socket 12V DC power lugs 12V DC circuit fuse 110V AC circuit fuse event recorder circuit fuse motor box stop switches event recorder/wet mode heater switch drive motor shaft clutch tooth thrust collar with set screw clutch tooth /tension plate switching magnets clutch tooth tension spring 27 28 29 30 31 32 2-1 2 2 3 3 3 5 6 6 6 6 6 4 3 6 4 4 Revision No. 0 Date: Sept. 5, 1984 3. PICTORIAL GUIDE TO PARTS PHOTO #1 COLLECTOR MAINFRAME/SENSOR 3-1 Revision No. 0 Date: Sept. 5, 1984 PHOTO #2 COLLECTOR MAINFRAME (TOP) PHOTO # 3 COLLECTOR MAINFRAME (UNDERSIDE) 3-2 Revision No. 0 Date: Sept. 5, 1984 PHOTO #4 MOTOR BOX (FRONT) 3-3 Revision No. 0 Date: Sept. 5, 1984 3-4 Revision No. 0 Date: Sept. 5, 1984 4. 4.1 TROUBLE SHOOTING Sensor Unit-"What Does It DO?" The sensor unit has two functions: to signal the movement of the collector lid by activating the motor box unit when the start and stop of precipitation is detected, and to regulate two heating modes, the ambient mode to melt snow and the wet collect mode to dry water from the wetted sensor. (1) Activating Motor Box Unit When water fills the space between the sensor grid (5) and plate (6) (rain begins), the sensor unit activates the motor box unit to move the collector lid over the dry-side bucket. This leaves the wet-side bucket exposed to capture precipitation. When water no longer fills this space (the rain slows or stops), the motor box is once again activated to move the collector lid over the wet-side bucket. This leaves the dry-side bucket exposed. In serving this function the sensor unit is acting as a simple on/off switch. (2) Regulating Sensor Heating Modes A heater fixed to the sensor plate in the sensor unit (1) is activated when the ambient air temperature falls below 4°C (40°F) or when the collector lid is covering the dry-side bucket due to a wetted sensor. The ambient heater mode is controlled by a temperature sensitive electrical component called a thermistor, mounted to the sensor plate. This component turns on the heater at a low power setting when the sensor plate drops below 4°c (40°F) and turns it off again when the plate warms above that temperature. In this fashion the heater melts snow and ice so that the resulting liquid can bridge the sensor grid and plate, allowing the collector to open. The wet collect mode of the sensor heater is activated when the collector lid is covering the dry side bucket due to a wetted sensor. In this position, the event recorder/wet mode heater switch on the left side of the drive motor shaft (27) is tripped by the clutch unit switching magnets (31). This turns on both the wet collect mode of the sensor heater and energizes the event recorder terminal (19) with a 14 ± 3 volt DC current. In this mode the thermistor attached to the sensor plate budgets the current flow to the heater so that the plate temperature is regulated to a 50°C maximum. Five to ten minutes typically pass after the heater has been activated before it reaches full heat. 4-1 Revision No. 0 Date: Sept. 5, 1984 Sensor Units - "What Goes Wrong" When the sensor unit is faulty, some of the following symptoms may be observed: Symptom See Flow C h a r t Collector lid stays over the dry-side bucket long after precipitation stops, sensor dries slowly (more than 30 minutes for rain), motor not running. (If motor is running, see Clutch Unit What Goes Wrong.) #1, page 4-8 Collector lid oscillates non-stop between buckets, sensor wet or dry #5, page 4-12 Collector lid stays over wet-side bucket, sensor wet, motor not running. (If motor is running, see Clutch Unit - "What Goes Wrong".) #6, page 4-13 Collector lid stays over dry side bucket, sensor dry, motor not running. (Again, if motor is running, see Clutch Units - "What Goes Wrong".) #4, page 4-11 Sensor plate (6) snow covered or iced up. #3, page 4-10 4.2 Motor Box Unit - "What It Does" The motor box unit (9) houses a drive motor, power and control circuitry, and fuses (22, 23, and 24). One visible side of the unit is occupied by connectors, such as the sensor unit socket (20), event recorder terminal (19), etc., (see Photo #4). The other side (see Photo #5) is occupied by the drive motor shaft (27) and three switching magnets (25 and 26). The motor box has two main functions: to power the lid mechanism between the wet and dry-side buckets, and to interact with the clutch unit to control the lid position. (1) Power Function In order to move the lid mechanism from bucket to bucket, the collector uses a small DC electric motor and gear cluster. These exit the motor box at the drive motor shaft (27). This shaft is a steel 4-2 Revision No. 0 Date: Sept. 5, 1984 half-round component to which the clutch arm unit (10) is fastened. Force is then passed through the clutch arm and a long push rod (14) to the lid drive arms (16). These lid drive arms, in turn, exit out the top of the collector mainframe and attach to the lid or roof of the collector. (2) Motor Box/Clutch Interaction As we have already mentioned, the sensor unit acts as the "on" switch which tells the motor box to move the lid to the dry bucket (or conversely the "off" switch which causes the collector to move the lid to the wet bucket.) The motor box components responsible for this interaction are the clutch arm switching magnets (31) and the motor box stop switches (25). When the motor box receives a "wet" signal the dry collect stop switch, the one to the right of the motor shaft in Photo 5, releases. The clutch arm then moves counterclockwise stopping at the wet collect stop switch, which operates in tandem with the event recorder/wet mode heater switch (see 25 and 26). The clutch arm should stay in this position until the sensor signals "dry." This allows the wet collect stop switch to "release" and the mechanism to power to the dry collect stop switch, causing the wet collect bucket to be covered. Motor Box Unit - "What Goes Wrong" When the motor box unit is faulty, some of the following symptoms may be observed: Symptom See Flow C h a r t Collector lid stays over the dry-side bucket long after precipitation stops, sensor dries slowly (more than 30 minutes for rain), motor not running. (If motor running, see Clutch Unit - "What Goes Wrong".) #1, page 4-8 Collector lid stays over wet-side bucket, sensor wet, motor not running. (If running, see Clutch Unit - "What Goes Wrong".) #6, page 4-13 Collector lid stays over dry-side bucket, sensor dry, motor not running. (If running, see Clutch Unit - "What Goes Wrong".) #4, page 4-11 Collector lid oscillates non-stop between buckets, sensor wet or dry. #5, page 4-12 4-3 Revision No. 0 Date: Sept. 5, 1984 4.3 Clutch Unit - "What It Does" The clutch unit (10) has two main functions: (1) to act as a mechanical break or "fuse" in the drive system of the collector, and (2) to signal to the motor box the position of the lid of the collector, (i.e., the wet or dry mode). (1) Fusing The Drive System The clutch serves to protect the rest of the drive train from any damage due to a stoppage in its motion. Such cases are generally either caused by freeze downs, gross collector damage from blowover or tree limbs, or snow mounding high on the flat lids or on unheated snow roofs. In these cases the clutch works as follows (see Photo 5): from its normal position with the clutch tooth (28) in the thrust collar indent (29), one of the above cases causes the tooth to "pop out" of the indent. After a full rotation of the thrust collar the tension spring will again pull the tooth into the indent, beginning the cycle anew. Since the thrust collar should be secured to the motor shaft by the set screw (29) the thrust collar must turn with the motor shaft. For efficient operation, the clutch tooth tension spring (32) is stretched so as to hold the clutch tooth into the thrust collar indent. In this way the force produced by the drive motor shaft is then transferred through the clutch to the rest of the collector lid drive mechanism. In addition the clutch locks this mechanism, keeping the lid tightly secured over the appropriate sampling bucket. (2) Signaling The Motor Box As mentioned in the motor box unit description, the clutch interacts with the motor box stop switches (25) to control the position of the lid mechanism. In order to properly signal the stop switches, switching magnets (31) are built into the clutch arm; their position reflects the relative position of the lid mechanism. As the clutch arm and hence the lid mechanism near their stop positions, the appropriate switch releases or activates to fix the lid over either the wet or dry bucket (see Photos 5 and 6). Clutch Unit - What Goes Wrong When the clutch unit is faulty or out of adjustment, some of the following symptoms may be observed: Symptom Cause Motor running, lid mechanism not moving. (Collector on wet side, dry side or in between.) 4-4 In this case the clutch mechanism is probably worn or out of adjustment. It should be serviced using the following steps: Revision No. 0 Date: Sept. 5, 1984 Symptom Cause 1. Remove the clutch arm machine bolt (11), thus separating the clutch unit from the rest of the collector lid mechanism. 2. Loosen the thrust collar set screw (29) and gently pry the clutch unit off the drive motor shaft (27). NOTE: to expose the set screw simply start the motor running stop the clutch arm with your hand and unplug the collector when the set screw becomes visible. 3. Examine the clutch unit: if the thrust collar indent or the clutch tooth (28) appear severely rounded then the clutch probably merits replacement. (Call us here at CAL.) If they do not then the force with which the tooth is held into the indent should be increased. NOTE: The clutch spring should not be stretched so far as to "freeze" the clutch. The drive motor has a maximum torque rating and can be damaged if the clutch will not "pop out." After resetting the tension spring, be certain the clutch can still be popped out by the drive motor. 4. ADJUSTING THE CLUTCH TOOTH TENSION SPRING. The tooth/ indent pressure is adjusted via the position of the clutch tooth tension plate (30). The further away from the thrust collar the plate is pushed the more tension is produced. a) Mark the tension plate's original position with a pencil; b) Loosen the tension plate screw; c) Move the plate out 1/4"; d) Test the clutch (see NOTE aside); 4-5 Revision No. 0 Date: Sept. 5, 1984 Symptom Cause e) slide clutch unit back into the drive shaft and tighten the set screw; f) Plug in the collector and hold the clutch unit to make certain it will function as described; g) Reattach the machine bolt and drive arm of the lid mechanism. Some trial and error may be necessary to reach an appropriate clutch spring tension. Symptom Cause Collector will not shut off, continually recycling between buckets. In this case the motor box has malfunctioned (reference Flow Chart #5) or the clutch unit position is incorrect. In order to properly signal the motor box unit, the clutch must be within 1/4 inch. This is necessary so that the switching magnets are close enough to trigger the motor box stop switches (25) and the event recorder/wet mode heater switch (26). To be certain the clutch is on all the way, loosen the set screw (29) and gently tap the clutch with a small hammer or screwdriver handle, then retighten the set screw. The next section is a series of flow charts which should be useful in diagnosing the problems with a malfunctioning collector. 4-6 Revision No. 0 Date: Sept. 5, 1984 4.4 FLOW CHARTS Below are listed the most common failure symptoms experienced with the Aerochem Metrics wet/dry collector, at least those with which most often come to our attention here at the CAL. Hopefully this list can refer you to an appropriate flow chart so that you can begin the trouble shooting steps necessary to get your collecor back into operation. Symptom Flow C h a r t ( s ) No. Collector stays open long after precipitation event ends 1 Event recorder not working 1 and 2 Sensor ices up during cold weather 3 Collector stuck over dry-side bucket 4 Collector cycling continuously 5 Collector stays on wet-side bucket although sensor grid and plate are shorted 6 Note: ALL OF THE FOLLOWING FLOWCHARTS ASSUME THAT THERE IS ADEQUATE POWER TO THE UNIT, INCLUDING THAT THE FUSES ARE INTACT. 4-7 Revision No. 0 Date: Sept. 5, 1984 FLOW CHART #1 COLLECTOR STAYS OPEN LONG AFTER PRECIPITATION EVENT STOPS 4-8 Revision No, 0 Date: Sept, 5, 1984 FLOW CHART #2 EVENT RECORDER NOT WORKING A problem exists if the clutch unit is too far from the motor box unit. The magnets in the clutch can only trip the switches in the motor box if they are within -.1/4 inch. See the text of this guide, Section 4.3 page4-6 for more information on clutch position. 4-9 Revision No. 0 Date: Sept. 5, 1984 FLOW CHART #3 SENSOR ICES UP IN COLD WEATHER AND SNOW 4-10 Revision No. 0 Date: Sept. 5, 1984 FLOW CHART #4 COLLECTOR STUCK OVER DRY-SIDE BUCKET 4-11 Revision No. 0 Date: Sept. 5, 1984 FLOW CHART #5 COLLECTOR CYCLING CONTINUALLY 4-12 Revision No. 0 Date: Sept. 5, 1984 FLOW CHART #6 COLLECTOR NOT OPENING TO EXPOSE WET-SIDE IN HEAVY RAINFALL 4-13 Revision No. 0 Date: Sept. 5, 1984 5. COMPONENT REPLACEMENT AND ROUTINE SERVICING 1. Component Replacement a. Motor box sensor plug arm machine attachments inserts are replace. This component can be removed by separating the from the sensor socket (20), removing the clutch bolt (11), and then removing the four motor box (7) from the collector main frame (2). Threaded used in the motor box so there are no nuts to WARNING: The motor box will literally fall out when the last of the four screws are removed. Make plans to support it in some fashion. Last, with the box on the ground and in easy access, remove the event recorder leads from their terminal (19). b. Sensor unit - This component is easily removed by separating the sensor socket (20) from the sensor plug in and removing the four sensor attachments (3). Again, the main frame is equipped with threaded inserts so there are no nuts to contend with. c. Clutch unit - The clutch can be removed from the motor drive shaft by choosing an appropriately sized Allen wrench and loosening the set screw at (29). Then simply pry the clutch assembly off using a sturdy screwdriver. Please reference page 10 of this manual for additional remarks concerning replacement and maintenance. Remember to return all used components to the manufacturer promptly. 2. Routine Servicing In general, the Aerochem Metrics wet/dry collector is maintenance free. The one routine service chore which all sites should perform is the testing of the sensor "switching" and heating functions. It is recommended that these tests be incorporated into weekly wet-side bucket changes using the steps listed below. a) First, feel the sensor grid. Assuming it has not been raining, it should be cool. b) Short the sensor grid and plate with water (water is better than metal for this test, due to its lower conductivity.) 5-1 Revision No. 0 Date: Sept. 5, 1984 c) Allow the lid mechanism to move over and cover the dry-side bucket. This step (1) checks the switching function of the sensor, (2) checks the lid driving mechanism of the collector, and (3) keeps the lid mechanism out of the way while you make your bucket change. d) Change buckets, (reference NADP Instruction Manual for Site Operations). e) After the collector has been open for at least 5 minutes, feel the sensor grid. In all but very cold temperatures the heater should be easy to feel. f) Blow remaining water off the sensor, allowing the lid mechanism to return to the wet-side bucket and the motor box to shut off. Other Routine Servicing Suggestion: a) Periodically clean the sensor grid so as to remove any accumulation of minerals or contamination that could close the circuit and thus present a false "wet" signal. To clean the space between the grid and the plate, cut a strip of cardboard from a time card or a manila folder to a width of about 1.8 inches (4.5 cm); this can be passed between the Teflon washers which fix the separation of the grid and plate, or simply use an old toothbrush and deionized water or alcohol to remove accumulated material. b) As needed, clean the lid, roof and arm mechanisms to remove any residues (e.g., bird feces, dust, other organic material). 5-2 - NOTES - - NOTES - - NOTES -
