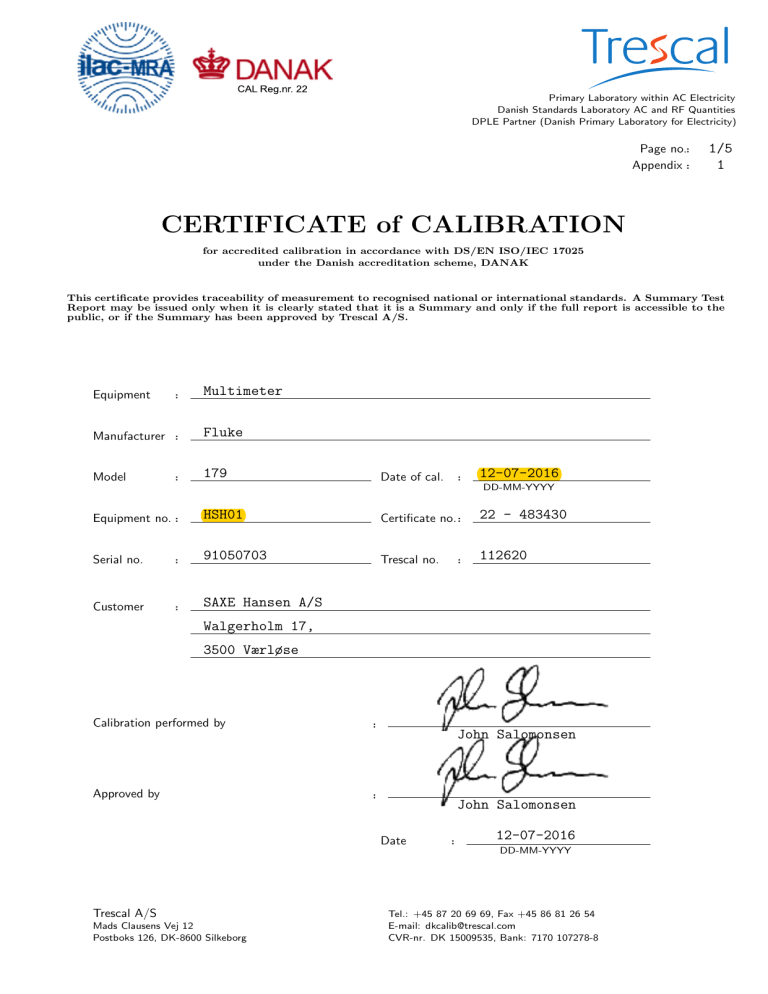
Primary Laboratory within AC Electricity Danish Standards Laboratory AC and RF Quantities DPLE Partner (Danish Primary Laboratory for Electricity) Page no.: Appendix : 1/5 1 CERTIFICATE of CALIBRATION for accredited calibration in accordance with DS/EN ISO/IEC 17025 under the Danish accreditation scheme, DANAK This certificate provides traceability of measurement to recognised national or international standards. A Summary Test Report may be issued only when it is clearly stated that it is a Summary and only if the full report is accessible to the public, or if the Summary has been approved by Trescal A/S. Equipment : Multimeter Manufacturer : Fluke Model : 179 Date of cal. : 12-07-2016 DD-MM-YYYY Equipment no. : HSH01 Certificate no. : 22 - 483430 Serial no. : 91050703 Trescal no. 112620 Customer : SAXE Hansen A/S : Walgerholm 17, 3500 Værløse Calibration performed by : John Salomonsen Approved by : John Salomonsen Date : 12-07-2016 DD-MM-YYYY Trescal A/S Mads Clausens Vej 12 Postboks 126, DK-8600 Silkeborg Tel.: +45 87 20 69 69, Fax +45 86 81 26 54 E-mail: [email protected] CVR-nr. DK 15009535, Bank: 7170 107278-8 Cert. no. Environmental conditions Uncertainty : : : 22 - 483430 Page no. : 2/5 23˚C±2.5˚C, 45% relative humidity ±20% R.H. The uncertainty is based on an estimated confidence probability of 95% (k=2), and includes the uncertainties from the reference equipment and the unit under test according to EA-4/02. Procedure: The instrument has been calibrated according to Trescal procedure number 7816 ,based on Calibration Information for Fluke 179 True RMS Multimeters, Performance Tests. The calibration has been carried out under the environmental conditions as stated above. Equipment: Reference equipment is listed on page 5. Results: AC Volts. Note: Range: Input: Auto Auto Auto Auto Auto Auto Auto Auto Auto 300.0 mV 5.000 V 5.000 V 50.00 V 50.00 V 300.0 V 500.0 V 500.0 V 1000 V 45 Hz 500 Hz 1 kHz 45 Hz 1 kHz 45 Hz 500 Hz 1 kHz 45 Hz Reading: Error: Uncert.: Spec.: 300.1 mV 4.998 V 4.960 V 49.99 V 50.11 V 300.0 V 500.9 V 500.9 V 998 V 0.1mV -2mV -40mV -0.01 V 0.11 V 0.0 V 0.9 V 0.9 V -2 V ±200µV ±3mV ±3mV ±30mV ±30mV ±200mV ±300mV ±300mV ±1V Reading: Error: Uncert.: Spec.: 45.00 Hz 50.00 kHz 0.00Hz 0.00kHz ±10mHz ±10Hz 0.1% + 10mHz 0.1% + 10Hz Reading: Error: Uncert.: Spec.: V V V V -1mV 0.0 V 0 V 0 V ±1mV ±100mV ±1V ±1V 0.09% + 2mV 0.09% + 200mV 0.15% + 2 V 0.15% + 2 V Reading: Error: Uncert.: Spec.: 45.00 Hz 50.00 kHz 0.00Hz 0.00kHz ±10mHz ±10Hz 0.1% + 10mHz 0.1% + 10Hz 1% + 1% + 2% + 1% + 2% + 1% + 1% + 2% + 1% + 300µV 3mV 3mV 30mV 30mV 300mV 300mV 300mV 3 V AC Volts - Frequency. Note: Range: Input: Auto Auto 1.000 V 5.000 V 45.00 Hz 50.00 kHz DC Volts. Note: Range: Auto Auto Auto Auto Input: 5.000 300.0 1000 -1000 V V V V 4.999 300.0 1000 -1000 DC Volts - Frequency. Note: Range: Input: Auto Auto 3.000 V 30.00 V 45.00 Hz 50.00 kHz Cert. no. : 22 - 483430 Page no. : 3/5 Millivolts DC. Note: Range: Input: Reading: Error: Uncert.: Spec.: Auto Auto Auto 30.0 mV -300.0 mV 600.0 mV 30.0 mV -299.9 mV 599.7 mV 0.0mV 0.1mV -0.3mV ±100µV ±100µV ±100µV 0.09% + 200µV 0.09% + 200µV 0.09% + 200µV Input: Reading: Error: Uncert.: Spec.: 0.1 ˚C -40.0 ˚C 399.8 ˚C 0.1˚C 0.0˚C -0.2˚C ±0.1˚C ±0.1˚C ±0.1˚C Temperature, Type K. Note: Range: Auto Auto Auto 0.0000 mV ≈ -1.5269 mV ≈ 16.3971 mV ≈ Range: Input: Reading: Error: Uncert.: Spec.: Auto Auto 19.0 Ω 19.00 MΩ 19.0 Ω 19.02 MΩ 0.0 Ω 0.02MΩ ±100mΩ ±20kΩ 0.9% + 200mΩ 1.5% + 30kΩ Range: Input: Reading: Error: Uncert.: Spec.: Auto 900 nF 901 nF 1nF ±3nF Error: Uncert.: V 0mV ±1mV Reading: Error: Uncert.: Spec.: 3.01 mA 50.02 mA 399.9 mA 0.01mA 0.02mA -0.1mA ±10µA ±60µA ±600µA 1.5% + 30µA 1.5% + 30µA 1.5% + 300µA 0.0 ˚C -40.0 ˚C 400.0 ˚C 1% + 1% + 1% + 1˚C 1˚C 1˚C Ohms. Note: Capacitance. Note: 1.2% + 2nF Continuity. Note: Text: Check: Continuity Passed. Diode. Note: Range: Auto Input: 2.000 Reading: V 2.000 Spec.: 1% + 2mV AC milliamps. Note: Range: Input: Auto Auto Auto 3.00 mA 50.00 mA 400.0 mA 45 Hz 1 kHz 1 kHz Cert. no. : 22 - 483430 Page no. : 4/5 AC Amps. Note: Range: Auto Auto Input: 4.000 9.00 A A 45 Hz 1 kHz Reading: Error: Uncert.: 4.002 9.01 A A 2mA 0.01 A ±4mA ±30mA Spec.: 1.5% + 1.5% + 3mA 30mA DC milliamps. Note: Range: Input: Reading: Error: Uncert.: Spec.: Auto Auto Auto 3.00 mA 50.00 mA -400.0 mA 3.01 mA 49.99 mA -399.9 mA 0.01mA -0.01mA 0.1mA ±10µA ±10µA ±200µA 1% + 30µA 1% + 30µA 1% + 300µA Range: Input: Reading: Error: Uncert.: Spec.: 4.000 -9.00 0mA 0.00 A ±3mA ±10mA DC Amps. Note: Auto Auto 4.000 -9.00 A A A A 1% + 1% + 3mA 30mA Cert. no. : 22 - 483430 Page no. : 5/5 REFERENCE EQUIPMENT USED FOR CALIBRATION Trescal Id: 401691 401308 400264 Reference Equipment: Cal.due: Fluke, Calibrator, 5520 A Trescal, Thermocouple, Type K Danbridge, Decade Capacitance Box, DK 4 S jul-2016 aug-2016 jan-2017 DANAK (Danish Accreditation) The Danish Accreditation and Metrology Fund - DANAK - is managing the Danish accreditation scheme based on a contract with the Danish Safety Technology Authority under the Danish Ministry of Economics and Business Affairs who is responsible for the legislation on accreditation in Denmark. The fundamental criteria for accreditation of calibration laboratories are described in DS/EN ISO/IEC 17025 ”General requirements for the competence of testing and calibration laboratories”. DANAK uses guidance documents to clarify the requirements in the standards, where this is considered to be necessary. These will mainly be drawn up by the ”European co-operation for Accreditation (EA)” or the ”International Laboratory Accreditation Co-operation (ILAC)” with a view to obtaining uniform criteria for accreditation worldwide. In addition DANAK issues regulations with requirements for accreditation deriving from requirements in DS/EN ISO/IEC 17011 and national statutory orders on accreditation, (for details see http://www.danak.dk). APPENDIX Page no. : 1/1 CERTIFICATE OF COMPLIANCE: Equipment : Multimeter Manufacturer : Fluke Model : 179 Date of Cal. : 12-07-2016 DD-MM-YYYY Equipment no. : HSH01 Serial no. : 91050703 OWNERS SIGN.: Cert. no. : 22 - 483430 Trescal no. : 112620 DATE: All measured values are (The measured value is) within the stated requirements for compliance, according to the explanation below, with the given specifications. P ! !! F NE × × × × + Spec. × Nom.Value ÷ Spec. For instruments, that have a specification, the measured values are evaluated as follows: Passed (not marked): All (All other) measurement results are within the specification when added the measurement uncertainty: Compliance. !): The measurement result is within the specification, but it is outside when added the measurement uncertainty: Compliance cannot be decided. !!): The measurement result is outside the specification, but it is inside when added the measurement uncertainty: Compliance cannot be decided. Failed (F): The measurement result added the measurement uncertainty is outside the specification : No Compliance. Evaluation not possible (NE): The measured value is inside (outside) the specification, but the uncertainty is larger than or equal to the specification. Therefore a statement about compliance is not possible. A confidence level of 95% is used for calculation of measurement uncertainty. Trescal A/S Mads Clausens Vej 12 Postboks 126, DK-8600 Silkeborg Tel.: +45 87 20 69 69, Fax +45 86 81 26 54 E-mail: [email protected] CVR-nr. DK 15009535, Bank: 7170 107278-8
