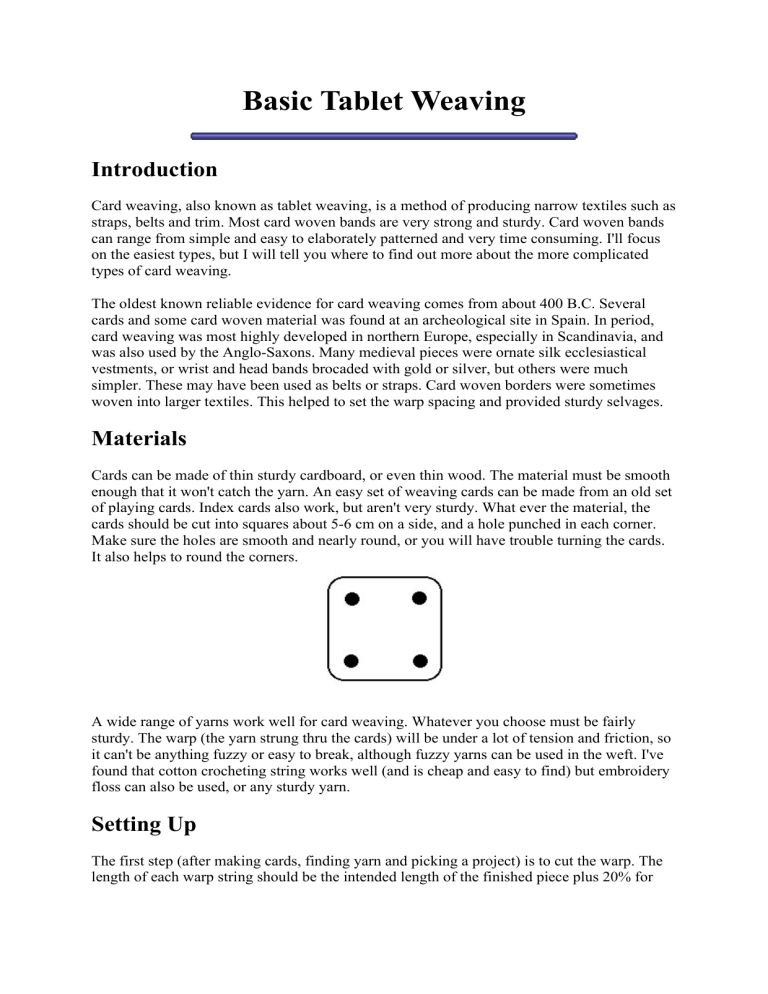
Basic Tablet Weaving Introduction Card weaving, also known as tablet weaving, is a method of producing narrow textiles such as straps, belts and trim. Most card woven bands are very strong and sturdy. Card woven bands can range from simple and easy to elaborately patterned and very time consuming. I'll focus on the easiest types, but I will tell you where to find out more about the more complicated types of card weaving. The oldest known reliable evidence for card weaving comes from about 400 B.C. Several cards and some card woven material was found at an archeological site in Spain. In period, card weaving was most highly developed in northern Europe, especially in Scandinavia, and was also used by the Anglo-Saxons. Many medieval pieces were ornate silk ecclesiastical vestments, or wrist and head bands brocaded with gold or silver, but others were much simpler. These may have been used as belts or straps. Card woven borders were sometimes woven into larger textiles. This helped to set the warp spacing and provided sturdy selvages. Materials Cards can be made of thin sturdy cardboard, or even thin wood. The material must be smooth enough that it won't catch the yarn. An easy set of weaving cards can be made from an old set of playing cards. Index cards also work, but aren't very sturdy. What ever the material, the cards should be cut into squares about 5-6 cm on a side, and a hole punched in each corner. Make sure the holes are smooth and nearly round, or you will have trouble turning the cards. It also helps to round the corners. A wide range of yarns work well for card weaving. Whatever you choose must be fairly sturdy. The warp (the yarn strung thru the cards) will be under a lot of tension and friction, so it can't be anything fuzzy or easy to break, although fuzzy yarns can be used in the weft. I've found that cotton crocheting string works well (and is cheap and easy to find) but embroidery floss can also be used, or any sturdy yarn. Setting Up The first step (after making cards, finding yarn and picking a project) is to cut the warp. The length of each warp string should be the intended length of the finished piece plus 20% for take-up, plus 50 cm for room for the cards, starting and ending knots, etc. This is important, so I'll repeat it: warp length = 1.2 x final length + 50 cm One warp yarn will be strung through each hole in every card. A card can be strung from left to right (Z-threaded) or right to left (S-threaded), but all four holes must be strung in the same direction or the card won't turn. When you look at the cards from above, the yarn will be on a slight diagonal, either in the same direction as the middle line of a Z, or the same direction as the middle part of an S. It's probably easiest to tie each set of four warp yarns together after you thread a card. When all the cards are threaded, tie a big knot at the beginning and the end to hold everything together. The weft is the yarn that is passed back and forth between the warp threads, and holds the whole thing together. It will normally only show at the sides of the band. Take a fairly long piece of string (but not too long or it gets unmanageable) of the same color as the strings in the edge cards, and wind it around a shuttle or make in into a butterfly. Now you are ready to weave! Weaving Tie the far end of the warp to something sturdy, like a doorknob or a chair. Either hold the other end or attach it to your belt. The cards should all be in a pack with one set of edges flat towards you. Pass one end of the weft through the shed, which is the gap between the warp threads in the top holes of the cards and those in the bottom holes. Leave about 2 cm or so sticking out of the weft. Turn the entire pack of cards one-quarter turn, either forward (away from you) or backwards (towards yourself). The direction depends on the pattern. Pack the new shed towards yourself, wither with your finger or something smooth and flat, like the back of a knife blade, and pass the weft through again. Don't pull the weft all the way tight yet- leave a little loop sticking out. Now repeat the following steps: 1. 2. 3. 4. Turn the cards. Pack the shed. Tighten the previous weft shot just to the edge of the band. Pass a new weft shot through the shed. Continue until the band is the length you'd like. Easy, isn't it? Finishing Trim can be cut into lengths and sewn on, as long as the ends are firmly sewn down. For straps or belts, you can leave extra and make tassels or braids, or hem the ends. Or for a belt, you may want to attach a ring to one end. Just don't forget to take the cards off! Threaded-in Patterns Now that you know the mechanics of card weaving, you probably want to know how to make neat patterns, right? The easiest type of pattern is the threaded-in pattern, where the design is created by threading different colors of yard in the same card, and all the cards are turned in the same direction. These patterns are not medieval! Most period patterns involve some amount of individual manipulation of the cards. Any of the references at the end can give you more suggestions about medieval card weaving. Card weaving projects are usually set up from a pattern. The conventions I use are similar to those used by Collingwood and other authors in this area. Each hole in the card is given a letter to identify it. You don't need to write these on the card unless you really want to, but it is useful to mark to top of each card in some way. Most commercial cards are marked. Looking at the card from the left, the letters are: D C A B A pattern will show the order of the cards, what color weft to string through each hole, and the threading direction, and can be drawn quickly on graph paper, with each column of four squares indicating the four holes of one card. A \ below a column indicates that card is Sthreaded, and a / indicates a Z-threaded card. The following sample pattern would be for four cards with dark threads in their B holes and light threads in the remaining holes. The left two cards are S-threaded, and the right cards are Z-threaded. O O X O \ O O X O \ O O X O / O O X O / D C B A I have made a page with a few sample threaded-in patterns, and descriptions of the bands they will produce. Notice that for a Z-diagonal stripe to have smooth edges on the front of the band, the cards must be S-threaded and turned forwards. If S-threaded cards are turned backwards, a smooth S-diagonal stripe will result. The opposite is true for Z-threaded cards: if turned forwards, they will produce a clean S-diagonal. This effect is caused by the twisting together of the four threads in each card. Patterns with no diagonal lines usually work best with alternating Z and S-threaded cards. More Complicated Patterns One of the most common individual card manipulations is the twist. Simply rotate a card around its vertical axis. This changes the threading direction of the card as well as the color position. (Note: In some cases twisting the card is equivalent to turning it in the opposite direction. A Z-threaded card turned forwards will produce the same twist as an S-threaded card turned backwards, but the color pattern may not be the same with a twist as a reversal.) One pattern I really like is kivrim, which makes a spiral design. Double Face Weave This is the simplest weave that allows you to make patterns that do not depend on the threading of the cards. Nearly any two-colored pattern can be made using this weavepictures, letters, even Celtic knotwork. Set up all the cards with two dark threads in the holes nearest you (A and B) and light threads in the far two holes (C and D). The cards should alternate S and Z-threading. The basic double weave sequence is: 2xF, 2xB. This turning sequence will make a band that is all dark on the top and all light on the bottom. To switch colors in one card, simply twist that card when it has two different colors in the top two holes (the dark threads are in A and D, or in B and C). The card or cards twisted will now make a portion of the band with a light surface and a dark back. Having control over the color of each individual card allows you to weave any pattern that you can draw on graph paper, as long as each color change is a multiple of two squares long. This restriction is because you can only change colors in the first and third card positions in the sequence, and not in the second and fourth (twisting will have no effect on color position.) Double Faced 3/1 Broken Twill Basics This technique has been used throughout the Middle Ages, especially in northern Europe, to create elaborately patterned bands. The most common designs are geometric patterns and stylized birds and animals, but there are many possibilities. The oldest known sample comes from Norway, and is dated to the sixth century. Other period pieces are described in the references below. Twill cloth has a diagonal surface structure. This means that patterns with 45 degree diagonal lines are especially suited for this weave. All these directions assume that you are weaving a dark colored twill with white patterns. (The reverse side will be light with dark patterns, but the edges of the diagonal color boundaries will not be smooth.) The cards used for the twill weave are threaded with two light threads in adjacent holes, and dark threads in the other two holes. The card can assume four positions relative to the string colors. While weaving a twill with a dark upper surface, each card moves from position I to II to III back to I, and repeats the sequence. This turning pattern keeps a dark thread always showing on the top. (This is exactly like ordinary double face weave so far.) This card is out of step with its neighbors, though, which creates the twill line in the fabric. Twills are described as S or Z, depending on the direction of the twill line. (This is equivalent to the use of S and Z to describe card threading direction.) There are two methods to weave a twill, based on the fact that an S-threaded card turned forward is equivalent to a Z-threaded card turned backwards as long as the color pattern is symmetric. In the one-pack method, all cards are turned individually, and color changes are made by reversing the turning direction. The two-pack method, which is the one covered here (developed by Peter Collingwood), involves separating the cards into two groups, each of which is turned as a whole. Color changes are made by twisting the card about its vertical axis while it is in position I or III, which interchanges the positions of the light and dark threads, and switches the threading direction. A twist made while the card is in position II or IV will change the threading direction without affecting color position. Because of the frequent twisting, it is easiest to use fairly small cards, about 5 cm. Set-up Several selvage cards in plain weave should be used to stabilize the twill and provide a smooth, sturdy edge. The twill cards are threaded two light, two dark as described above. The twill cards are then separated alternately into two packs. The pack nearest the weaver is composed of all the odd-numbered cards, and starts in position II. The even-numbered cards are pushed away from the weaver, into a second pack, which starts in position I. The selvage cards for a third pack. There is a four-part turning sequence for the twill cards. First, both backs are turned forward (top edge away from weaver) and the weft is passed. Selvage pack is turned each time the twill packs are turned. Then pack 1 is turned back (top edge toward weaver) and pack 2 is turned forward. Both packs are turned back, and finally pack 1 is turned forward and pack 2 is turned back. If the selvage pack is always turned forward, the outermost card can be labeled in such a way that the top edge always indicates the current turning pattern. The threading direction of the cards depends on the desired twill direction. Examples of both S and Z twills are shown below. Twill direction can be changed while weaving by twisting cards in position II. Pattern drafting While it seems complicated at first, designing patterns actually follows a few straightforward rules. It is impossible to crate a smooth line across the width of the band, but lines along the band and at 45 degree angles are possible. Color changes can only occur when a card is in position I or III. This means that a color change must be a multiple of two turns long, and that cards in different packs cannot change colors at the same time. Graph paper can be used to design patterns, although I use "rectangle paper," which conforms to the limitations of this technique. This type of paper is available in craft stores for designing bead loom patterns The underlying principle is that a card in position I relative to the top color at a color change must be treaded in the same direction as the line of the color change, and a card in position III must be threaded in the opposite direction. If a card is threaded in the wrong direction for a smooth color change, twisting it while it is in position II just before the interchange will put the card in the right orientation without leaving long floats. While learning how this rule translates into practice, I found it helpful to draw out the threading direction and card position at each color change. There are some derived rules which can also be useful. If two parallel diagonal color boundaries are 2, 6, 10, etc. turns apart, no twists are needed to adjust threading direction. If two perpendicular boundaries are 4, 8, 12, etc. turns apart, no twists are needed. Steps in drafting a pattern. 1. Draw the design on graph paper, remembering that color boundaries must be separated by multiples of two turns. 2. Determine whether the card is in position I or III at each color change (with an arbitrary starting point.) 3. Decide what the twill direction for each section of the pattern should be (your call) and use that information to determine the proper threading direction for each card at each color change. 4. Use the threading directions to determine both the initial set-up and the locations where a twist is required. Double Faced 3/1 Broken Twill Background Tablet-woven 3/1 was used to create some of the most elaborately patterned bands of the Middle Ages. Collingwood's Techniques of Tablet Weaving (TTW) illustrates some amazing examples, including the maniple from Arlon, which is my favorite piece of tablet weaving. 3/1 twill isn't that different from doubleface. The tablets follow the same sequence (ffbb; Fig. 1) to create a fabric that is all dark on one side and all light on the other. The ffbb turning sequence creates a fabric where the warp threads each go over 3 and under 1 weft thread. In doubleface, the 3-weft floats are all parallel across the band, so this could be called 3/1 repp, but in 3/1 twill the floats are staggered along diagonal lines (Fig. 2). The diagonals can run in either S or Z directions. Figure 1. Sequence of tablet positions for double-faced weaves. At least one dark thread is always on top, and crosses the top with each turn, so the upper face of the band will be dark. Figure 2. Alignment of floats for three double-faced structures. The strong diagonals in 3/1 broken twill make it possible to design elaborate patterns based on diagonal lines, but make it impossible to weave smooth horizontal lines. Weaving twill There are two ways to weave 3/1 twill. The two-pack method was developed by Peter Collingwood, and is faster for large areas of plain ground and for simple patterns. The onepack method is easier to understand, and it is easier to move from the one-pack method to other structures, especially Snartemo. I'm only going to cover the one-pack method here. All the tablets are S-threaded with two light and two dark threads in adjacent holes (as in Fig. 1). It has become conventional to draft patterns on graph paper, using / to indicate a forward turn and \ a backward because those are the directions of twist created by an S-threaded tablet turned in the appropriate direction. The twill direction is indicated by the parallel lines of / or \ running in the appropriate direction (Fig. 3). Figure 3. Pattern draft for single-color S and Z twill. The slashes line up along the twill direction. Changing color Plain twill isn't all that interesting - the fun part is making designs. There are several possibilities, but the easiest way to change colors is to turn the tablets 4 times in the same direction, then resume the regular ffbb sequence. In Figure 3, the slashes lined up along the twill line. When changing colors, the color change also needs to follow the twill line, so the color change shows up on the pattern as 4 parallel slashes along that line (Fig. 4). The color change actually happens in the middle of that broader line. With this kind of color change, the twill direction is the same on both sides. Figure 4. S and Z color changes. To come out smooth, the color change always has to match the twill direction, so that technique lets us make patterns of diagonal lines all going in one direction. Again, not very interesting. Even the simplest diamond requires diagonals going in both directions. Since the color change must match the twill direction, the only solution is to change the twill direction. Twill direction is changed by shortening the turning sequence (Fig. 5). The sequence only changes for every other tablet - where there are 2,6,10, ... picks between the change in direction. Figure 5. Two ways to change twill direction. The one on the left changes in the middle of the area, while the one on the right changes just before the boundary. The points where the turning sequence has been changed are shaded. Twill has long floats, so bands should have warp-twined selvages. These are made with 2 or more tablets always turned the same direction, and only reversed when too much twist has built up. Warp-twining creates a sturdy edge and prevents the floats from snagging. Putting it all together I've found that the easiest way to draft patterns is to start with the pattern itself and work backwards. Let's try a diamond with one side filled in and the other hollow. 1.Sketch the outside of the diamond using two parallel slashes in the direction of the color lines. The point of the diamond must be made with one card instead of two (not completely symmetrical). 2.Fill in the solid half, working from the edges inward and putting the twill direction change along the middle of the diamond. 3.Color changes are made up of 4 consecutive turns, so add those turns to the outside of the diamond, and to the inside of the hollow half. 4.Fill in the hollow half. 5. Fill in the background. The decision on what twill directions to choose will depend on your overall plan for the band. For whatever reason, I want this diamond to appear on a background of S-twill. To weave this pattern, you need to set your tablets up based on the first two rows of the pattern (read from the bottom). If they are both forward (/), the tablet must have the surface color in the two holes closest to you. If both turns are backward (\), the surface color is in the farthest holes. If the two turns are different, the surface color is in the top two holes. This pattern could have been done differently to avoid the long floats at the points of the diamond, but I wanted to illustrate the simplest way of drafting it. Threading Tablets Judging from the email I get, this is one of the hardest things to figure out from my web page. So I've added this page, with several more figures, to help explain. First, for most patterns each tablet requires four warp threads, one through each hole. A threaded tablet looks like this: If you, the weaver, are holding the end indicated, so that the front of the tablet in the picture is to your right, then this tablet would be Z-threaded. If all four threads passed through the tablet from the back to the front, instead of front to back, the tablet would be S-threaded. Once you get all the tablets threaded, set them all next to each other in a pack, as in this photo: Assuming the perspective shown in the top figure, for a forward turn the tablet would move clockwise, and a backward turn would be counterclockwise. An S-threaded tablet turned forward makes a Z-twisted cord. Reversing the turning reverses the cord twist, and reversing the threading also reverses the cord twist. The opposite twist appears on the back of the band. This is what makes jagged diagonal lines. The pictures below show the front and back of a sample band which includes all the possible threading and turning combinations. Front Back
