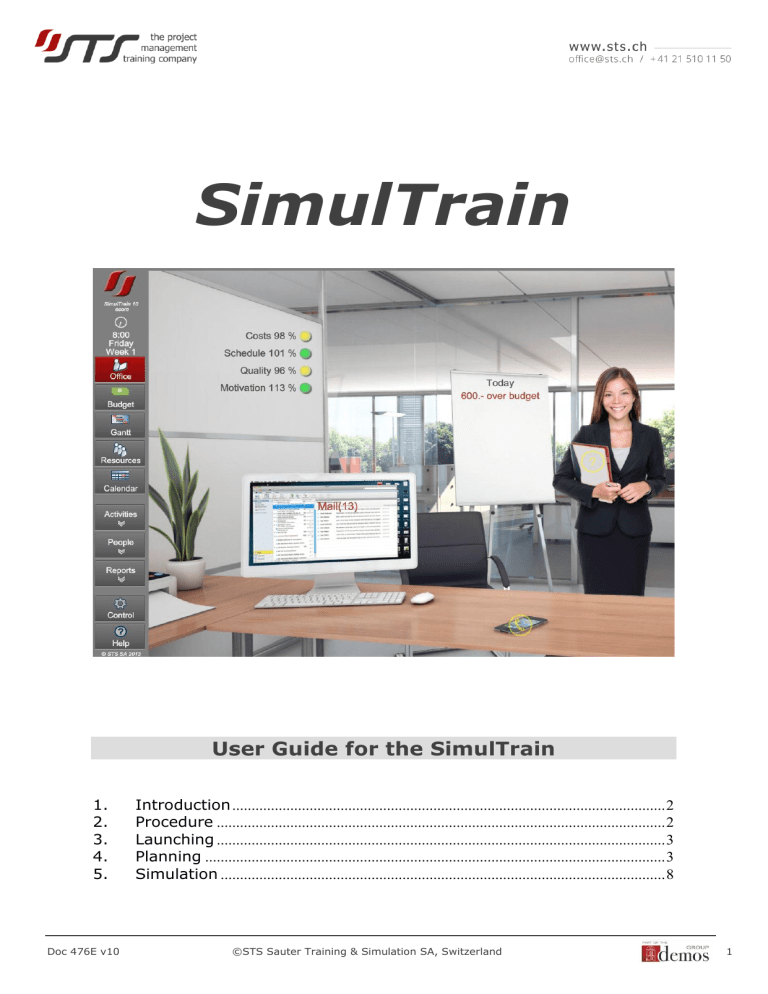
SimulTrain User Guide for the SimulTrain 1. 2. 3. 4. 5. Doc 476E v10 Introduction ................................................................................................................ 2 Procedure .................................................................................................................... 2 Launching .................................................................................................................... 3 Planning ....................................................................................................................... 3 Simulation ................................................................................................................... 8 ©STS Sauter Training & Simulation SA, Switzerland 1 1. Introduction SimulTrain is a simulation of the planning and execution phases of a medium-sized project. In the planning phase you have to constitute your team and allocate resources. In the execution phase your objective is to cope with all arising events in order to finish the project on time and within budget. IMPORTANT: You can, at any moment, interrupt the simulation and start again at a later stage. To interrupt: simply close the software. To continue: restart the simulator Attention: Do not open 2 or more sessions with the same password at the same time. 2. Procedure A. Program of the first period (simulation week 1 to week 4) Planning (60’) Execution of the first period (90’) "Start Simulation" Debriefing (30’) End of period (the simulation stops): – Contact the coach – Analyze your results – Write a progress report B. Program of the second period Planning (10’) Execution of the second period (70’) "Start Simulation" Doc 476E v10 Debriefing (30’) End of period (the simulation stops): – Contact the coach – Analyze your results – Draw conclusions, write a report ©STS Sauter Training & Simulation SA, Switzerland 2 3. Launching When you launch the program, you find yourself in the virtual office of the project manager. Below the simulator’s main functions are presented: Duration The simulation is divided into two periods of 4 weeks each. After the first 4 weeks of the simulation (approximately 90 minutes), the simulation will be put on hold to allow you to assess your performance and plan corrective action before continuing. 4. Planning In this phase, you must set up the project team and assign the activities to the different team members. You can always go back and change any allocation that was made and change it in the course of the planning period. When you’ve completed the planning phase and all tasks have resources you can launch the simulation. A. Here are some indications for simple planning. There are three main buttons in the simulation: - one button allowing you to view the project activities, - one button allowing you to view the available resources, - one button allowing you to view information and reports. Doc 476E v10 ©STS Sauter Training & Simulation SA, Switzerland 3 In the "Reports" menu, look at the Project Description. Furthermore, have a look at the Organization Chart which indicates the different resources and roles in the organization. B. Have a look at the 17 project activities at the Activity Network. Some of the activities can be done in parallel! Some of them are critical! It means that a delay of the activity execution will delay the whole project. Read more detail about the activities by choosing one from “Activities” menu at the top: Select an activity, for instance Activity 1. Doc 476E v10 ©STS Sauter Training & Simulation SA, Switzerland 4 You will see that this task requires 2 people; its duration is 5 days. You can also consult the skills required for this activity: 2 in Web design, 5 in Business, and 3 in Sales & Marketing. C. Now you can look at the resources, which are available for your project. To consult the files of the different resources click on a People button and the name – for instance, Anna. She’s seems well qualified! You can also see her profile, her training and even her likes and dislikes. Doc 476E v10 ©STS Sauter Training & Simulation SA, Switzerland 5 D. Allocating an activity to a resource You can allocate different activities to each resource, just click on the button "Add” and select the activity. Anna will now work on Activity 2 in first priority. You can, of course, allocate more than 6 activities to a resource: you will simply have to wait for one of the first 6 allocated activities to be finished to be able to allocate others… E. Diagrams We can now look at the Gantt diagram. We see that Anna will work on Activity 2: F. Core-team Three people have been allocated full-time to the project: Fred, Sue and Tim. Let’s have a look at their skills: Doc 476E v10 ©STS Sauter Training & Simulation SA, Switzerland 6 Too bad… Fred doesn’t seem to be the brightest star in the sky. Nevertheless, we have to work with him… You know how to allocate tasks to people now: try allocating activities 1 and 3 to Fred. Please allocate activities 1 and 3 to Sue (who is also a member of the core-team). G. Check planning Please click on the Gantt diagram now, it should look like this: H. End of planning The planning is completed when every single activity of the project has been assigned to one or several team members. Doc 476E v10 ©STS Sauter Training & Simulation SA, Switzerland 7 I. Risk Management If the Risk Management is switched on for your simulation, you need to plan preventive actions in the Risk register. To access the risk register, please click on “Risk Management”. Click on an item in the list and choose one or several actions to prevent the risk. New items will appear in the Risk register during the simulation. We advise to visit the Risk register and to plan preventive actions at the beginning of each week of the simulation. 5. Simulation As the planning has been completed, we are now ready to run the simulation: click on the Control button at the bottom left side of this page. Please use the code “life”. Doc 476E v10 ©STS Sauter Training & Simulation SA, Switzerland 8 You have now reached the "Simulation Control" screen. It is best not to modify anything and leave the default values. A. You can now click on the button "Start Executing". After having clicked on this button you will find yourself in the project manager’s office again, however this time the simulation is running! Your assistant enters the room After a certain time, your assistant enters the room, holding some documents for you. Read the documents by clicking on the assistant’s folder. Doc 476E v10 ©STS Sauter Training & Simulation SA, Switzerland 9 When you click on the documents, you get the following screen: You must make a decision and you have 4 possible options. It’s up to you to select the most adequate. Be careful: if you choose the last one (you decide not to make a decision for the time being), your assistant will wait till Friday evening. Then, she will call the big boss (Jeff), and he will take the decision. But unfortunately, Jeff has a weak point: when making a decision, he usually chooses the worst option… B. Making a decision Let’s choose the first option. After clicking on the button "I decide", you get some feedback. Doc 476E v10 ©STS Sauter Training & Simulation SA, Switzerland 10 You’ll get feedback for every decision taken. C. Setting up a meeting In order to improve team motivation, you could invite its members for a lunch: Simply click on the Calendar button. You could have a barbecue, invite the team to lunch or organize a sports outing. Let’s invite them for lunch. You use the calendar or the phone to set up meetings, appointments, etc. Naturally if the phone rings aloud, simply click on it to hear the message. Doc 476E v10 ©STS Sauter Training & Simulation SA, Switzerland 11 Messages You’ve got some e-mail. Just click on the screen of the computer in order to read them. Ooops… Fred is complaining: Doc 476E v10 ©STS Sauter Training & Simulation SA, Switzerland 12 Let’s talk with him: if you want to talk to Fred, just click on the calendar and make an appointment with him. D. Quality reviews For quality management purposes you should organize quality reviews for each project activity. Simply choose an activity (Activity button in the menu bar), and select the number of quality reviews you want. Doc 476E v10 ©STS Sauter Training & Simulation SA, Switzerland 13 These are the essential facts to be able to use the simulator. Further useful information is available in the Help menu integrated into the simulator: You will discover other aspects during the simulation.… Doc 476E v10 ©STS Sauter Training & Simulation SA, Switzerland 14
