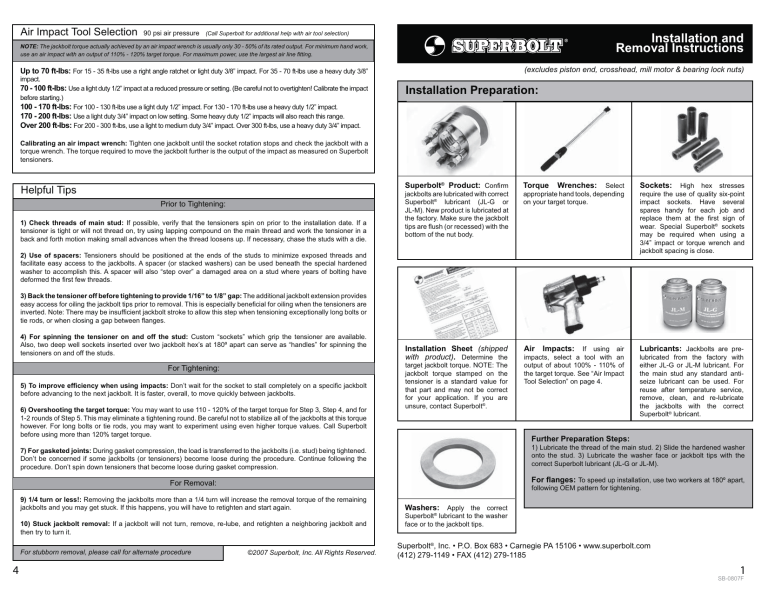
Air Impact Tool Selection 90 psi air pressure (Call Superbolt for additional help with air tool selection) NOTE: The jackbolt torque actually achieved by an air impact wrench is usually only 30 - 50% of its rated output. For minimum hand work, use an air impact with an output of 110% - 120% target torque. For maximum power, use the largest air line fitting. Installation and Removal Instructions Up to 70 ft-lbs: For 15 - 35 ft-lbs use a right angle ratchet or light duty 3/8” impact. For 35 - 70 ft-lbs use a heavy duty 3/8” (excludes piston end, crosshead, mill motor & bearing lock nuts) impact. 70 - 100 ft-lbs: Use a light duty 1/2” impact at a reduced pressure or setting. (Be careful not to overtighten! Calibrate the impact before starting.) Installation Preparation: 100 - 170 ft-lbs: For 100 - 130 ft-lbs use a light duty 1/2” impact. For 130 - 170 ft-lbs use a heavy duty 1/2” impact. 170 - 200 ft-lbs: Use a light duty 3/4” impact on low setting. Some heavy duty 1/2” impacts will also reach this range. Over 200 ft-lbs: For 200 - 300 ft-lbs, use a light to medium duty 3/4” impact. Over 300 ft-lbs, use a heavy duty 3/4” impact. Calibrating an air impact wrench: Tighten one jackbolt until the socket rotation stops and check the jackbolt with a torque wrench. The torque required to move the jackbolt further is the output of the impact as measured on Superbolt tensioners. Superbolt® Product: Confirm Helpful Tips Prior to Tightening: 1) Check threads of main stud: If possible, verify that the tensioners spin on prior to the installation date. If a tensioner is tight or will not thread on, try using lapping compound on the main thread and work the tensioner in a back and forth motion making small advances when the thread loosens up. If necessary, chase the studs with a die. jackbolts are lubricated with correct Superbolt® lubricant (JL-G or JL-M). New product is lubricated at the factory. Make sure the jackbolt tips are flush (or recessed) with the bottom of the nut body. Torque Wrenches: Select appropriate hand tools, depending on your target torque. Sockets: High hex stresses require the use of quality six-point impact sockets. Have several spares handy for each job and replace them at the first sign of wear. Special Superbolt® sockets may be required when using a 3/4” impact or torque wrench and jackbolt spacing is close. Air Impacts: If using air impacts, select a tool with an output of about 100% - 110% of the target torque. See “Air Impact Tool Selection” on page 4. Lubricants: Jackbolts are prelubricated from the factory with either JL-G or JL-M lubricant. For the main stud any standard antiseize lubricant can be used. For reuse after temperature service, remove, clean, and re-lubricate the jackbolts with the correct Superbolt® lubricant. 2) Use of spacers: Tensioners should be positioned at the ends of the studs to minimize exposed threads and facilitate easy access to the jackbolts. A spacer (or stacked washers) can be used beneath the special hardened washer to accomplish this. A spacer will also “step over” a damaged area on a stud where years of bolting have deformed the first few threads. 3) Back the tensioner off before tightening to provide 1/16” to 1/8” gap: The additional jackbolt extension provides easy access for oiling the jackbolt tips prior to removal. This is especially beneficial for oiling when the tensioners are inverted. Note: There may be insufficient jackbolt stroke to allow this step when tensioning exceptionally long bolts or tie rods, or when closing a gap between flanges. 4) For spinning the tensioner on and off the stud: Custom “sockets” which grip the tensioner are available. Also, two deep well sockets inserted over two jackbolt hex’s at 180º apart can serve as “handles” for spinning the tensioners on and off the studs. For Tightening: 5) To improve efficiency when using impacts: Don’t wait for the socket to stall completely on a specific jackbolt before advancing to the next jackbolt. It is faster, overall, to move quickly between jackbolts. 6) Overshooting the target torque: You may want to use 110 - 120% of the target torque for Step 3, Step 4, and for 1-2 rounds of Step 5. This may eliminate a tightening round. Be careful not to stabilize all of the jackbolts at this torque however. For long bolts or tie rods, you may want to experiment using even higher torque values. Call Superbolt before using more than 120% target torque. target jackbolt torque. NOTE: The jackbolt torque stamped on the tensioner is a standard value for that part and may not be correct for your application. If you are unsure, contact Superbolt®. Further Preparation Steps: 7) For gasketed joints: During gasket compression, the load is transferred to the jackbolts (i.e. stud) being tightened. Don’t be concerned if some jackbolts (or tensioners) become loose during the procedure. Continue following the procedure. Don’t spin down tensioners that become loose during gasket compression. 1) Lubricate the thread of the main stud. 2) Slide the hardened washer onto the stud. 3) Lubricate the washer face or jackbolt tips with the correct Superbolt lubricant (JL-G or JL-M). For Removal: For flanges: To speed up installation, use two workers at 180º apart, following OEM pattern for tightening. 9) 1/4 turn or less!: Removing the jackbolts more than a 1/4 turn will increase the removal torque of the remaining jackbolts and you may get stuck. If this happens, you will have to retighten and start again. 10) Stuck jackbolt removal: If a jackbolt will not turn, remove, re-lube, and retighten a neighboring jackbolt and then try to turn it. For stubborn removal, please call for alternate procedure 4 Installation Sheet (shipped with product). Determine the ©2007 Superbolt, Inc. All Rights Reserved. Washers: Apply the correct Superbolt® lubricant to the washer face or to the jackbolt tips. Superbolt®, Inc. • P.O. Box 683 • Carnegie PA 15106 • www.superbolt.com (412) 279-1149 • FAX (412) 279-1185 1 SB-0807F Removal Installation Step 1: Step 2: CAUTION! Jackbolts must be unloaded gradually. If some jackbolts are fully unloaded prematurely, the remaining jackbolts will carry the entire load and may be hard to turn. With extreme abuse, a jackbolt tip can deform, making removal difficult. Service Under 250ºF Preparation: Spray jackbolts with penetrating oil or hydraulic oil prior to start (especially if product is in corrosive environment). Step 1: Step 2: Repeat a 2nd round as above for all studs, now loosening each jackbolt 1/4 turn in a circular pattern. Spin the tensioner onto the main thread until it seats against the washer. You may want to back off the tensioner slightly as mentioned in Helpful Tip #3 on page 4. Tighten (4) jackbolts at 90º apart (12:00, 6:00, 9:00, and 3:00) on all studs with a partial torque (30-70%). This serves to seat the flange. If using an air impact, use a reduced setting or lightly pulse the trigger at the full setting. Step 3: Step 4: Step 3: Continue loosening 1/4 turn for 3rd Loosen each jackbolt 1/8 turn following a circular pattern around the tensioner (1 round only). As you move around and get back to the first jackbolt, it will be tight again. Do this for all studs on the joint prior to the next step. and successive rounds until all jackbolts are loose. NOTE: Usually after the 3rd or 4th round, an impact can be used to completely extract the jackbolts, one by one. For long bolts or tie rods, additional rounds may be required before removing the jackbolts with an impact tool. Step 4: Remove, clean and relubricate the jackbolts prior to next use with correct Superbolt lubricant (JL-G or JL-M). Service Over 250ºF Preparation: Above 300ºF the petroleum base of the lubricant burns off. Oil per “STEP 1” below to reduce the removal torque. At 100% target torque, tighten the same (4) jackbolts on all studs. At 100% target torque, tighten all jackbolts in a circular pattern. Do this for all studs (1 round only). See Helpful Tip #7 about using up to 120% torque. Step 1: OIL Step 5: Step 3: Now begin with “STEP 1” of the procedure for service under 250ºF. NOTE: Product with 4 or 6 jackbolts - use a star pattern for all steps. Repeat “STEP 4” until all jackbolts are stabilized (less than 10º rotation). This usually requires 2-4 additional passes. If using air tools, switch to a torque wrench when socket rotation is small. Use the torque wrench to stabilize at the target torque. 2 Step 2: Wait for tensioners to cool below 200ºF. Using a circular pattern, “crack” each jackbolt only enough to ensure movement. Do not turn beyond the break loose point. Do this for all studs. As the equipment is cooling down (around 300ºF), apply hydraulic oil to the jackbolts and washer and let sit for several hours. Thoroughly “wetdown” all components and re-apply during equipment cool down period. If the tensioner is inverted, squirt oil in the gap between the nut body and the washer. Synthetic oil can be used for oiling above 300ºF. NOTE: Heating Rods can be used to reduce the removal torque required. 3
