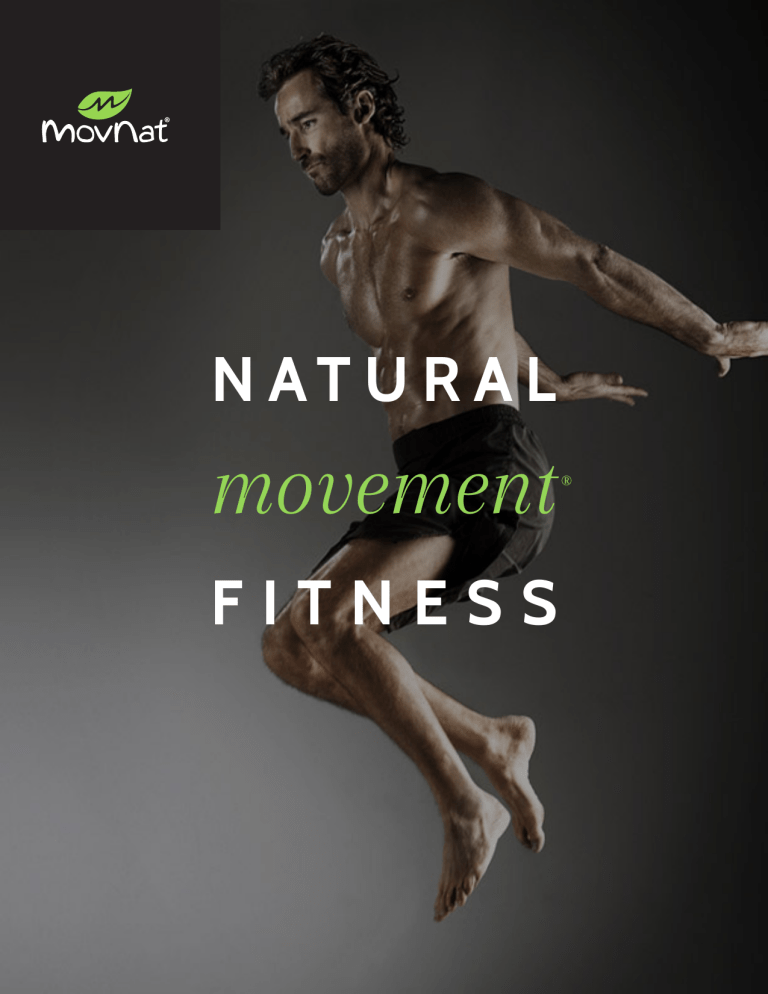
N AT U R A L movement FITNESS ® HIGHLIGHTS FROM THE 2014 NEWSLETTER. Welcome to the tribe. BE STRONG TO BE HELPFUL SITTING. Does it have to be bad for you? No. Sitting is actually good for you, if you make it so IS SITTING WORSE THAN SMOKING? While scientific studies are gathering growing evidence of the many adverse health effects of prolonged sitting, let’s emphasize the positive aspects of sitting. Indeed, sitting is actually good for you, if you make it so. First off, sitting is a practical movement ability that allows you to take a break and rest, wait, observe, and or work. It helps improve or restore your mobility if your body has gotten stiff over time. Of course, hours of sitting a day, everyday, in the same exact position, most of the time in a bad position, is harmful. Standing all day is not really a solution, as the adverse effects of prolonged standing are known as well. tntal positions, at MovNat sits are regarded as practical positions, and practical positions are part of Natural Movement. Therefore they should never be forgotten or neglected. You might notice that the more sit positions you practice, the better your mobility gets, with immediate benefits to other movement skills, including squatting. If you are working from home with a laptop or a low desk, you can easily keep working while practicing your sit, a great to add healthy Natural Movement to your day without taking extra time. So the key to effective, beneficial and enjoyable sitting is variety. THINK WITH YOUR WHOLE BODY. MOVE WITH YOUR WHOLE MIND. THE GET UP GET DOWN TEST. A recent study has shown that our ability to sit down on the floor and then get back up may be an indicator of how long we’re going to live. Middle-aged and elderly people who need to use both hands and knees to get up and down are almost seven times more likely to die within six years, compared to those who can spring up and down without support. While the ratio of muscle power to body weight is the most important factor in such ability, there are other very relevant aspects to it. Aside from strength - it is mobility, balance, and coordination that also participate very significantly in the transition from standing to sitting. So, when was the last time you sat on the floor, and how easily did you move from standing to sitting and back to standing? Do you remember how well you performed, how you felt? Do you remember having to use your hands or not? Such a simple test gives a quick, yet objective window into your ability to function from day to day. If this movement is gives you trouble, it is a good sign that some more practice is in order. How many ways do you know to get up and down from the floor? How many of them can you do smoothly, with minimal effort? The Natural Movement book I am currently writing will cover over 20 different ways, including several that are done without hand support. Fitness is not limited to strength and cardio and some stretching. Fitness to us is the practical ability to physically perform in the real-world. When you are older, you may not be able to lift as much or run as fast as you could when you are young, but you should seriously consider now that the simplest movement aptitudes will define your levels of physical autonomy in your later life. Will you be able to pick up your glasses after they fell on the living-room floor without being at risk of losing balance and hurt yourself? Now, are you ready for the standing to deep squat to bent sit movement? As you will soon realize, it might be MUCH more difficult that it looks… something we often need to underline: what is simple is not always easy. Before you start, make sure that you are not wearing very smooth synthetic fabrics and/or try the movement on a very smooth floor, as it will make your feet and rear slide and give you lots of trouble. GETTING UP AND DOWN. This is a good movement test. If it’s easy, you can move. If its hard... time to practice. Stand... and lower yourself to the deep squat...slowly. If you are unable to assume a stable, relaxed deep squat, you absolutely need to prioritize it, for you have lost significant natural movement abilities. There is no magic quick-fix for solving squatting issues. Pull your feet close to your bottom, heels against each other and firmly planted on the floor, feet splayed out, as the position of your feet is crucial to being successful at transitioning to the squat. Extended arms forward. Keep or bring your heels together and your feet splayed out. Gravity will pull you back and let you reach the bent sit. If your bottom isn’t close to the floor enough because of a lack of mobility, the transition might be heavy, loud, and not so comfortable. Avoid trying if your squat position is not deep enough. Or if you insist, at least place a pillow where you intend to sit! Quickly lean forward (you’ll need abdominal strength) to generate momentum, but also to shift weight to the front, helping your center of gravity to get position over your feet as fast as possible. Imagine you are using your heels as handles, and actually pull from your feet into the deep squat. You are back in the deep squat, ready to stand back up, right? THREE TIPS FOR BEGINNERS. • If you’re outside, find a slightly inclined area, and start the movement facing downhill. • Use something you can hold on to (a fence, a small tree etc..) to assist your squat and the transition from the squat to the bent sit. From the sit, lay back and swiftly rock forward to generate some helpful momentum. • Find a partner, and cross the index of one or two hands. One of the partners will help you control, and perform the movement on the way down and up. Switch roles. The irony of this movement is that it should be considered one of the simplest, most basic human movements. However most people, including some of the strongest and fittest, will have trouble doing it. The truth is that it should EASILY be done by every healthy human being. Very young kids can do it. So lets not blame our stregnth or conditioning, but rather our natural-movement-poor lifestyles. Most importantly, let’s seriously reconsider the value of practical, fundamental movements in our daily lives. Simple isn’t easy, but it is always worth doing. FURTHER PRACTICE Here are a few more techniques to practice. This is just the tip of the iceberg, as there are dozens of techniques, each with their own benefit. N AT U R A L M OV E M E N T IS TO FITNESS AS ORGANIC IS TO FOOD. “Erwan, in fact, could be one of the best living examples of what our bodies were originally designed to do.” - CHRISTOPHER MCDOUGALL, NATURAL BORN HEROS B R E AT H I N G . Breathing is a movement. Everything starts with breathing. It is not a movement of your body through space, but an internal movement your body needs from the moment you are born to the moment you die. Most of us take it for granted, but ask anyone with breathing issues and they will tell you that they would give anything to regain a healthy breathing. Without breathing normally, the body and mind become extremely stressed, sometimes to a state of absolute panic. Here’s something important to reflect on: just like any movement, breathing is a SKILL. It means that, while everyone who’s alive is breathing, one can breath efficiently…or not. Because it is a skill, it can be practiced mindfully, and improved. In fact, making breathing a skill is one of the most important and POTENT ways to improve your movement and physical performance. The benefits carry over to every area of life! Diaphragmatic Breathing STEP 1 I assume a prone lying stance with my arms either out perpendicularly to my body. Pushing off the ball of my feet, I make a wide step forward, placing the foot at about hip level. The leg I move forward is opposite to the shoulder I will roll over. This move advantageously start positioning my body sideways in the direction of the weight-bearing shoulder. I start to preventively and protectively tuck my chin in. STEP 2 Time to breath in. The common reflex is to inflate your chest and make it big. Resist this. Oppositely, avoid any voluntary movement from your chest and upper respiratory muscles (photo 4). Of course chest breathing is very useful in movement…when intensity demands it. Learn to dissociate and select various ways of breathing, at will. Today focus on your abdomen area and diaphragm. STEP 3 Now that we have made room for new air, it is time to breath in! The breathing in we want is that the diaphragm contracts, pushing your belly OUT as you inhale fully. It won’t show your 6 packs abs, but it is essential to learn to breath relaxedly. When you breath in and you’re just sitting or standing, you don’t need the superficial layer of your abdominal muscles to contract. If there is a slight motion in your chest, it is the sole result of your deep inhale, not the result of a voluntary use of other respiratory muscles else than the diaphragm. Keep your mouth close and inhale through the nose. STEP 4 Once you start to feel and control your diaphragmatic breathing, you may release the lower hand and keep only the upper one to keep the chest in check. Then you can release both. STEP 5 A breathing drill is just that, a breathing drill. The real goal is to improve your breathing as you move and perform physically (and in any situation of life for that matter), especially when intensity comes into play. STEP 6 Practicing controlled, ample, powerful diaphragmatic is best trained when abdominal muscles are forcefully contracted. Practicing the same exercise while sitting with your feet off the floor is a great way to do it. MOVNAT | THE MOVEMENTS Breathing Progressions and variations: #1 Practice rhythm, for instance breathing in and out increasingly fast, or alternate fast inhale and slow exhale, slow inhale and fast exhale etc…without losing your pattern and get confused, or bring the chest into your breathing practice. #2 If you lose your ability to control your breath while in motion, then the standing drill is close to uselessness, as it doesn’t transfer to actual movement. Practice transitions from varied sitting positions to varied crawling techniques, at LOW intensity first, then increasingly fast. Keep practicing your diaphragmatic breath control with other movement skills, at varied levels of intensity, until you feel that it becomes an integral part of your movement. MOVNAT | THE MOVEMENTS T H O U G H YO U M AY N E V E R M A S T E R YOUR ENVIRONMENT... YO U M AY L E A R N TO MASTER HOW YOU MOVE THROUGH IT. Forward Roll Rolling is one of those natural movements everyone loves to do on grass, sand, or a foam mat. It is also one of these movements everyone thinks they know how to do, until they are asked to do it in a controlled manner. As a practical movement it allows me to change my body orientation from prone (facing down) to supine (facing up) as well as my body direction. It can be quite useful in situations that require staying low to reduce visibility or vulnerability. V E RY I M P O R TA N T S A F E T Y P O I N T E R : In the case of the forward roll, it is essential to not push bodyweight onto the neck. It is also essential that I turn my neck and head in the OPPOSITE direction of the weight-bearing shoulder and tuck my chin in. Keeping my head straight or worse, trying to turn it in the same direction as the weightbearing shoulder as in the backward roll would only end up in straining, or even hurting my neck badly. It is simply bio-mechanically incompatible. MOVNAT | THE MOVEMENTS Forward Roll STEP 1 I assume a prone lying stance with my arms either out perpendicularly to my body. Pushing off the ball of my feet, I make a wide step forward, placing the foot at about hip level. The leg I move forward is opposite to the shoulder I will roll over. This move advantageously start positioning my body sideways in the direction of the weight-bearing shoulder. I start to preventively and protectively tuck my chin in. STEP 2 Pushing off the foot of the bent leg, I drive my body forward, rear up, while shifting weight onto the weight-bearing shoulder and avoiding pushing my body straight towards my head and neck. STEP 3 I have pushed off my feet and extended my legs fully. The ball of my feet are still on the floor/ground, ready for the final push off that will make my center of gravity go beyond my base of support, and my body topple and unfold in a roll on my back to the other side. I am using both my arms on the floor/ground to stabilize my body and direct my upcoming roll. I am also inwardly rotating my shoulder and arm during this phase to facilitate the smooth repositioning of my body in the supine lying. STEP 4 I am now rolling on the other side at no extra energy cost. Gravity is pulling my weight and lower limbs down. I immediately turn my head to verify I am headed in the right direction. STEP 5 As I unfold my legs, I still can adjust the direction of my body to some extent. STEP 6 I have repositioned my body to “land” my roll exactly aligned with my starting prone lying position, only in a supine lying. MOVNAT | THE MOVEMENTS “I’ve had the opportunity to start working with Erwan Le Corre founder of MovNat. It has added a new dimension to my training, and given me a new perspective on fitness and performance.” - CARLOS CONDIT, CHAMPION UFC FIGHTER Inverted Foot Hand Crawl Though the inverted foot hand crawl (aka “crab crawl”) is well known to everyone, it common to see people struggling with it because due to inefficiencies, such as breathing, position and timing. This technique actually requires great shoulder, elbow and wrist mobility, so it is normal to see people being quite uncomfortable in assuming the inverted foot-hand crawl position. Practical applications are varied, but most importantly it will be used going forward down a steep or slippery slop, allowing greater balance and a wider base of support. It is also used in hiding and stalking so as to be able to move while staying minimally visible, or in confined areas where standing is not an option. MOVNAT | THE MOVEMENTS Inverted Foot Hand Crawl : Movement Sequence STEP 1 Start in a typical contralateral stance, with on one side of your body the foot and hand relatively close and on the other side the foot and hand wider appart. Your ideal position should be the most comfortable, not too wide or too compact. Both arms should be in the locked out positions. Lifting the top part of the foot and planting the heel firmly on the floor/ground might help get greater friction, especially when the terrain is slippery. STEP 4 Resume the same motion as in photo two and three to find yourself in the exact same position as in photo one. For optimum technique, your ideal position is replicated very closely on both sides every cycle, except when the terrain imposes modifications in changes for the sake of adaptability and effectiveness. MOVNAT | THE MOVEMENTS STEP 2 Pushing from the front foot and letting go of the rear hand, shift bodyweight on the supporting front hand, making sure to keep the front arm in the locked out position for stability. You will momentarily find yourself in a contralateral stance. STEP 3 Pull the rear foot backward and place it on the floor/ground, leg bent, while at the same time extend the trail arm backward in front of your body. The moving foot and hand should reach the ground at the exact same time, and the bodyweight should shift on them so quickly that the opposite foot and hand can be lifted such that it doesn’t look or feel like the body is resting on all four points of support. Inverted Foot Hand Crawl: Next Steps Going forward, the main technical point is to use the heels as “anchors” and pull the body forward through the legs. This simple cue will correct the common perception that one should only push themselves forward through the arms, which is energetically very costly. When you imagine pulling your body to the front from your feet, you will use your legs much more, distributing the load and effort more equally through the upper and lower body. Typical faults in the inverted foot-hand crawl include an overly compact stance, keeping the upper body vertical, hunched shoulders, and bent arms. Progressions for this technique include distance, speed, complexity with uneven, slippery, or inclined terrains. For training purpose, one can choose the counterintuitive options of going downhill backward or going uphill forward, which can also be done in urban environments on stairways and can make for an efficiently brutal workout. MOVNAT | THE MOVEMENTS Leg Swing Jump If you have to get over a gap that is a little too big to step over it, or a landing surface that is narrow or unstable, go for the “leg swing jump”. It is a great introductory technique to jumping because it involves a short distance and is low impact. If you have practiced the tiptoeing balancing movement (previous newsletter), it will help your landing efficiency. MOVNAT | THE MOVEMENTS Leg Swing Jump : Movement Sequence STEP 1 If you are not familiar with jumping practice, it is preferable and safer to not start with an elevated gap, but directly at floor level (draw or tape a line, or place a small stick on the floor/ ground), to get a sense of context. A good test for proper leg swing jump distance, is a distance half a step or one step beyond the maximum distance you could reach by stepping out in front of you. STEP 2 Stand straight and focus on your target. Get a mental sense of how much energy you’ll need to generate to reach the landing surface without pushing too hard and landing heavily. STEP 3 Shift weight on one foot only, bend your knee slightly, and pull the other leg behind your body, as your upper body lean forward. Maintain a straight posture and your arms relaxed, and keep looking at your landing target. STEP 4 Swiftly swing the trail leg forward in the direction of your landing surface to generate and transfer momentum to the whole body. As the trail leg passes to the front, push off the supporting leg. STEP 5 While airborne, rapidly pull the trail leg towards the front one. The front foot will land a second before the trail foot.The landing on both feet takes place on the ball of the foot, in a tiptoe fashion. If the landing surface is big enough, allow both feet to come flat after landing first on the ball of the feet. Bend your knees to dispatch impact forces, while keeping a tall back. STEP 6 You may “secure” the landing by bending your legs a bit more and stabilizing your balance fully before you stand up. MOVNAT | THE MOVEMENTS Leg Swing Jump Progressions The progression of this technique is not to jump higher or farther. The leg swing jump applies to short distances only. The progression is to gradually increase environmental complexity, for instance a more narrow, unstable, or elevated landing surfaces. Nature is ideal for this practice. Think of short, mindful jumps amung rocks, trees, and streams. MOVNAT | THE MOVEMENTS YOU ARE MEANT TO BE STRONG Straddle Sit to Split Squat When you balance on a fallen tree, or even at the top of a narrow wall, you sometimes need to get up or down. The get up can be quite intimidating if you are at height. The get down can be a cautious way to ensure balance with a much lower center of gravity and a greater surface of contact for the base of support. This is a very secure transition that allows you to use both hands for support (though it can also be done with a single-hand support). It is somewhat easier to do than the tripod transitions, as you can keep facing one direction. The foot hook is a great way to use your foot and contributes to better foot and ankle mobility. You don’t need to try this movement on a high surface or narrow surface at first. It can be done on a fallen tree or other such objects. MOVNAT | THE MOVEMENTS Straddle Sit to Split Squat : Movement Sequence STEP 1 Start in the straddle sit, your hands right close together in front of you, upper body leaning forward. STEP 2 Pull one foot up behind your rear and hook it on the surface of the bar. You need to feel that you will be able to pull from it, so you need enough foot surface, not just your toes. If you lack the flexibility to pull your foot up that way, you can elevate your waist by pushing off your arms. STEP 4 Having created the vertical space you needed, you can now pull your free foot up onto the top surface of the bar and place it flat on the bar. MOVNAT | THE MOVEMENTS STEP 3 Having positioned your foot adequately to create friction, you now can pull from it and elevate your waist, while leaning and shifting weight a little more toward the front. STEP 5 Modify the position of your back foot from hooked to bent (dorsiflexion) on the ball of your foot. From there you can push off your hands and front foot backward in a split squat and establish a stable split squat, with good posture and relaxed arms. Balancing This deceptively simple yet nuanced movement has many far reaching implications. This movement is not a “calf raise” drill (we should rather call it simply “standing tiptoeing”). It is a balancing movement. This is movement nuance. The goal of this movement is not to target your calves (this is only one of the outcomes of practicing this movement, as it will also improve your ankle mobility, strengthen your foot muscles and tendons, challenge your vestibular system and improve your balance). From a practical standpoint, the ability to perform this move effectively is essential to balancing on narrow surfaces before jumping or after landing. It will also benefit your walking and running gaits on uneven terrains, your jumping skills, and more. MOVNAT | THE MOVEMENTS Balancing : Movement Sequence STEP 1 Step on a box (the ledge of a flat stone, sidewalk curb, or anything stable and slightly elevated) in the neutral stance (toes and heels level). Place only the ball of your feet on the surface, keep an erect posture and your head up. Make sure that you are first able to hold this position at least 10 seconds at a time without getting off balance. Then begin to raise or lower your heels. In the beginning, slightly slide your feet forward to get more surface of support and to be better balanced if needed. MOVNAT | THE MOVEMENTS STEP 2 Pushing off your feet, raise your heels slowly, elevating your center of gravity in a controlled, balanced manner. Don’t try to go too high at first. STEP 3 Slowly lower your center of gravity by lowering your heels below the surface level. Stop going lower if the stretch feels painful or too uncomfortable. Balancing Next Steps Once you’ve managed to perform this movement slowly with balance (i.e without stepping off the box involuntarily), gradually move to the following progression (in any order you want): • Increase the amplitude of your ankle motion - raise and lower more. • Increase velocity. Make the up and down motion faster, or alternate fast/slow motions. • Slide your feet backward to reduce the surface of support. This is more challenging. • Practice the movement on either a round surface, an elevated surface, an unstable surface, or a combination of all three. As you progess you will see how this one movement, when applied to different environments and conditions, becomes incredibly varied and challenging. MOVNAT | THE MOVEMENTS REMEMBER Animals don’t “exercise” - they do whtat is required to survive. Birds don’t read a flight manual - they fly. Fish swim. A tiger is a powerful, graceful animal simply by being a Tiger. This is what we have lost, and what Natural Movement can restore. Copyright 2015 MovNat LLC. All Rights Reserved.
