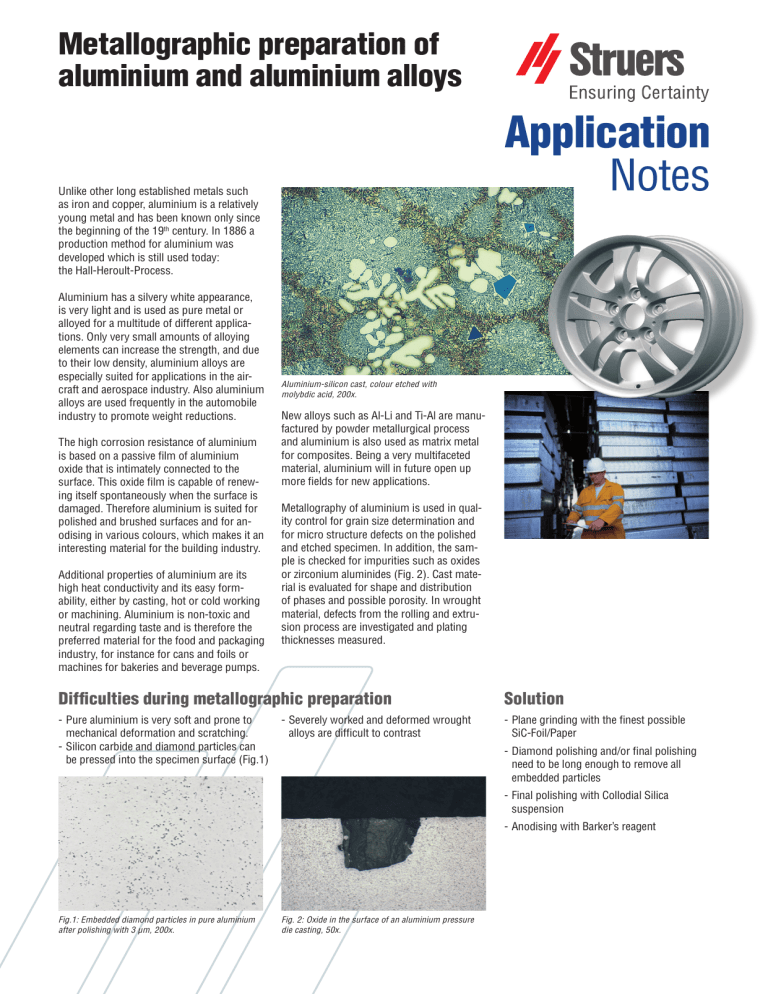
Metallographic preparation of aluminium and aluminium alloys Application Notes Unlike other long established metals such as iron and copper, aluminium is a relatively young metal and has been known only since the beginning of the 19th century. In 1886 a production method for aluminium was developed which is still used today: the Hall-Heroult-Process. Aluminium has a silvery white appearance, is very light and is used as pure metal or alloyed for a multitude of different applications. Only very small amounts of alloying elements can increase the strength, and due to their low density, aluminium alloys are especially suited for applications in the aircraft and aerospace industry. Also aluminium alloys are used frequently in the automobile industry to promote weight reductions. The high corrosion resistance of aluminium is based on a passive film of aluminium oxide that is intimately connected to the surface. This oxide film is capable of renewing itself spontaneously when the surface is damaged. Therefore aluminium is suited for polished and brushed surfaces and for anodising in various colours, which makes it an interesting material for the building industry. Additional properties of aluminium are its high heat conductivity and its easy formability, either by casting, hot or cold working or machining. Aluminium is non-toxic and neutral regarding taste and is therefore the preferred material for the food and packaging industry, for instance for cans and foils or machines for bakeries and beverage pumps. Aluminium-silicon cast, colour etched with molybdic acid, 200x. New alloys such as Al-Li and Ti-Al are manufactured by powder metallurgical process and aluminium is also used as matrix metal for composites. Being a very multifaceted material, aluminium will in future open up more fields for new applications. Metallography of aluminium is used in quality control for grain size determination and for micro structure defects on the polished and etched specimen. In addition, the sample is checked for impurities such as oxides or zirconium aluminides (Fig. 2). Cast material is evaluated for shape and distribution of phases and possible porosity. In wrought material, defects from the rolling and extrusion process are investigated and plating thicknesses measured. Difficulties during metallographic preparation Solution - Pure aluminium is very soft and prone to mechanical deformation and scratching. - Silicon carbide and diamond particles can be pressed into the specimen surface (Fig.1) - Plane grinding with the finest possible SiC-Foil/Paper - Severely worked and deformed wrought alloys are difficult to contrast - Diamond polishing and/or final polishing need to be long enough to remove all embedded particles - Final polishing with Collodial Silica suspension - Anodising with Barker’s reagent Fig.1: Embedded diamond particles in pure aluminium after polishing with 3 µm, 200x. Fig. 2: Oxide in the surface of an aluminium pressure die casting, 50x. Production and application of aluminium Bauxite Scrap Alumina Extraction Alumina Pure Hall-Heroult Process Secondary Melting Primary Aluminium Aluminium is one of the most frequently occuring metals in the earth’s crust. It is not found in its pure state but combined in the form of chemical compounds. An economical extraction is only possible from bauxite which consists of 60% aluminium oxide as hydroxide (Al2O3 + H2O), the rest are metal oxides (Fe203, Si02, Ti02). The production process is complex and energy intensive and is mainly based on two steps that are briefly described in the following. Extraction of pure alumina (aluminium oxide, Al2O3) from bauxite Alumina recovery begins by crushing and finely grinding the bauxite and heating it with sodium hydroxide under pressure. In this process a water soluble sodium aluminate is formed together with undissolved residues of iron, titanium and silicon, called “red mud” that is separated by sedimentation. To the highly diluted sodium aluminate solution “seed crystals” of fresh aluminium hydroxide are added to initiate the precipitation of pure aluminium hydroxide (Al(OH)3). Through calcination at 1200°C the water is removed from aluminium hydroxide and pure anhydrous alumina (aluminium oxide) remains. The Hall-Heroult process: Converting alumina to aluminium The reaction chemistry of pure alumina requires an electro-chemical process to extract aluminium from its oxide. As the melting point of aluminium oxide is very high, 2050°C, it is mixed with cryolite which reduces the melting point to 950°C. In addition, the cryolite increases the conductivity and consequently the electricity yield. The electrolysis takes place in a large carbon or graphite lined steel container that contains steel rods for conducting electricity. The carbon clad walls and floor form the cathode and the aluminium oxide-cryolite melt is the electrolyte. Carbon blocks hang on a rack over the melt function as anodes. During the electrolysis the carbon of the anode reacts with the oxygen of the alumina and in a secondary reaction, metallic aluminium is produced with the formation of carbon dioxide: 2 Al2O3 + 3 C → 4 Al + 3 CO2 Mixed Secondary Aluminium Alloy amount approx. 2% Rolling Mill Foundry Semi-finished Products Casts Alloy amount < 15% Scrap FINAL PRODUCTS Scrap Consumer Scrap Simplified diagram of the aluminium production process. Graphite anodes Alumina Cryolite Alumina crust CO + CO2 5 Volt 150 kA Electrolyte/Melt Molten aluminium Carbon cathode Al Busbar Schematic drawing of the electrolysis producing pure aluminium. The molten aluminium has a higher density than the electrolyte-melt and settles at the bottom of the pot. It is tapped once a day and cast into pigs. With this process, aluminium of 99.0 – 99.9% purity is produced of which the largest part is used for the production of aluminium alloys. Through an additional electrolysis the purity of the aluminium can be increased to 99.98% for semi-finished products and to 99.99% for pig casts. This pure aluminium has a very high corrosion resistance and is particularly well suited for anodising. It is used for brightening products such as decorative trim, reflectors, foils for electrolytecapacitors and for tubes in the chemical and food industry. As the cost of aluminium increases with increasing purity, the purity of a specific aluminium used for a product is determined by the requirements of its application. The diagram shows the cycle of aluminium with its production steps. The main products are wrought alloys for semi-finished products containing up to 2% alloying elements and cast alloys with up to 15% alloying elements. There are numerous aluminium alloys and they are categorised as wrought and cast alloys. These two groups are differentiated again by heat-treatable and non-heattreatable alloys. The addition of very small amounts of alloying elements produce an increase in tensile strength, yield strength and hardness when compared with the mechanical properties of pure aluminium. The most important alloying elements are Si, Mg, Cu, Zn and Mn. Combinations of alloying elements with aluminium or with each other (Mg2Si, Al2Cu, MgZn2 and Al-Fe-Si compounds) influence the workability. These mostly eutectic compounds have to be finely dispersed first through a hot working process before the alloy can be cold worked. Lamps with reflectors of highly polished aluminium. The most important process to improve the mechanical properties of aluminium alloys is age hardening. It requires a solid solution with a decreasing solubility of the alloying elements with falling temperatures, for instance AlCuMg and AlMgSi. Natural age hardening (example AlCuMg). After solution annealing the workpiece is quenched and consequently the precipitation of the Al2Cu in the solid solution is suppressed. The workpiece is then left to age in ambient temperature. During this process the aluminium lattice precipitates the copper from the supersaturated solution. The resultant strain produced in the aluminium lattice leads to an increase in strength and hardness. Natural hardening takes approx. 5-8 days. In the artificial age hardening process the dynamics are the same as described above. However, ageing takes place at an elevated temperature. For instance, for an AlMgSi alloy, ageing occurs in 4-48 hrs at 120-175°C after solution annealing and quenching. The precipitation of the Mg2Si phase produces internal strain in the aluminium lattice which results in an increase of strength and hardness. Wrought alloys Billets for rolling and ingots for pressing are produced in a continuous casting process. In many cases casting is followed by annealing for homogenisation. Transformation of the cast structure into a wrought structure is effected by hot rolling, extrusion or forg- ing. Only after this hot forming, in which the embrittling eutectic grain and cell boundary structure is broken up, is the cold working of wrought alloys possible (Fig. 3-5). The main alloying elements for wrought aluminium alloys are copper, magnesium, zink and manganese. Silicon and iron affect the mechanical properties and corrosion resistance and can either be impurities or alloying elements, depending on the requested purity and application. Wrought alloys are for example used for plates in mechanical engineering and mould construction, for rolled products such as sheet and strip and for plated products like radiators and heat exchangers. Plated sheets which have to combine specific mechanical properties and high corrosion resistance have a core billet of an aluminium alloy that is covered on both sides with pure aluminium and rolled. These plated sheets are used for specific semi-finished products for aircraft construction or for decorative applications such as trim and reflectors. Plated sheet, core: aluminium alloy 3503, plating: aluminium alloy 4104, unetched 100x. Plated sheet, core: aluminium alloy 2024, plating: aluminium 99.5%, etched with Dix and Keller, 50x. High strength aluminium wrought alloys are used in mechanical engineering, conveying and electro technical applications and for sports and leisure products such as bindings for snowboards, ski poles and gears for mountain bikes etc. Aluminium is increasingly used as matrix material for composites, especially for fibre reinforced aluminium in the aircraft and aerospace industries. Non hardening alloys are work hardened through cold working Main alloying element Serial number Examples of alloys More than 99% pure, with traces of Cu, Fe, Si 1xxx Al 99,0; Al 99,5; Al 99,85 Mn3xxxAl-Mn; Al-Cu-Mn-Mg Mg5xxxAlMg3; Al-Mg-Mn-Cr Other elements8xxxAl-Fe-Si; Al-Li-Mg-Cu Hardening alloys are hardened through natural and artificial hardening Cu2xxxAl-Cu-Si-Mg Si4xxxAl-Si-Mg Mg, Si6xxxAl-Mg-Si Zn7xxxAl-Zn-Mg-Cu Fig. 3: Aluminium alloy 2024, cast, showing eutectic precipitation on grain boundaries, unetched, 200x. Fig. 4: As Fig. 3, homogenised, unetched, 200x. Fig. 5: As Fig. 4, hot rolled, unetched, 200x. ß-AlFeSiMn α-AlFeSiMn Al2Cu Si Fig. 6: AlSi6Cu4 cast, the various phases can be identified by there typical colour. Cast alloys Aluminium casts are mainly alloyed to improve the mechanical properties and are differentiated according to their main alloying elements silicon, magnesium and copper. Alloy contents that exceed the saturation of the solid solution are precipitated as pure metal such as silicon or as eutectics and inter metallic phases. Silicon increases the castability of aluminium, and in eutectic alloys, such as AlSi12, small amounts of sodium are added before casting to refine the eutectic. In this refining process, instead of precipitating as coarse needles or plates (Fig. 7), silicon forms a very fine eutectic with the α-solid solution (Fig. 8). The effect of hardening in these alloys is very low and therefore magnesium is added so that they can be age hardened. Cast alloys are produced by sand- chill- or die casting. Alloys with specific properties are used in various product groups for the fabrication of pistons, slide bearings, parts for mechanical engineering, cylinder heads, brake shoes etc. Difficulties during the preparation of aluminium and aluminium alloys Recommendations for the preparation of aluminium and aluminium alloys With increasing purity, aluminium becomes softer and more susceptible to mechanical deformation and scratches. Consequently, grinding can cause already deep deformation in high purity aluminium. Grinding and polishing abrasives can be pressed into the surface. With increasing alloying content aluminium becomes harder and cast alloys are relatively easy to prepare. It needs to be emphasised though, that the aluminium matrix has to be well polished in order to avoid errors in the structure interpretation (Fig. 9 and 10). For sectioning of aluminium a hard silicon carbide cut-off wheel is used that is generally suitable for non-ferrous metals. For mounting resin a phenolic resin is in most cases sufficient. Thin sheets and foils and specimens for anodising are best mounted in slow curing epoxy resins, whereby the samples should protrude from the back of the mount to serve as electrical contacts. Fig. 9: Aluminium-silicon cast, after polishing with 3µm diamond small scratches are still visible, 200x. Diamond polishing has to be carried out until all deep scratches from grinding have been removed. In case water soluble constituents have to be identified, polishing with water free diamond suspension and lubricant is recommended. If diamond particles have been pressed into the surface during polishing the following final polish with silicon dioxide suspension can be relatively long (See Fig.1). Very often one can see already with the naked eye bright and dull areas on the samples surface. This is an indication that the final polish is not yet sufficient. It needs to be pointed out that the embedded particles can lead to erroneous interpretations of the structure. Some of the more important cast alloys and their properties are listed: AlSi10Mg Age hardening, vibration and corrosion resistant AlSi5Cu1 Age hardening, good castebility, for welding, for thin section casting AlMg3 Resistant against sea water AlSi25+ Cu Ni Age hardening, special alloy, for pistons, wear resistant due to high Si content AlMgSiPb Suitable for machining AlSi9Cu3 Well castable universal alloy, most important alloy for pressure die casting Fig. 7: Aluminium-silicon cast, unrefined, 500x. Fig.10: Structure as in Fig. 9, but fine polished with OP-U suspension. The matrix is well polished and the eutectic has more contrast, 200x. Fig. 8: Aluminium-silicon cast, refined, 500x. Mechanical grinding and polishing It is recommended that plane grinding is carried out with the finest possible grit in order to avoid any excessive mechanical deformation. Hardness, size and number of samples have to be taken into account, but even with larger samples of pure aluminium, 500# is sufficient for plane grinding. Large cast parts of aluminium alloys can be ground with 220# or 320#. It is important that the force for grinding is also very low to avoid deep deformation and reduce friction between grinding foil/paper and sample surface; this can be relatively high for pure aluminium. Section of a mechanical engineering part with aluminium cast components. quality control as it delivers fast and reproducible results. For routine grain size determination at 100x, pre-grinding with 1000# Pure Aluminium Grinding Fig.11: Aluminium-silicon cast polished too long with OP-S suspension, silicon precipitates stand in relief, 100x. After 1 minute polishing with OP-U suspension the result is checked in the microscope. If necessary the polish should be continued for another minute and the result checked again. It is recommended to continue this polish /check sequence until the required quality of the result has been achieved. (Approx. 20-30 sec before the end of polishing, water is poured onto the polishing cloth to rinse the sample as well as the cloth. Then the sample is washed again with clean water from the tap and then dried. Note: Polishing too long with silicon dioxide suspension OP-S NonDry can cause a pronounced relief, see Fig.11). The following data are for the automatic preparation of mounted specimens, 30 mm. PG PG Surface Foil/Paper* Foil/Paper* Foil/Paper* Foil/Paper* FG 2 FG 3 SiC SiC SiC #800 #1200 #4000 Suspension Water / Lubricant Water Water Water Rpm 300 300 300 300 Force (N)/ specimen 25 25 25 25 0.5 0.5 0.5 Time (min) Until plane Step DP Surface MD-Mol** MD-Chem Abrasive OP Type Diamond Collodial Silica Size 3 µm 0.04 µm Suspension DiaPro / Lubricant Mol R3 OP-U or OP-S Rpm 150 150 Force (N)/ specimen 25 15 Time (min) 4 * To avoid coarse scratches, the SiC-Foil/ Paper can be rubbed with wax before grinding. **Alternatively MD-Dac 2-5 Mask: 2 cm2 Pure Aluminium, alternative method Grinding Abrasive PG FG Foil/Paper* MD-Pan Type SiC Diamond Size #320 15 µm Suspension / Lubricant Water DiaPro Pan 15 Rpm 300 150 MD-Molto MD-Largo Abra- Type sive Size Diamond Diamond Force (N) / specimen 25 25 #220 9 μm Time (min) Until plane 5 Suspension / Lubricant Water DiaPro Allegro/ Largo 9 Rpm 300 150 Step DP OP Surface MD-Dac 3 or MD/Dur 3 MD-Chem Type Diamond Collodial Silica Size 3 µm 0.04 µm Suspension / Lubricant DiaPro Dac 3/Dur 3 OP-U or OP-S Rpm 150 150 Force (N) / specimen 25 15 Time (min) 4 2-5 25 30 Time (min) Until plane 4 Polishing Abrasive Polishing Step DP OP Surface MD-Mol* MD-Chem Abra- Type sive Size Diamond Collodial Silica 3 μm 0.04 μm Suspension / Lubricant DiaPro Mol R3 OP-U NonDry Rpm 150 150 Force (N)/ specimen 25 15 Time (min) 3 1 *Alternatively MD-Dac. Electrolytic Polishing is especially suited for pure aluminium and wrought alloys. It leaves a scratch free surface and is often used in Fig.13: Pressed part, macro etching, primary and heterogeneous precipitates are revealed that have a negative effect on the surface of the final product. Electrolyte: A2 Surface Force (N)/ specimen Fig.12: Plated sheet, anodised, grain areas are clearly visible and suited for automatic image analysis, polarised light with λ¼-plate, 100x. Polishing Surface FG FG 1 Abra- Type SiC sive Size #320/500 Step Aluminium - Silicon Cast Grinding Step Step *To avoid coarse scratches, the SiC-Foil/Paper can be rubbed with wax before grinding. SiC-Foil/Paper is sufficient. Rolled or drawn surfaces do not need any grinding or polishing. For pure aluminium and precise examinations of grain shapes the samples have to be fine ground to 2000# and sometimes even to 4000# before electrolytic polishing. Due to the many different phases in cast alloys, they are not suited for electrolytic polishing. Voltage: 39 V Flow rate: 10 Time: 20 sec. After the polish, anodising with Barker’s reagent gives a colour contrast that is particularly suited for grain size evaluation. To obtain the colour effect, polarised light with a λ¼ sensitive tint plate is used (Fig.12). Electrolyte: 200 ml water 10 ml fluoroboric acid (35%) (Barker’s) Mask: 2 cm2 Voltage:24 V Flow rate:8 Time: 1-2 min. Etching and structure Macro etchants are used for grain size evaluation; also to show flow lines from extrusion (Fig.13) and for revealing weld seams. Before etching, the sample has to be ground to 1200# or 2400#. The many alloying possibilities of aluminium result in a large variety of different phases that cannot always be clearly identified in some of the multi component alloys. Some of the well known phases have the following characteristic colours (see also Fig.6): SiGrey Mg2Si Tarnished dark blue during polishing (in cast: Chinese script) Al2Cu Pinkish-brown, copper coloured Al6Mn Light grey Fig.15: Experimental aluminium alloy with 6% Si and 10% copper, unetched. Depending on the alloying content, these eutectic phases can sometimes be recognised by the typical shape of their eutectic. The relevant literature lists etchants which can be used to identify these phases (Fig.15 and 16). Wrought alloys with a heavily deformed structure such as foils or very thin sheets are difficult to contrast with chemical etchants; this can make the automatic image analysis difficult. It is recommended to anodize the sample with Barker’s reagent and then evaluate the structure “manually” with the microscope as sometimes, even with Barker’s reagent, the contrast is not sufficient for an automatic image analysis. It should be pointed out that certain specifications for wrought alloys require “manual” grain size determination, as the image analysis is not precise enough. Etching solutions Note: When working with chemicals the standard safety precautions have to be observed. Macro etching For pure aluminium 90 ml water 15 ml hydrochloric acid 10 ml hydrofluoric acid Deep etching to reveal the primary dendritic structure 100 ml water 10-25 g sodium hydroxide Micro etching Flick’s reagent: Grain boundary etching for most types of aluminium and alloys 90-100 ml water 0.1-10 ml hydrofluoric acid Dix and Keller reagent: Grain area etching for Al-alloys with copper, also suitable for pure aluminium. 190 ml water 5 ml nitric acid 10 ml hydrochloric acid 2 ml hydrofluoric acid Colour etchants: Molybdic acid solution according Klemm or Weck Struers ApS Pederstrupvej 84 DK-2750 Ballerup, Denmark Phone +45 44 600 800 Fax +45 44 600 801 [email protected] www.struers.com Fig.16: Same as Fig.15 but etched for 30 sec with 1g molybdic acid in 200 ml water + 6 g ammonium chloride. The silicon is dark blue and is distinguishable from the greyish CuAl2. determination, evaluation of phases, impurities and mechanical defects. Pure aluminium is very susceptible to deformation and therefore grinding should not be carried out with coarse grits. A very thorough final polishing with silicon dioxide suspension is necessary to ensure that embedded diamond particles are completely removed from the sample surface. Aluminium cast alloys are polished relatively easily. For grain size evaluation anodising with Barker’s reagent is particularly suited as it results in a better contrast than chemical etching. Different phases in cast alloys can either be identified by their characteristic colour or by etching with specific solutions that attack certain phases preferentially. Authors Elisabeth Weidmann, Anne Guesnier, Struers ApS, Copenhagen, Denmark Acknowledgements We wish to thank AMAG rolling GmbH, Ranshofen, Austria, for supplying sample material and for the permission to reproduce the photo with the lamps on page 3. Our special thanks go to Ms. Petra Mersch and Dr. Reinhardt Rachlitz for their support. We wish to thank Austria Alu-Guss-Gesellschaft G.m.b.H., Ranshofen, Austria, for the permission to reproduce the photo of the aluminium wheel rim on page 1. We wish to thank Thomas Zwieg, Danish Institute of Technology, Aarhus, Denmark, for the permission to reproduce Fig.17. Bibliography Structure 38, Thomas, Zwieg, Danish Institute of Technology, Aarhus, Denmark, A universal method for the mechanical preparation of aluminium alloy specimens with high edge retention and their subsequent colour etching. Structure 8, Etching of aluminium alloys, Dr. Philippe Lienard, Pof. Clement Pacque, Faculte Polytechnique de Mons, Belgien. ASM Handbook, Vol. 9, Metallography and Microstructures, ASM, 2004. Metals Handbook, Desk Edition, ASM, 1997. Informationsmaterial des Gesamtverbands Deutscher Metallgießereien e.V., Düsseldorf. Summary Its low density, high strength and corrosion resistance make aluminium and its alloys the material of choice for many applications in, among others, the automobile, aircraft/ aerospace and packaging industry. Metallography is used in quality control for grain size AUSTRALIA & NEW ZEALAND Struers Australia 27 Mayneview Street Milton QLD 4064 Australia Phone +61 7 3512 9600 Fax +61 7 3369 8200 [email protected] BELGIUM (Wallonie) Struers S.A.S. 370, rue du Marché Rollay F- 94507 Champigny sur Marne Cedex Téléphone +33 1 5509 1430 Télécopie +33 1 5509 1449 [email protected] BELGIUM (Flanders) Struers GmbH Nederland Zomerdijk 34 A 3143 CT Maassluis Telefoon +31 (10) 599 7209 Fax +31 (10) 5997201 [email protected] CANADA Struers Ltd. 7275 West Credit Avenue Mississauga, Ontario L5N 5M9 Phone +1 905-814-8855 Fax +1 905-814-1440 [email protected] CHINA Struers Ltd. No. 1696 Zhang Heng Road Zhang Jiang Hi-Tech Park Shanghai 201203, P.R. China Phone +86 (21) 6035 3900 Fax +86 (21) 6035 3999 [email protected] CZECH REPUBLIC & SLOVAKIA Struers GmbH Organizační složka vědeckotechnický park Přílepská 1920, CZ-252 63 Roztoky u Prahy Phone +420 233 312 625 Fax +420 233 312 640 [email protected] [email protected] GERMANY Struers GmbH Carl-Friedrich-Benz-Straße 5 D- 47877 Willich Telefon +49 (0) 2154 486-0 Fax +49 (0) 2154 486-222 [email protected] FRANCE Struers S.A.S. 370, rue du Marché Rollay F-94507 Champigny sur Marne Cedex Téléphone +33 1 5509 1430 Télécopie +33 1 5509 1449 [email protected] HUNGARY Struers GmbH Magyarországi Fióktelepe 2040 Budaörs Szabadság utca 117 Phone +36 2380 6090 Fax +36 2380 6091 Email: [email protected] IRELAND Struers Ltd. Unit 11 Evolution@ AMP Whittle Way, Catcliffe Rotherham S60 5BL Tel. +44 0845 604 6664 Fax +44 0845 604 6651 [email protected] ITALY Struers Italia Via Monte Grappa 80/4 20020 Arese (MI) Tel. +39-02/38236281 Fax +39-02/38236274 [email protected] Fig.17: Burr on a solder spot of a heat exchanger, pre-etched with sodium hydroxide, colour etched with potassium permanganate according to Weck. JAPAN Marumoto Struers K.K. Takanawa Muse Bldg. 1F 3-14-13 Higashi-Gotanda, Shinagawa Tokyo 141-0022 Japan Phone +81 3 5488 6207 Fax +81 3 5488 6237 [email protected] NETHERLANDS Struers GmbH Nederland Zomerdijk 34 A 3143 CT Maassluis Telefoon +31 (10) 599 7209 Fax +31 (10) 5997201 [email protected] NORWAY Struers ApS, Norge Sjøskogenveien 44C 1407 Vinterbro Telefon +47 970 94 285 [email protected] AUSTRIA Struers GmbH Zweigniederlassung Österreich Betriebsgebiet Puch Nord 8 5412 Puch Telefon +43 6245 70567 Fax +43 6245 70567-78 [email protected] POLAND Struers Sp. z o.o. Oddział w Polsce ul. Jasnogórska 44 31-358 Kraków Phone +48 12 661 20 60 Fax +48 12 626 01 46 [email protected] ROMANIA Struers GmbH, Sucursala Bucuresti Str. Preciziei nr. 6R 062203 sector 6, Bucuresti Phone +40 (31) 101 9548 Fax +40 (31) 101 9549 [email protected] SWITZERLAND Struers GmbH Zweigniederlassung Schweiz Weissenbrunnenstraße 41 CH-8903 Birmensdorf Telefon +41 44 777 63 07 Fax +41 44 777 63 09 [email protected] SINGAPORE Struers Singapore 627A Aljunied Road, #07-08 BizTech Centre Singapore 389842 Phone +65 6299 2268 Fax +65 6299 2661 [email protected] SPAIN Struers España Camino Cerro de los Gamos 1 Building 1 - Pozuelo de Alarcón CP 28224 Madrid Teléfono +34 917 901 204 Fax +34 917 901 112 [email protected] FINLAND Struers ApS, Suomi Hietalahdenranta 13 00180 Helsinki Puhelin +358 (0)207 919 430 Faksi +358 (0)207 919 431 [email protected] SWEDEN Struers Sverige Box 20038 161 02 Bromma Telefon +46 (0)8 447 53 90 Telefax +46 (0)8 447 53 99 [email protected] UNITED KINGDOM Struers Ltd. Unit 11 Evolution @ AMP Whittle Way, Catcliffe Rotherham S60 5BL Tel. +44 0845 604 6664 Fax +44 0845 604 6651 [email protected] USA Struers Inc. 24766 Detroit Road Westlake, OH 44145-1598 Phone +1 440 871 0071 Fax +1 440 871 8188 [email protected] 08.03.2019 / 62140407

