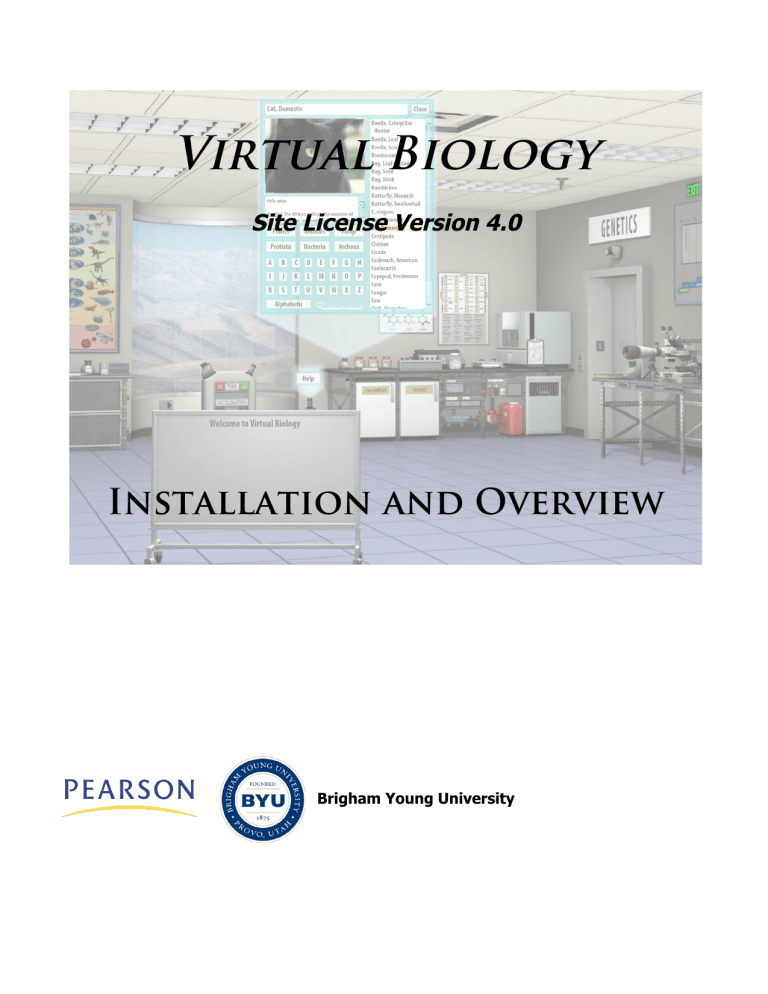
Virtual Biology Site License Version 4.0 Installation and Overview Brigham Young University Table of Contents Overview ................................................................................................................ 1 System Requirements .............................................................................................. 5 Installing Virtual Biology ........................................................................................... 5 Getting Started ........................................................................................................ 6 Installation Notes and Known Issues ....................................................................... 10 i Overview Introduction Welcome to Virtual Biology, a set of realistic and sophisticated simulations covering many of the fundamental experiments in general biology. In these laboratories, students are put into a virtual environment where they are free to make the choices and decisions that they would confront in an actual laboratory setting and, in turn, experience the resulting consequences. These laboratories include simulations for determining the taxonomy of species, ecology, Mendelian and population genetics, microscopy, and molecular biology. This overview outlines the general philosophy behind the virtual biology environment and briefly describes each of the laboratory simulations contained within Virtual Biology. Details on using the various laboratories are found elsewhere in the Virtual Biology Help. Principles of Virtual Laboratories Disciplines such as chemistry, physics, and biology are laboratory sciences and as such require students to apply what they have learned in the classroom in a laboratory setting. Ideally, students should be placed in a situation where they can have access to level appropriate equipment and experiments to explore and discover the principles being taught in the classroom. In practice, however, such an environment is limited or does not exist because of cost, time, liability, and logistical constraints, and students are often placed in laboratory settings that encourage “cookbooking” and attention to procedures rather than the principles governing the experiments. The challenge becomes balancing the competing demands of teaching students laboratory technique and the application of fundamental principles. While a real laboratory environment is ideal for teaching laboratory technique, the cost, time, liability, and logistical constraints limit or prevent exploration and open-ended assignments. On the other hand, virtual laboratory environments are generally not well suited for teaching laboratory technique since computers prevent “hands on” manipulations, but appropriately constructed virtual environments are ideal for exploration, access to expensive equipment, and allowing open-ended assignments and activities for students. The combination of real and virtual laboratories can provide the ideal environment for students to learn laboratory techniques and the application of principles in the design of experiments and the interpretation of experimental results. The purpose of Virtual Biology is to provide a virtual laboratory where students are free to explore the various aspects of biology and perform experiments in an open-ended environment. While simulations and virtual laboratories are often considered equivalent, Virtual Biology is more than a set of simulations since it creates a holistic and immersive virtual environment for students to use microscopes, molecular biology, genetics, systematics, and ecology to study the diversity of life and the evolutionary forces at the origin of this diversity. The primary focus in the virtual biology environment is to allow students to concentrate on performing experiments across the biology discipline, collecting data easily, and then interpreting the data to understand fundamental biological principles. While some of the laboratories involve laboratory technique, that is not the primary focus and is best left to an actual laboratory setting. We want students to explore the diversity of life at all its different levels and discover the underlying principles of biology. 1 Laboratory Overview When the software is first started, students are placed in a room containing lab benches or spaces for Systematics, Ecology, Molecular Biology, Microscopy, and the elevator is used for access to the Genetics laboratory. Selecting a species is central to performing any of the available experiments in the laboratory and is done using the Species Selector located in the main laboratory or at any of the laboratory benches. Initially, over 175 species are available for study, but this database will grow over time. Given below is a brief outline of what is available in each of the five biology laboratories. Details on using the various laboratories are found elsewhere in the Virtual Biology Help. Systematics. The purpose of the Systematics laboratory is to allow students to classify a selected species into taxa using the traits or characters of the species. The classification can be performed using a traditional ranked system or simultaneously by building a cladogram-type structure or tree. The ultimate goal is for students to determine the taxonomy of a species or set of species to visualize the different taxonomic relationships. Various classification schemes are provided including a simple, Linnaean, three domain, six kingdom, and a scheme based on the Tree of Life. A glossary is also provided as well as several approaches to classifying the species. Ecology. In this laboratory, students will be able to select species from the Species Selector and place them in a virtual environment defined by such variables as rainfall, seasonal temperatures, and elevation among other abiotic factors. Once the species and their initial populations have been selected and the environment defined, the species are then allowed to reproduce and interact, and the student can track the populations, biomass, or energy content of the selected species as a function of time. In addition to this basic functionality, abiotic factors can be changed or cataclysmic events introduced to investigate the effect on population equilibriums. Genetics. The genetics laboratory is divided into two distinct experiments covering Mendelian genetics and Population genetics. For Mendelian experiments, students can select a set of traits for the selected species, define the initial genotype for the parents, and cross these parents to produce the first generation of offspring. For the first generation, specific or random crosses of the offspring can then be performed to produce subsequent generations. For each generation a summary is provided showing the frequencies of each of the phenotypes, and students can also 2 view the phenotypes of each of the individual offspring. The goal is to allow students to observe how the selected traits get expressed as a function of generation, and then from these observations determine and understand the genetic model governing expression of these traits. In a Population experiment, students will be able to select an allele frequency within a population and manipulate different forces on that population to see how they affect the HardyWeinberg equilibrium. These forces and variables will include population size, allele frequency, mutation rates, genotype fitness, assortative and disassortative mating, and linkage disequilibrium. The goal is to demonstrate the basic principles of Hardy-Weinberg equilibrium and also the affects of population forces on this equilibrium. Microscopy. The purpose of the Microscopy laboratory is to provide students with the opportunity to explore the virtual world of species from the microscopic to the macroscopic using microscopes that provide a complete range of viewing magnifications. The microscopes available in the laboratory include a dissecting microscope, compound microscope, scanning tunneling microscope (SEM), and a transmission electron microscope (TEM). A field microscope is also provided for observing objects with no magnification or with normal eyesight. These microscopes provide a complete and realistic series of magnifications enabling students to view a wide range of images, subjects, and scales. Molecular Biology. The purpose of this laboratory is to allow students to extract a DNA sample from any of the available species, amplify a segment of the DNA using Polymerase Chain Reaction (PCR), run a gel electrophoresis experiment on any of the amplified products, and place a sample in an automatic sequencer to determine the sequence of the amplified segments or genes. When setting up to run a PCR experiment, students must add the appropriate nucleotides, Taq polymerase, and select the correct primers to successfully amplify the desired segment. The student must also set up the 3 PCR instrument with the correct temperatures and dwell times for the denaturation, annealing, and elongation steps. Once the gene sequences have been determined, these can be saved to the lab book for analysis or copied and used in other external analysis web sites. 4 System Requirements Minimum system requirements are as follows: PC Pentium III Processor (Pentium 4 recommended) Microsoft® Windows® XP Home, Professional, or Tablet PC Edition with Service Pack 2 or 3, Windows Server® 2003, Windows Vista® Home Premium, Business, Ultimate, or Enterprise (including 64-bit editions) with Service Pack 1, or Windows 7 Adobe® AIR® 2.0.2 or later installed 512 Mb RAM (1 Gb Recommended) CD-ROM drive (for installation only) 400 Mb of free disk space Recommended minimum resolution 1024 x 768 Macintosh Intel CoreTM Duo or faster processor Mac OS X v10.5 or v10.6 Adobe® AIR® 2.0.2 or later installed 512 Mb RAM (1 Gb Recommended) CD-ROM drive (for installation only) 400 Mb of free disk space Recommended minimum resolution 1024 x 768 Installing Virtual Biology Use the following steps to install Virtual Biology: 1. Confirm Adobe® AIR® 2.0.2 or later has already been installed. Installers are included on the CD. 2. Run the program “Setup Virtual Biology.air” on the CD-ROM drive then follow the prompts. There is only one install option available for the site license version, which installs the complete software package to the hard drive. The CD is not needed to run the program after performing the installation. 5 Getting Started After Virtual Biology has been successfully installed, the VBL icon used to launch the program will be located on the desktop. Clicking on the VBL icon will start the simulation where you will be brought to the main laboratory room containing four lab benches and an elevator. This section gives you a brief tutorial on how to access the different laboratory experiments and use many of the features found throughout the virtual laboratory. Details on using the various laboratories are found elsewhere in the Virtual Biology Help. The Virtual Biology Environment Main Laboratory. Once the Virtual Biology simulation has started, the user is placed in the main laboratory, which contains various lab benches, an elevator, and a whiteboard. You can gain access to any of the laboratories by clicking on the appropriate lab bench or by clicking on the elevator, which will then take you to the genetics laboratory. The virtual biology environment consists of approximately 175 species that represent the broad spectrum of species that inhabit the world. Admittedly, many common species are missing from the virtual world, but the species that have been included represent important experimental models and an impressive diversity of life. Holographic Projectors. As the user navigates through the virtual laboratory, holographic projectors are used to control laboratory functions and display results and outcomes from different instruments and experiments. Holographic displays are mostly turned on and off automatically, but they can be turned on and off when needed by clicking on the individual projector or in some cases by clicking on the instrument attached to the projector. Species Selector. At the core of the virtual biology environment is the Species Selector, which allows students to select a species and then enter a laboratory and perform experiments on that species. You can also enter a laboratory first and select a species later if that is easier. Not all species are available in all of the laboratories, but in general all of the species are available in the Microscopy, Molecular, and Systematics laboratories. The power of the virtual laboratory is the 6 ability to study species at the molecular level, at the cell level using microscopes, at the genetic level by performing crosses, at the ecology level, and by using systematics. Virtual Biology Tour Given below is a brief tour of some of the important virtual laboratory interface elements that will be used heavily to get around in the laboratory. A brief description of each of the laboratory benches can be found in the laboratory overview above. Whiteboard and Worksheets. The whiteboard is used to display several types of information including (a) a welcome screen, (b) a list of worksheet assignments that are used with accompanying workbooks, and (c) a collection of various maps. The different whiteboard pages are accessed by clicking on the arrows located on the top of the whiteboard. While the laboratory is open-ended and is designed to allow students to explore and perform any experiments they choose, in most cases students will be given worksheet assignments either online through a course management system, as PDF files, or on actual paper. In all of these cases, the worksheets provide step-by-step instructions to guide the student through an experiment, and the worksheets also require students to provide experimental data, answers to questions, and conclusions. In some cases when these worksheets are given the student will enter Virtual Biology bypassing the main room and will be placed at a specific laboratory. In other cases, however, students will be given a collection of worksheets and will be directed to perform a specific assignment. In this instance, the student will need to go to the whiteboard, select the worksheet page, and then locate and click on the appropriate assignment title. This will automatically bring the student to the appropriate laboratory for the assigned worksheet and set up the laboratory with the necessary equipment or configuration. Consequently, in many cases the whiteboard will be the main conduit for performing laboratory assignments using Virtual Biology. Preset Experiments or Clipboards. The Virtual Biology environment is designed to allow students access to the full range experiments available in each laboratory. While conceptually this is very powerful, in practice learning how to navigate all of the virtual laboratories and perform experiments can be intimidating and time consuming. The virtual laboratory mitigates this difficulty using preset experiments where each laboratory can be pre-configured for a certain experiment or 7 limited to a smaller set of options. These preset experiments are located on clipboards in each of the laboratories and contain a list of preset titles. Mousing over a title pops up a short summary of the preset below the preset list. In every way, these presets are identical to the worksheet assignments listed on the whiteboard, however in the case of the clipboards these presets are not associated with specific worksheet assignments but are designed for more exploratory or general use. When a preset has been selected in a particular laboratory, the laboratory will automatically be configured as defined by the preset and the lab book will have a blinking spotlight. Clicking on the lab book will open the lab book window and display any laboratory instructions or background information associated with the preset experiment. As data is recorded in the lab book or other links are shown, these instructions can always be displayed by clicking on the Preset menu button on the lab book. When a preset experiment is no longer needed, exiting the lab will generally clear the experiment or click on the Finish button located at the bottom of the preset instructions. Species Selector. The species selector is used to view available species and select species for different experiments in the laboratories. The species selector is projected from each bench in the main laboratory and is also available in each laboratory. The species selector consists of (a) a list of available species, (b) a picture of the selected species, (c) a brief overview and description of the selected species, and (d) various methods to select subsets of the species by moving the slider or clicking the adjacent button. Species organizations include Alphabetic, Characters, Classifications, Biomes, and Models. Lab Book. As in real laboratories, the lab book is used to record experimental observations and data. Clicking on the lab book in any of the laboratories will open the lab book window, which can be sized and moved within the laboratory window. All of the laboratories allow you to save experiment data to the lab book including microscopy pictures, gels, DNA sequences, population data, cladograms, and phenotype frequency data to name a few examples. This data is saved in the lab book as links, which can be clicked to open a Link window attached to the lab book that is used to show and in some 8 cases analyze the saved data. Note that the lab book is not saved automatically and will be lost when you leave the virtual laboratory. However, the lab book can be saved locally and opened in a later laboratory session for further work and analysis. Details on using the lab book can be found in the Lab Book Help menu. 9 Important Installation Notes and Issues 1. The graphics used in the simulations require the monitor to be set to 24-bit true color (millions of colors). Lower color resolutions can be used, but the graphics will not be as sharp. 2. Right clicking anywhere in the lab will bring up several menu options, one of which shows the current software and database version numbers. On some Macintosh computers, after exiting this menu and returning to the lab tooltips, rollovers, and highlighting will no longer work. This issue is fixed by exiting and restarting the program. 10
