USB 2.0 to DVI – VGA – HDMI adapter
Anuncio
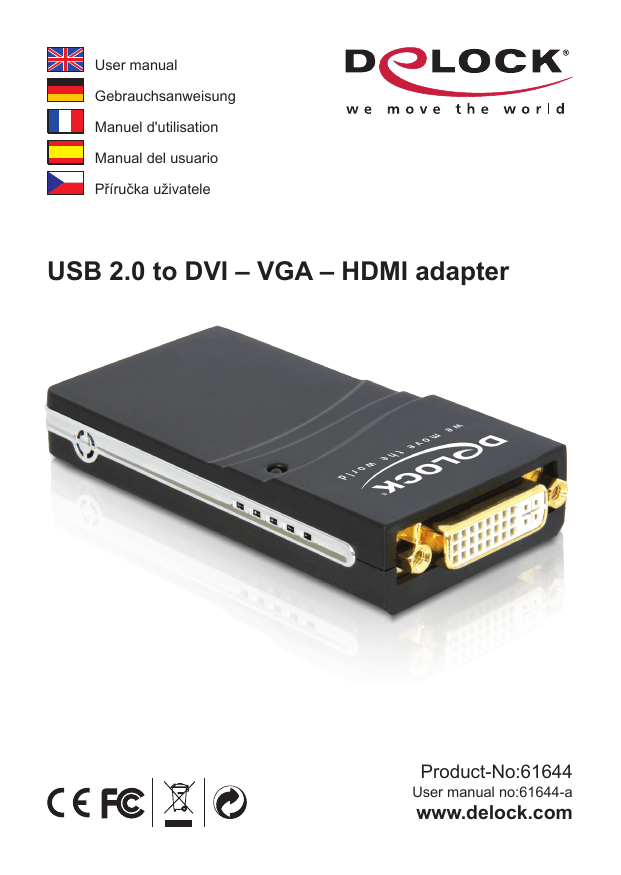
User manual Gebrauchsanweisung Manuel d'utilisation Manual del usuario Příručka uživatele USB 2.0 to DVI – VGA – HDMI adapter Product-No:61644 User manual no:61644-a www.delock.com Description The USB 2.0 to DVI Adapter enables you to connect any monitor, LCD or projector to your PC or notebook. By using the included adapter DVI to VGA and DVI to HDMI, you can also connect VGA and HDMI monitors. In order to connect several monitors, etc. to a PC, you simply need an additional adapter for each display. You can connect up to 6 adapter to one PC. The USB 2.0 Adapter can mirror and extend the display. If you use this external USB 2.0 technology, you do not need an additional VGA card. Specification • USB 2.0 specification revision 2.0 • DVI, VGA, HDMI connector • Resolutions: 640 x 480 VGA 8, 16, 32 bit 720 x 480 VGA 8, 16, 32 bit 768 x 576 VGA 8, 16, 32 bit 800 x 600 SVGA 8, 16, 32 bit 1024 x 768 XGA 8, 16, 32 bit 1280 x 720 8, 16, 32 bit 1280 x 1024 SXGA 8, 16, 32 bit 1360 x 768 8, 16, 32 bit 1368 x 768 8, 16, 32 bit 1440 x 900 8, 16, 32 bit 1600 x 1200 UXGA 8, 16, 32 bit 1680 x 1050 8, 16, 32 bit • Connection for maximum 6 adapter per PC • Hot Plug, Plug & Play • Supports Windows Aero System requirements • Windows 2000/XP/Vista • PC with one free USB Port • 2.0 GHz CPU or higher • 256MB RAM • Minimum SVGA (800 x 600) Graphic card • Minimum 30MB free HDD space -- Package content* • USB 2.0 DVI Adapter • USB cable • DVI to VGA Adapter • DVI to HDMI Adapter • Driver CD • User manual *Make sure that the product package contains all items before operation. If any item is missing or damaged, then please contact your dealer immediately. Note: Follow the general instructions for installation of the adapter. If necessary, read the manual of your computer, or ask a specialist for help. Driver Installation Windows XP/Vista 1. Switch on your computer. 2. Put the driver CD in the CD ROM drive. 3. The Setup program will start automatically. If necessary click on "Setup.exe". 4. Choose "USB 2.0 VGA Drivers for XP/Vista". 5. Click on "Allow". 6. Read the license agreement and confirm it by "I accept". 7. Choose "Install this driver software anyway". 8. Click on "Next". 9. Your computer will ask to reboot. Click "Yes" to restart the computer. 10. After restart, connect the adapter with a free USB port of your computer. 11. You can now start to use the device. Windows 2000 1. Switch on your computer. 2. Put the driver CD in the CD ROM drive. 3. The Setup program will start automatically. 4. Choose "USB 2.0 VGA Drivers for Windows 2000". 5. Click on "Next". 6. Read the license agreement and confirm it by "I accept". 7. Click on "Install". 8. Your computer will ask to reboot. Click "Yes" to restart the computer. 9. After restart, connect the adapter with a free USB port of your computer. 10. You can now start to use the device. -- Configuration You can set the additional display on mirroring or extended. The monitor will now be sent on extended: 1. Click with the right mouse button on the desktop and click on „Properties“. 2. Click on "Settings". 3. Choose in the Display drop- down menu "...DisplayLink Graphics Adapter". 4. Choose the order of displays which you can select as 1. 2. and 3. etc. To mirror a monitor please follow these steps: 1. Choose in the Display drop- down menu "...DisplayLink Graphics Adapter". 2. Remove the tick from "Expand Windows-Desktop to this monitor". 3. Click on "OK". Support Delock If you have further questions, please contact our customer support [email protected] / www.delock.com or phone +49 30 81789324*. You can contact our service hotline during the following times: Mon – Fri: 9:00 – 16:30 pm * A connection fee applies according to fee schedule of your local telephone provider. You can find current product information on our homepage: www.delock.com Final clause Information and data contained in this manual are subject to change without notice in advance. Errors and misprints excepted. Copyright No part of this user manual may be reproduced, or transmitted for any purpose, regardless in which way or by which means, electronically or mechanically, without explicit written approval of Delock. Edition: 07/2008 -- Kurzbeschreibung Der USB 2.0 zu DVI Adapter ermöglicht Ihnen jeden Monitor, LCD Display oder Projektor an Ihren PC oder an Ihr Notebook anzuschließen. Durch die im Lieferumfang befindlichen Adapter DVI zu VGA und DVI zu HDMI, können Sie auch diese Monitore mit nutzen. Um mehrere Monitore, etc. an einen PC anschließen zu können, brauchen Sie für jeden weiteren einen zusätzlichen Adapter. Es können bis zu 6 Adapter an einem PC angeschlossen werden. Der USB 2.0 Adapter kann das Display sowohl spiegeln als auch erweitern. Wenn Sie diese externe USB 2.0 Lösung verwenden, benötigen Sie keine zweite Grafikkarte. Technische Daten • USB 2.0 Spezifikation Revision 2.0 • DVI, VGA, HDMI Anschluss • Auflösungen 640 x 480 VGA 8, 16, 32 bit 720 x 480 VGA 8, 16, 32 bit 768 x 576 VGA 8, 16, 32 bit 800 x 600 SVGA 8, 16, 32 bit 1024 x 768 XGA 8, 16, 32 bit 1280 x 720 8, 16, 32 bit 1280 x 1024 SXGA 8, 16, 32 bit 1360 x 768 8, 16, 32 bit 1368 x 768 8, 16, 32 bit 1440 x 900 8, 16, 32 bit 1600 x 1200 UXGA 8, 16, 32 bit 1680 x 1050 8, 16, 32 bit • Anschluss von maximal 6 Adaptern pro PC • Hot Plug, Plug & Play • Windows Aero Unterstützung • Für Windows 2000/XP/Vista Systemvoraussetzung • Windows 2000/XP/Vista • PC mit einem freien USB Port • 2.0 GHz CPU oder höher • 256MB Arbeitsspeicher • Mindestens SVGA (800 x 600) Grafik Karte • Mindestens 30MB freier Festplattenspeicher -- Packungsinhalt* • USB 2.0 DVI Adapter • USB Kabel • DVI zu VGA Adapter • DVI zu HDMI Adapter • Treiber CD • Bedienungsanleitung *Überzeugen Sie sich vor Inbetriebnahme, dass alle Bestandteile des Lieferumfangs in der Verpackung enthalten sind. Sollte etwas fehlen oder beschädigt sein, wenden Sie sich bitte umgehend an Ihren Fachhändler. Hinweis: Folgen Sie den hier anschließenden allgemeinen Anweisungen zur Installation des Adapter. Bei Bedarf lesen Sie bitte in Ihrem Computerhandbuch nach oder wenden Sie sich an einen Fachmann. Treiber Installation Windows XP/Vista 1. Schalten Sie den Computer ein. 2. Legen Sie die Treiber CD in Ihr Laufwerk. 3. Das Setup Programm wird automatisch gestartet. Klicken Sie ggf. auf "Setup. exe". 4. Wählen Sie "USB 2.0 VGA Drivers for XP/Vista". 5. Klicken Sie auf "Zulassen". 6. Lesen Sie die Lizenzbedingungen und bestätigen diese mit "Ich akzeptiere". 7. Wählen Sie "Diese Treibersoftware trotzdem installieren". 8. Klicken Sie auf "Weiter". 9. Danach fragt der Rechner nach Neustart. Klicken Sie auf "Ja", um den Rechner neu zu starten. 10. Nach dem Neustart verbinden Sie den Adapter mit einem freien USB Port Ihres Computers und Ihrem Monitor. 11. Sie können nun das Gerät verwenden. -- Windows 2000 1. Schalten Sie den Computer ein. 2. Legen Sie die Treiber CD in Ihr Laufwerk. 3. Das Setup Programm wird automatisch gestartet. 4. Wählen Sie "USB 2.0 VGA Drivers for Windows 2000". 5. Klicken Sie auf "Weiter". 6. Lesen Sie die Lizenzbedingungen und bestätigen diese mit "Ich akzeptiere". 7. Klicken Sie auf "Installieren". 8. Danach fragt der Rechner nach Neustart. Klicken Sie auf "Ja", um den Rechner neu zu starten. 9. Nach dem Neustart verbinden Sie den Adapter mit einem freien USB Port Ihres Computers und Ihrem Monitor. 10. Sie können nun das Gerät verwenden. Konfiguration Sie können Ihren zusätzlichen Monitor auf Spiegeln oder Erweitern einstellen. Der Monitor ist nun als erweiterter Monitor voreingestellt: 1. Klicken Sie mit der rechten Maustaste auf Ihren Desktop und klicken Sie auf "Eigenschaften". 2. Klicken Sie auf "Einstellungen". 3. Wählen Sie bei Anzeige den "...DisplayLink Graphics Adapter" aus. 4. Wählen Sie die Reihenfolge der Monitore die Sie als 1. 2. bzw. 3. etc. auswählen können. Um den Monitor zu spiegeln gehen Sie wie folgt vor: 1. Wählen Sie bei Anzeige den "...DisplayLink Graphics Adapter" aus. 2. Entfernen Sie den Haken bei "Windows-Desktop auf diesem Monitor erweitern". 3. Klicken Sie auf "OK". -- Support Delock Bei weitergehenden Supportanfragen wenden Sie sich bitte an [email protected] / www.delock.de oder telefonisch an +49 30 81789324*. Sie können die Service-Line zu folgenden Zeiten erreichen: Mo – Fr: 9:00 – 16:30 Uhr *Es entstehen Ihnen Verbindungsentgelte gemäß der Verbindungspreisübersicht Ihres Telefonanbieters für ein Gespräch zur Ortseinwahl Deutschland/Berlin. Aktuelle Produktinformationen und Treiber Downloads finden Sie auch auf unserer Homepage: www.delock.de Schlussbestimmung Die in diesem Handbuch enthaltenen Angaben und Daten können ohne vorherige Ankündigung geändert werden. Irrtümer und Druckfehler vorbehalten. Copyright Ohne ausdrückliche schriftliche Erlaubnis von Delock darf kein Teil dieser Bedienungsanleitung für irgendwelche Zwecke vervielfältigt oder übertragen werden, unabhängig davon, auf welche Art und Weise oder mit welchen Mitteln, elektronisch oder mechanisch, dies geschieht. Stand: 07/2008 -- Description L’adaptateur USB 2.0/DVI vous permet de connecter un moniteur, un écran LCD ou un projecteur à votre PC ou votre ordinateur portable. En utilisant les adaptateurs DVI/VGA et DVI/HDMI fournis, vous pouvez aussi connecter des moniteurs VGA et HDMI. Si vous voulez connecter plusieurs moniteurs à un PC, vous devrez seulement utiliser un adaptateur supplémentaire pour chaque écran. Vous pouvez connecter jusqu'à 6 adaptateurs à un PC. L’adaptateur USB 2.0 peut être utilisé comme un miroir ou une extension de l'écran. Si vous utilisez cette technologie USB 2.0 externe, vous n’aurez plus besoin d’utiliser une autre carte VGA. Spécifications techniques • Spécification USB 2.0 • DVI, VGA, HDMI connecteur • Résolution: 640 x 480 VGA 8, 16, 32 bit 720 x 480 VGA 8, 16, 32 bit 768 x 576 VGA 8, 16, 32 bit 800 x 600 SVGA 8, 16, 32 bit 1024 x 768 XGA 8, 16, 32 bit 1280 x 720 8, 16, 32 bit 1280 x 1024 SXGA 8, 16, 32 bit 1360 x 768 8, 16, 32 bit 1368 x 768 8, 16, 32 bit 1440 x 900 8, 16, 32 bit 1600 x 1200 UXGA 8, 16, 32 bit 1680 x 1050 8, 16, 32 bit • Connexion pour un total de 6 adaptateurs sur chaque PC • Branchement à chaud, Plug & Play • Supporte Windows Aero Configuration système requise • Windows 2000/XP/Vista • PC avec un port USB disponible • 2.0 GHz CPU ou supérieur • 256Mo RAM • Au minimum SVGA (800 x 600) Carte graphique • Au minimum 30Mo d’espace HDD libre -- Contenu de l’emballage* • Adaptateur USB 2.0 DVI, Câble rallonge USB 2.0, Adaptateur DVI/VGA • Adaptateur DVI/HDMI, CD d'installation des pilotes, Mode d’emploi *Assurez-vous que l'emballage du produit contient tous les éléments avant de procéder. Si un quelconque élément venait à manquer ou était endommagé, veuillez contacter immédiatement votre revendeur. Note: Suivez les instructions générales pour l'installation de l’Adaptateur. Si nécessaire, consultez le manuel de votre ordinateurs, ou demander l'aide d'un spécialiste. Installation du pilote Windows XP/Vista 1. Allumez votre ordinateur. 2. Mettez le CD pilote dans le lecteur CD ROM. 3. Le programme d'installation s'ouvre automatiquement. Cliquez evtl. sur "Setup.exe". 4. Choisissez "USB 2.0 VGA Drivers for XP/Vista". 5. Cliquez sur "Autoriser". 6. Lisez l'accord de licence et confirmez avec "J'accepte". 7. Choisissez "Installer quand même le pilote logiciel". 8. Cliquez sur "Suivant". 9. Votre ordinateur demande à redémarrer. Cliquez sur "Oui" pour le redémarrer. 10. Après le redémarrage, branchez l’adaptateur sur un port USB libre de votre ordinateur. 11. Vous pouvez à présent commencer à utiliser le périphérique. Windows 2000 1. Allumez votre ordinateur. 2. Mettez le CD pilote dans le lecteur CD ROM. 3. Le programme d'installation s'ouvre automatiquement. 4. Choisissez "USB 2.0 VGA Drivers for Windows 2000". 5. Cliquez sur "Suivant". 6. Lisez l'accord de licence et confirmez avec "J'accepte". 7. Cliquez sur "Installation" 8. Votre ordinateur demande à redémarrer. Cliquez sur "Oui" pour le redémarrer. -- 9. Après le redémarrage, branchez l’adaptateur sur un port USB libre de votre ordinateur. 10. Vous pouvez à présent commencer à utiliser le périphérique. Configuration Vous pouvez régler l’écran supplémentaire sur miroir ou extension. Le moniteur sera maintenant réglé sur extension: 1. Cliquez avec le bouton droit de la souris sur le bureau et cliquez sur "Propriétés". 2. Cliquez sur "Paramètres". 3. Choisissez dans le menu déroulant "…DisplayLink Graphics Adapter". 4. Choisissez l’ordre des écrans, que vous pouvez sélectionner avec 1, 2 et 3, etc. Pour utiliser un moniteur comme un miroir, suivez les étapes suivantes: 1. Choisissez dans le menu déroulant "…DisplayLink Graphics Adapter". 2. Décochez la case "Etendre le bureau de Windows sur ce moniteur". 3. Cliquez sur "OK". Assistance Delock Si vous avez d'autres questions, veuillez contacter notre assistance client: [email protected] / www.delock.fr ou par téléphone +49 30 81789324*. Vous pouvez contacter notre service hotline aux horaires suivants: Lun – Ven: 9:00 – 16:30 * Des frais de connexion s'appliquent selon les tarifs horaires de votre prestataire de téléphonie local. Vous pouvez trouver les informations sur nos produits actuels sur notre page d'accueil: www.delock.fr Clause finale Les informations et données contenues dans ce manuel sont sujettes à modifications sans préavis. Sont exclues les erreurs et les fautes d'impression. Copyright Aucune partie de ce manuel d'utilisation ne peut être reproduite ou transmise, quel qu'en soit le but, et sous quelque moyen que ce soit, électronique ou mécanique, sans l'approbation écrite expresse de Delock. Version: 07/2008 -10- Descripción El Adaptador USB 2.0 a DVI le permite conectar a cualquier monitor, LCD o proyector a su PC o portátil. Usando el adaptador DVI a VGA y DVI a HDMI incluido, también puede conectar monitores VGA y HDMI. Para conectar varios monitores, etc. a un PC, sólo necesita un adaptador adicional para cada pantalla. Puede conectar hasta 6 adaptadores a un único PC. El Adaptador USB 2.0 puede replicar y extender la pantalla. Si usa esta tecnología USB 2.0 externa, no necesitará una tarjeta VGA adicional. Especificación técnica • Especificación USB 2.0 • DVI, VGA, HDMI conector • Resolución: 640 x 480 VGA 8, 16, 32 bit 720 x 480 VGA 8, 16, 32 bit 768 x 576 VGA 8, 16, 32 bit 800 x 600 SVGA 8, 16, 32 bit 1024 x 768 XGA 8, 16, 32 bit 1280 x 720 8, 16, 32 bit 1280 x 1024 SXGA 8, 16, 32 bit 1360 x 768 8, 16, 32 bit 1368 x 768 8, 16, 32 bit 1440 x 900 8, 16, 32 bit 1600 x 1200 UXGA 8, 16, 32 bit 1680 x 1050 8, 16, 32 bit • Conexión para los 6 adaptadores en total a cada PC • Funciones Conexión en caliente y Conectar y listo (Plug & Play) • Compatible con Windows Aero Requisitos del Sistema • Windows 2000/XP/Vista • PC con un puerto USB disponible • 2.0 GHz CPU o superior • 256MB de memoria RAM • Tarjeta Gráfica: Mínima SVGA (800 x 600) • 30 MB de espacio disponible en disco duro -11- Contenido de la caja* • Adaptador USB 2.0 a DVI, Cable USB, Adaptador DVI a VGA • Adaptador DVI a HDMI, Driver en CD, Manual del usuario *Asegúrese de que el paquete del producto contenga todos los elementos antes de su funcionamiento. Si falta o hay algo dañado, por favor póngase en contacto con su distribuidor inmediatamente. Nota: Siga las instrucciones generales para la instalación de la adaptador. En caso necesario, lea el manual de su equipo o pida ayuda a un especialista. Instalación del controlador Windows XP/Vista 1. Encienda su PC. 2. Inserte el CD del controlador en la unidad de CD ROM. 3. El programa de instalación se abrirá automáticamente. Si es necesario pulse en "Setup.exe". 4. Elija "USB 2.0 VGA Drivers for XP/Vista". 5. Haga clic en "Admitir". 6. Lea el contrato de licencia y acéptelo haciendo clic en "Acepto". 7. Elija "Instalar el software del controlador de todos modos". 8. Haga clic en "Siguiente". 9. Su PC le pedirá reiniciarse. Haga clic en "Sí" para reiniciar el equipo. 10. Tras reiniciar, conecte el adaptador a un puerto USB libre de su ordenador. 11. Ahora ya puede utilizar el dispositivo. Windows 2000 1. Encienda su PC. 2. Inserte el CD del controlador en la unidad de CD ROM. 3. El programa de instalación se abrirá automáticamente. 4. Elija "USB 2.0 VGA Drivers for Windows 2000". 5. Haga clic en "Siguiente". 6. Lea el contrato de licencia y acéptelo haciendo clic en "Acepto". 7. Haga clic en "Instalar". 8. Su PC le pedirá reiniciarse. Haga clic en "Sí" para reiniciar el equipo. 9. Tras reiniciar, conecte el adaptador a un puerto USB libre de su ordenador. 10. Ahora ya puede utilizar el dispositivo. -12- Configuración Puede configurar la pantalla adicional para replicar o extender. Ahora el monitor quedará configurado como extendido: 1. Haga clic con el botón derecho del ratón en el escritorio y haga clic en “Propiedades”. 2. Haga clic en "Configuración". 3. Elija en el menú desplegable de la Pantalla "...DisplayLink Graphics Adapter" (Adaptador de Gráficos DisplayLink). 4. Elija el orden de pantallas, que puede seleccionar como 1, 2, 3, etc. Para replicar un monitor, por favor, realice los siguientes pasos: 1. Elija en el menú desplegable de la Pantalla "...DisplayLink Graphics Adapter" (Adaptador de Gráficos DisplayLink). 2. Elimine la marca de "Expand Windows-Desktop to this monitor" (Expandir Escritorio de Windows a este monitor). 3. Haga clic en "OK". Soporte técnico Delock Si tiene alguna pregunta, póngase en contacto con nuestro servicio de atención al cliente [email protected] / www.delock.es o llamando al teléfono +49 30 81789324*. El horario de atención de nuestro número de teléfono de atención al cliente es: Lun – Vie: 9:00 – 16:30 * Se aplicará una tarifa de conexión en función del horario de la compañía telefónica local. Puede encontrar información actual del producto en nuestra página Web: www.delock.es Cláusula final La información y los datos contenidos en este manual están sujetos a cambios sin previo aviso. Exceptuando errores y erratas. Copyright Queda prohibida la reproducción o transmisión para cualquier fin de parte alguna de este manual del usuario, independientemente de la forma en que se realice, ya sea, electrónicamente o mecánicamente, sin el consentimiento escrito de Delock. Versión: 07/2008 -13- Popis Adaptér z USB 2.0 na DVI umožňuje připojení monitoru, LCD nebo projektoru k PC nebo notebooku. Pomocí adaptéru z DVI na VGA a z DVI na HDMI (který je součástí dodávky) je možné připojit I VGA nebo HDMI monitory. Pro připojení vice monitorů současně postačí zakoupení dalších adaptérů. K jednomu PC je možné připojit až 6 těchto adaptérů. USB 2.0 adaptér může zrcadlit nebo rozšiřovat zobrazovaný displej – nahrazuje použití další grafické karty. Specifikace • USB specifikace 2.0 • DVI, VGA, HDMI konektor • Rozlišení: 640 x 480 VGA 8, 16, 32 bit 720 x 480 VGA 8, 16, 32 bit 768 x 576 VGA 8, 16, 32 bit 800 x 600 SVGA 8, 16, 32 bit 1024 x 768 XGA 8, 16, 32 bit 1280 x 720 8, 16, 32 bit 1280 x 1024 SXGA 8, 16, 32 bit 1360 x 768 8, 16, 32 bit 1368 x 768 8, 16, 32 bit 1440 x 900 8, 16, 32 bit 1600 x 1200 UXGA 8, 16, 32 bit 1680 x 1050 8, 16, 32 bit • K jednomu PC lze připojit až 6 adaptérů • Hot Plug, Plug & Play • Podporuje Windows Aero Systémové požadavky • Windows 2000/XP/Vista • PC s USB portem • 2.0 GHz CPU nebo vyšší • 256MB RAM • Minimálně SVGA (800 x 600) grafická karta • Minimálně 30MB volného místa na disku -14- Obsah balení* • USB 2.0 DVI adaptér • Kabel USB • DVI na VGA adaptér • DVI na HDMI adaptér • CD s ovladači • Uživatelská příručka *Před použitím se ujististěte, zda balení obsahuje všechny položky. Pokud něco chybí nebo je poškozeno, kontaktujte prosím svého prodejce. Poznámka: Pro instalaci konvertoru dodržujte všeobecné pokyny. Pokud to bude potřeba, použijte manuál vašeho počítače nebo požádejte o pomoc specialistu. Instalace ovladače Windows XP/Vista 1. Zapněte počítač. 2. Vložte CD do CD-ROM mechaniky. 3. Automaticky je spuštěn instalační program. Pokud je potřeba, klikněte na "Setup.exe". 4. Zvolte "USB 2.0 VGA Drivers for XP/Vista". 5. Klikněte na "Allow" (Povolit). 6. Přečtěte si licenční ujednání a potvrďte je pomocí "I accept". 7. Zvolte "Install this driver software anyway" (Zvolte Instalujte ovladač). 8. Klikněte na "Next" (Pokračovat). 9. Budete vyzvání k restartu počítače. Klikněte na "Ano" ("Yes") pro provedení restartu počítače. 10. Po restartu připojte adaptér na volný USB port PC nebo notebooku. 11. Zařízení můžete začít používat. -15- Windows 2000 1. Zapněte počítač. 2. Vložte CD do CD-ROM mechaniky. 3. Automaticky je spuštěn instalační program. 4. Zvolte "USB 2.0 VGA Drivers for Windows 2000". 5. Klikněte na "Next" (Pokračovat). 6. Přečtěte si licenční ujednání a potvrďte je pomocí "I accept". 7. Klikněte na "Install" (Instalovat). 8. Budete vyzvání k restartu počítače. Klikněte na "Ano" ("Yes") pro provedení restartu počítače. 9. Po restartu připojte adaptér na volný USB port PC nebo notebooku. 10. Zařízení můžete začít používat. Konfigurace Přídavný displej může být nastaven jako zrcadlo nebo rozšíření stávajícího displeje. Monitor je nastaven jako rozšíření: 1. Klikněte pravým tlačítkem myši na pracovní plochu a zvolte „Properties“ (Vlastnosti). 2. Klikněte na "Settings" (Nastavení). 3. V menu Zobrazení zvolte "...DisplayLink Graphics Adapter". 4. Zvolte pořadí nastavovaného displeje jako 1, 2, 3 atd.. Pro zrcadlení monitoru zvolte: 1. Zvolte v menu Zobrazení "...DisplayLink Graphics Adapter". 2. Zrušte zaškrtnutí "Expand Windows-Desktop to this monitor". 3. Klikněte na "OK". -16- Technická podpora S dalšími technickými otázkami můžete kontaktovat naše středisko podpory: [email protected] nebo telefonicky +49 30 81789324 (pouze německy nebo anglicky) * Servisní středisko je v provozu v pracovní dny od 9:00 do 16:30 hodin *Bezplatné hovory z České a Slovenské republiky nejsou možné. Další informace vám může zprostředkovat rovněž prodejce, u kterého byl výrobek zakoupen. Aktuální informace o produktu můžete nalézt i na našich webových stránkách http://www.delock.com Závěrečné upozornění Informace a data obsažená v této příručce mohou být změněny bez předchozího upozornění. Za tiskové chyby neručíme. Copyright Bez předchozího písemného výslovného svolení od Delocku nesmí být použita žádná část této příručky pro jakékoliv účely rozmnožování, překládání nebo dalších úprav nezávisle na tom, jakým způsobem nebo jakými prostředky k tomu dochází (elektronicky nebo mechanicky). Ochranná známka Delock je registrovaná obchodní značka a bez písemného svolení jejích vlastníků nesmí být používána. Nesmí být v žádném případě upravena nebo doplněna. Ochranné známky, obchodní jména, značky a názvy produktů použité v této příručce mohou být registrovanými ochrannými známkami třetích firem zapsanými u příslušných úřadů. verze: 07/2008 -17- Declaration of conformity Products with a CE symbol fulfill the the EMC- directives (89/336/EEC), which were released by the EU-comission. The compliance with these directives implicates the conformity with the following European standards (in brackets you will see the equivalent international standards). EN 55022:2006 EN61000-3-2:2006 EN 55024:1998+A1:2001+A2:2003 EN61000-3-3:1995+A1:2001+A2:2005 More informations for the declaration of conformity you can find on: http://www.delock.de/service/conformity WEEE-notice The WEEE (Waste Electrical and Electronic Equipment)-directive, which became effective as European law on February 13th 2003, resulted in an all out change in the disposal of disused electro devices. The primarily purpose of this directive is the avoidance of electrical waste (WEEE) and at the same time the support of recycling and other forms of recycling in order to reduce waste. The WEEE-logo on the device and the package indicates that the device should not be disposed in the normal household garbage. You are responsible for taking the disused electrical and electronical devices to a respective collecting point. A separated collection and reasonable recycling of your electrical waste helps handling the natural resources more economical. Furthermore recycling of electrical waste is a contribution to keep the environment and thus also the health of men. Further information about disposal of electrical and electronical waste, recycling and the collection points are available in local organizations, waste management enterprises, in specialized trade and the producer of the device. Compliance with RoHS This product complies with the directive 2002/95/EC of the European parliament and the council from January 27th 2003 concerning the restricted use of dangerous substances in electrical and electronical devices (RoHS) as well as its modification. Ro HS Co m p lia n t
