Thermo-/Hygrometer mit Schimmelalarm Modell WS 1500
Anuncio
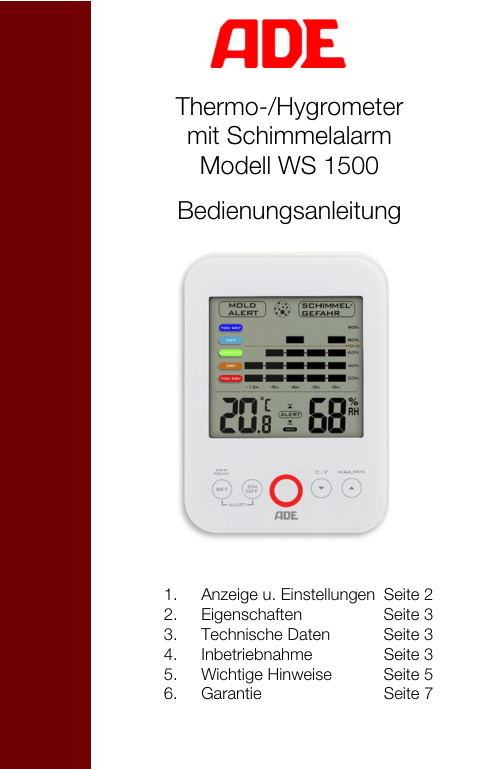
Thermo-/Hygrometer mit Schimmelalarm Modell WS 1500 Bedienungsanleitung 1. 2. 3. 4. 5. 6. Anzeige u. Einstellungen Eigenschaften Technische Daten Inbetriebnahme Wichtige Hinweise Garantie Seite 2 Seite 3 Seite 3 Seite 3 Seite 5 Seite 7 Vielen Dank, dass Sie sich für den Kauf dieses qualitativ hochwertigen Produkts der Firma Waagen-Schmitt entschieden haben. Sie haben ein Thermometer/Hygrometer mit höchstem technischem Standard und von bewährter Qualität erworben. Dieses Thermometer/Hygrometer ist ein ideales Messinstrument um die Beschaffenheit des Raumklimas zu überprüfen. Bitte lesen Sie diese Bedienungsanleitung vor der ersten Inbetriebnahme sorgfältig durch und bewahren sie dann gut auf, damit Ihnen diese Informationen bei Bedarf immer wieder zur Verfügung stehen. 1. Anzeigen und Einstellungen 2 2. Eigenschaften - - Extra großes LCD-Display Innenraumtemperatur-Anzeige Taupunkttemperatur-Anzeige Anzeige der relativen Luftfeuchtigkeit im Innenraum Wählbare Temperaturanzeige in °C oder °F Max-/Min-Anzeige der Temperatur und relativen Luftfeuchtigkeit Graphische Anzeige der relativen Luftfeuchtigkeit der letzten 12 Stunden Schimmelalarm mit Warnsymbol und blinkendem LED-Alarmsignal sowie wählbaren Grenzwerten (60%, 65%, 70%, 75%) Feuchtigkeitsalarm mit Warnsymbol und blinkendem LED-Alarmsignal sowie programmierbaren Grenzwerten der oberen/unteren relativen Luftfeuchtigkeit (30 - 95% in 5%-Schritten) Leicht ablesbarer, farbiger Komfort-Index (Wohlfühlniveau) Bedienung über Sensortasten 3. Technische Daten - Temperaturanzeige Taupunkt-Temperaturbereich Toleranz Bereich relativer Luftfeuchtigkeit Toleranz Auflösung Temperatur Auflösung relative Luftfeuchtigkeit Temperatur außerhalb des zulässigen Bereichs: Taupunkttemperatur außerhalb des zulässigen Bereichs: 0 °C bis +50 °C 0 °C bis +50 °C +/- 1 °C 20% bis 95% +/- 5% 0.1 °C 1% HH.H/LL.L HH.H/LL.L 4. Inbetriebnahme Öffnen Sie das Batteriefach an der Rückseite des Thermometer/Hygrometer, legen die mitgelieferten Batterien (2 x 1.5V AAA) ein und schließen dann wieder das Batteriefach. Bitte achten Sie auf die richtige Polung der Batterien (+/-). Das Thermometer/Hygrometer ist nun bereit. Einstellen des Feuchtigkeitsalarms 1. Um den Feuchtigkeitsalarm zu aktivieren, drücken und halten Sie die SETTaste, bis gleichzeitig die beiden Symbole ALERT und S im oberen Teil des Displays erscheinen und die Feuchtigkeitsanzeige blinkt. Drücken Sie nun die Soder T-Taste, um die Feuchtigkeitsobergrenze (in 5%-Schritten) zu setzen. 2. Drücken Sie nun die SET-Taste noch einmal und ALERT und T erscheinen im unteren Teil des Displays und die Feuchtigkeitsanzeige blinkt. Drücken Sie nun die Taste, um die Feuchtigkeitsuntergrenze (in 5%-Schritten) zu setzen. 3 3. Drücken Sie die SET-Taste noch einmal oder warten Sie ca. 10 Sekunden, die Anzeige kehrt dann wieder in den Normalmodus zurück. 4. Um den Feuchtigkeitsalarm zu aktivieren, drücken Sie einmal die ON.OFFTaste. ALERT erscheint im Display 5. Sobald die Luftfeuchtigkeit den von Ihnen gesetzten Wert über- oder unterschreitet, blinkt das Symbol T oder S und gleichzeitig das rote LEDAlarmsignal (schnelle Blinkfolge). 6. Um das Blinken von Symbol und Alarmsignal zu stoppen drücken Sie eine beliebige Taste. 7. Um den Feuchtigkeitsalarm auszuschalten, drücken Sie einmal die ON.OFFTaste. ALERT und S oder T werden nicht mehr angezeigt. Bemerkung: Die Dauer des Alarms beträgt eine Minute. Einstellen des Schimmelalarms 1. Um den Schimmelalarm zu aktivieren, drücken und halten Sie die T /°C/°FTaste bis gleichzeitig im oberen Teil des Displays die Symbole MOLD ALERT SCHIMMELGEFAHR erscheinen und die Feuchtigkeitsanzeige blinkt. Drücken Sie nun die S-oder T-Taste, um die Schimmelalarmobergrenze mit einem Wert von 60%, 65%, 70% oder 75% zu setzen. 2. Drücken und halten Sie noch einmal die T /°C/°F-Taste oder warten ca. 10 Sekunden, um in den normalen Anzeigemodus zurück zu gelangen. 3. Sobald die Luftfeuchtigkeit den gesetzten Schimmelalarmwert überschreitet, besteht das Risiko von Schimmelbildung. Dann erscheinen die Symbole MOLD ALERT SCHIMMELGEFAHR im Display und gleichzeitig blinkt das rote LEDAlarmsignal (langsame Blinkfolge – alle 5 Sekunden). 4. Drücken Sie eine beliebige Taste um das rote LED-Alarmsignal zu stoppen. Die Symbole MOLD ALERT SCHIMMELGEFAHR bleiben auf dem Display sichtbar, bis die gemessene Luftfeuchtigkeit wieder unter den eingegebenen Schimmelgrenzwert fällt. Die werkseitige Voreinstellung des Schimmelalarmwertes beträgt 65%. Wählen der Temperaturanzeige (°C oder °F) Um zwischen den Temperatureinheiten °C oder °F zu wählen, drücken Sie die °C/°F-Taste. Ablesen und Zurücksetzen der Aufzeichnung von Maximum-/MinimumTemperatur und Luftfeuchtigkeit Um die Maximum- oder Minimum-Temperatur und die relative Luftfeuchtigkeit seit 4 Ihrem letzten Zurücksetzen abzulesen, drücken Sie jeweils einmal die MAX.MINTaste. Bei der Anzeige des Symbols MAX können Sie die Maximumwerte und bei der Anzeige des Symbols MIN die Minimumwerte ablesen. Wenn die Maximum-Werte durch MAX angezeigt werden, kann durch Drücken und Halten der MAX.MIN-Taste die Aufzeichnung zurückgesetzt und eine neue Aufzeichnung gestartet werden. Wenn die Minimum-Werte durch MIN angezeigt werden, kann durch Drücken und Halten der MAX.MIN-Taste die Aufzeichnung zurückgesetzt und eine neue Aufzeichnung gestartet werden. 4. Wichtige Hinweise Wie beeinflusst die Luftfeuchtigkeit Ihre Gesundheit und Ihr Heim Eine zu hohe Luftfeuchtigkeit in Innenräumen fördert das Wachstum von unerwünschten Organismen. Die Aufrechterhaltung einer Luftfeuchtigkeit im Bereich zwischen 30% bis 50% in Innenräumen trägt dazu bei, dem Wachstum von Schimmelpilzen, Moder und Milben vorzubeugen. Der Aufenthalt in Räumen mit Schimmelpilzbefall kann das Immunsystem von Menschen schädigen, schwächt den Widerstand gegen Allergien der Atemwege und steht im Zusammenhang mit Infektionen. Zu trockene Luft in Innenräumen kann die Haut austrocknen, reizt Hals und Nasennebenhöhlen und trägt dazu bei, dass sich diese Bereiche eher infizieren. In trockenem Klima oder im Winter, wenn durch Heizung die Luft in Innenräumen austrocknet, kann die relative Luftfeuchtigkeit mit Hilfe eines Luftbefeuchters erhöht werden. Durch zu trockene Luft in Innenräumen kann sich Holz zusammenziehen und reißen, besonders dünnes Holz wie z.B. Holz zum Bau von Gitarren oder Geigen. Bei großer Trockenheit über einen längeren Zeitraum ist auch ein Reißen von soliden Holzbalken oder Gips möglich. Aktives Heizen und Lüften kann dazu beitragen, ein angenehmes und gesundes Wohnklima zu schaffen. Informationen zum Taupunkt Der Taupunkt ist ein Maß zur Erfassung der Feuchtigkeit in der Luft und wird aus dem Verhältnis der relativen Luftfeuchtigkeit zur Temperatur berechnet. Er definiert die Temperatur, bei der Luftfeuchtigkeit kondensiert. Je wärmer die Luft ist, desto mehr Feuchtigkeit kann sie transportieren. Sind Taupunkt und Temperatur genau gleich, beträgt die Luftfeuchtigkeit 100 %, d.h. die Luft ist gesättigt und die Luftfeuchtigkeit kondensiert – in Innenräumen z.B. an Wänden, im Freien kommt es zur Bildung von Nebel oder Niederschlag. 5 Normale, weitgehend als angenehm empfundene Raumluft von 22° C und 40% Luftfeuchtigkeit hat beispielsweise einen Taupunkt von ca. 8° C. Insbesondere um Schimmelbildung in Innenräumen zu vermeiden ist diese Information hilfreich. Sobald die Temperatur von z.B. Außenwänden auf den Taupunkt oder niedriger fällt, schlägt sich Feuchtigkeit daran nieder, was langfristig zur Schimmelbildung führen kann. Bemerkung: Der Taupunkt-Temperaturbereich des Hygrometers geht von 0 °C bis 50 °C. Beträgt die Taupunkttemperatur mehr als 50° C wird im Display „HH.H“ angezeigt, ist sie unter 0°C wird im Display „LL.L“ angezeigt. Graphische Darstellung der Luftfeuchtigkeit innerhalb der letzten 12-Stunden In der graphischen Darstellung können Sie sehr einfach die Aufzeichnung der relativen Luftfeuchtigkeit und des gefühlten Niveaus im Raum innerhalb der letzten 12 Stunden ablesen. Gefühltes Niveau (Komfort Index) Relative Luftfeuchtigkeit Zu feucht 81% bis 90% Feucht 61% bis 80% Angenehm 41% bis 60% Trocken 31% bis 40% Zu trocken 20% bis 30% 6 6. Garantie WAAGEN-SCHMITT garantiert für 3 Jahre ab Kaufdatum die kostenfreie Behebung von Mängeln aufgrund Material- oder Fabrikationsfehlern durch Reparatur oder Austausch. Im Garantiefall bitte das Thermo-/Hygrometer mit Rechnungsbeleg, unter Angabe des Reklamationsgrundes, an Ihren Händler zurückgeben. Hinweis: Unter extremen elektromagnetischen Einflüssen, z.B. bei Betreiben eines Funkgerätes in unmittelbarer Nähe des Thermo-/Hygrometers, kann eine Beeinflussung des Anzeigewertes verursacht werden. Nach Ende des Störeinflusses ist das Produkt wieder bestimmungsgemäß benutzbar, ggfls. ist ein Wiedereinschalten erforderlich. Gesetzliche Hinweispflicht zur Batterie-Entsorgung: Batterien gehören nicht in den Hausmüll. Als Verbraucher sind Sie gesetzlich dazu verpflichtet, gebrauchte Batterien zurückzugeben. Sie können Ihre alten Batterien bei den öffentlichen Sammelstellen in Ihrer Gemeinde oder überall dort abgeben, wo Batterien der betreffenden Art verkauft werden. Hinweis: Diese Zeichen finden Sie auf Batterien: Li = Batterie enthält Lithium Al = Batterie enthält Alkali Mn = Batterie enthält Mangan CR (Li); AA (Al, Mn); AAA (Al, Mn) Entsorgung von gebrauchten elektrischen und elektronischen Geräten Das Symbol auf dem Produkt oder seiner Verpackung weist darauf hin, dass dieses Produkt nicht als normaler Haushaltsabfall zu behandeln ist, sondern an einer Annahmestelle für das Recycling von elektrischen und elektronischen Geräten abgegeben werden muss. Weitere Informationen erhalten Sie über Ihre Gemeinde, die kommunalen Entsorgungsbetriebe oder das Geschäft, in dem Sie das Produkt gekauft haben. 7 Konformitätserklärung des Herstellers Diese Waage wurde gemäß den harmonisierten europäischen Normen hergestellt. Es entspricht den Bestimmungen der unten angeführten EG – Richtlinien: - EMV-Richtlinie 2004/108/EG über die elektromagnetische Verträglichkeit - RoHS-Richtlinie 2011/65/EG in den jeweils geltenden Fassungen. Die Erklärung verliert ihre Gültigkeit, falls an der Waage eine nicht mit uns abgestimmte Änderung vorgenommen wurde. Hamburg, Mai 2015 WAAGEN-SCHMITT GmbH Hammer Steindamm 27 – 29 D-22089 Hamburg Operating Manual_N_WS1500_DE_150513_REV001 8 Thermo-/Hygrometer with Mould Alert Model WS 1500 Operating Manual 1. Display & Settings 2. Features 3. Technical Data 4. Start-up 5. Important Information 6. Warranty Page 2 Page 3 Page 3 Page 3 Page 5 Page 7 Thank you for deciding to purchase this high-quality product from the WaagenSchmitt Company. You have purchased a thermometer/hygrometer of the highest technical standard and proven quality. This thermometer/hygrometer is an ideal measuring instrument for checking the indoor climate characteristics. Please read through this operating manual carefully before starting-up for the first time, and keep it in a safe place so that this information is available to you when you need it. 1. Indicators and Settings Front view Mould alert Comfort level indicators 12-hour display of the relative humidity Max. indicator Relative humidity Battery indicator Dew point Temperature Alarm indicator Min. indicator Activate alarm/dew point sensor button Max./Min. Sensor Alarm on/off button °C/°F toggle button Red LED alarm signal 2 2. - - 3. - 4. Features Extra large LCD Internal room temperature indicator Dew point temperature indicator Display of relative humidity indoors Selectable temperature indicator, in °C or °F Max/min indicator of temperature and relative humidity Graphical display of relative humidity over the last 12 hours Mould alert with warning symbol and blinking LED alarm signal, as well as selectable threshold values (60%, 65%, 70%, 75%) Humidity alarm with warning symbol and blinking LED alarm signal, as well as programmable threshold values for the upper/lower relative humidity (30 - 95% in 5% intervals) Easy-to-read, colour comfort index (comfort level) Operation by means of sensor buttons Technical Data Temperature indicator Dew point temperature range Tolerance Relative humidity range Tolerance Temperature resolution Relative humidity resolution Temperature outside the permissible range: Dew point temperature outside the permissible range: 0 °C to +50 °C 0 °C to +50 °C +/- 1 °C 20% to 95% +/- 5% 0.1 °C 1% HH.H/LL.L HH.H/LL.L Start-up Open the battery compartment on the back of the thermometer/hygrometer, insert the supplied batteries (2 x 1.5V AAA) and then close the battery compartment again. Please be mindful of the correct polarity of the batteries (+/-). The thermometer/hygrometer is now ready. Setting the humidity alarm 1. In order to activate the humidity alarm, press and hold the SET button until the ALERT and S symbols appear simultaneously in the upper part of the display and the humidity indicator blinks. Now press the S or T button in order to set (in 5% intervals) the upper humidity threshold. 3 2. Now press the SET button once more and ALERT and T will appear on the lower part of the display and the humidity indicator will blink. Now press the S or T button in order to set (in 5% intervals) the lower humidity threshold. 3. Press the SET button once more or wait approx. 10 seconds; the indicator then returns to normal mode again. 4. In order to activate the humidity alarm, press the ON.OFF button once. ALERT appears on the display 5. As soon as the humidity falls below or exceeds the values that you have set, the T or S symbol and, at the same time, the red LED alarm signal (quickly) blink. 6. In order to stop the blinking of the symbol and alarm signal, press any button. 7. In order to switch off the humidity alarm, press the ON.OFF button once. ALERT and S or T will no longer be displayed. Remarks: The duration of the alarm is one minute. Setting the mould alert 1. In order to activate the mould alert, press and hold the T /°C/°F button until the MOLD ALERT MOLD RISK symbols appear simultaneously in the upper part of the display and the humidity indicator blinks. Now press the S or T button in order to set the upper mould threshold with a value of 60%, 65%, 70%, or 75%. 2. Press and hold the T /°C/°F button or wait approx. 10 seconds in order to return to the normal display mode. 3. As soon as the humidity exceeds the set mould alert value, there is a risk of mould formation. The symbols MOLD ALERT MOLD RISK then appear on the display and, simultaneously, the red LED alarm signal blinks (slowly – every 5 seconds). 4. Press any button in order to stop the red LED alarm signal. The MOLD ALERT MOLD RISK symbols remain visible on the display until the measured humidity falls back under the preset mould threshold value. The factory preset value for the mould alert is 65%. Selecting the temperature indicator (°C or °F) In order to toggle between °C and °F units of temperature, press the °C/°F button. 4 Reading and resetting the record of maximum/minimum temperature and humidity. In order to read the maximum or minimum temperature and relative humidity since the last time you reset the system, press the respective MAX.MIN button once. When the MAX symbol is displayed you can read off the maximum values, and when the MIN symbol is displayed you can read off the minimum values. When the maximum values are displayed by MAX, the record can be reset and a new record started by pressing and holding the MAX.MIN button. When the minimum values are displayed by MIN, the record can be reset and a new record started by pressing and holding the MAX.MIN button. 5. Important Information How does the humidity affect your health and your home? Excessive humidity indoors promotes the growth of undesirable organisms. The maintenance of humidity in the range between 30% and 50% indoors contributes to preventing the growth of mould, mildew, and mites. Staying in rooms infested with mould can damage the human immune system, weakens the resistance to respiratory allergies, and has been linked with infections. Excessively dry air indoors can dry out the skin, irritates the throat and paranasal sinuses, and contributes to the easier infection of these areas. In a dry climate or in winter, when the air indoors has been made dry by heating, the relative humidity can be increased with the help of a humidifier. Indoor air that is excessively dry can cause wood to contract and split, particularly thin wood such as that used in the making of guitars and violins. During extreme dryness over a long period of time, the splitting of solid wooden beams or plaster is also possible. Active heating and ventilating can contribute to creating a comfortable and healthy living climate. Information on the dew point The dew point is a measure for determining the moisture in the air and is calculated from the relationship of relative humidity to temperature. It defines the temperature at which moisture in the air condenses. The warmer the air, the more moisture it can transport. If dew point and temperature are exactly the same, the humidity is 100% i.e. the air is saturated 5 and the moisture condenses – e.g. indoors on walls, outdoors it leads to the formation of fog or precipitation. Normal indoor air at 22°C and 40% humidity, which is generally found to be comfortable, has – for example – a dew point of approx. 8°C. This information is particularly helpful for preventing the formation of mould. As soon as the temperature of e.g. external walls reaches the dew point or falls below it, moisture will be deposited; in the long term this can lead to the formation of mould. Remarks: The dew point temperature range of the hygrometer extends from 0°C to 50°C. If the dew point temperature exceeds 50°C, “HH.H” appears on the display; if it is below 0°C, “LL.L” appears on the display. Graphical representation of humidity within the last 12 hours. In the graphical representation, you can easily read the record of the relative humidity and the perceived level in the room within the last 12 hours. Perceived level (comfort index) Relative humidity Too wet 81% to 90% Wet 61% to 80% Comfortable 41% to 60% Dry 31% to 40% Too dry 20% to 30% 6 6. Warranty WAAGEN-SCHMITT guarantees the free correction of defects resulting from material or manufacturing faults through repair or exchange 3 years from the purchase date. In the event of a warranty claim, please return the thermo/hygrometer with the receipt to your dealer, specifying the reason for the claim. Please note: Under strong electromagnetic influences, e.g. when operating a radio device in immediate proximity to the thermo-/hygrometer, interference with the indicator values may be caused. After the disturbing influence has stopped, the product may once again be used as intended, although a re-activation may be necessary. Legal duty to inform about battery disposal: Batteries do not belong in household waste. As a consumer you are legally obligated to return batteries. You can hand in your old batteries at the public collection point in your community or anywhere where batteries of the same kind are sold. Please note: These symbols can be found on batteries: Li Al Mn = Battery contains lithium = Battery contains alkali = Battery contains manganese CR (Li); AA (Al, Mn); AAA (Al, Mn) Disposal of used electrical and electronic devices This symbol on the product or its packaging indicates that the product is not to be treated like normal household waste, but must be handed over at a collection point for the recycling of electrical and electronic devices. Further information can be obtained in your community, at communal disposal services or the business where you bought the product. 7 Declaration of conformity by the manufacturer This thermo-/hygrometer has been manufactured in accordance with the harmonised European standards. It conforms to the provisions of the following EC directives: - EMC Directive 2004/108/EC regarding electromagnetic compatibility - RoHS Directive 2011/65/EC in the currently valid versions. This declaration loses its validity if modifications are made to the scale without our approval. Hamburg, May 2015 WAAGEN-SCHMITT GmbH Hammer Steindamm 27 – 29 D-22089 Hamburg Operating Manual_N_WS1500_EN_150513_REV001 8 Termo-/higrómetro con alerta de moho Modelo WS 1500 Manual de funcionamiento 1. Pantalla y configuración 2. Características 3. Datos técnicos 4. Inicio 5. Información importante 6. Garantía Página 2 Página 3 Página 3 Página 3 Página 5 Página 7 Gracias por decidirse a comprar este producto de alta calidad de la compañía Waagen-Schmitt. Usted ha adquirido un termómetro/higrómetro del más alto estándar técnico y calidad comprobada. Este termómetro/higrómetro es un instrumento de medición ideal para el control de las características ambientales interiores. Lea este manual de funcionamiento detenidamente antes de ponerla en marcha por primera vez, y guárdelo en un lugar seguro de modo que esta información se encuentre disponible cuando la necesite. 1. Indicadores y configuración Vista delantera Alerta de moho Indicadores de nivel de confort Pantalla de 12 horas de humedad relativa Indicador de máximo Humedad relativa Indicador de la batería Punto de rocío Temperatura Indicador de mín. Indicador de alarma Activar el botón del sensor de punto de rocío/alarma Máx./Mín. Botón del sensor Botón de encendido/ apagado de la alarma botón de alternar °C/°F Señal de alarma LED roja 2 2. - - - 3. - 4. Características LCD extra grande Indicador de la temperatura ambiente interna Indicador de la temperatura del punto de rocío Visualización de la humedad relativa en el interior Indicador de temperatura seleccionable en °C o °F Indicador de temperatura máx/mín y humedad relativa Visualización gráfica de la humedad relativa durante las últimas 12 horas Alerta de moho con el símbolo de advertencia y señal de alarma de LED que parpadea, así como los valores de umbral seleccionables (60%, 65%, 70%, 75%) Alarma de humedad con el símbolo de advertencia y señal de alarma de LED que parpadea, así como los valores del umbral programable para la humedad relativa superior/inferior (30 - 95% en intervalos de 5%) Fácil de leer, índice de confort de color (nivel de confort) Funcionamiento por medio de los botones del sensor Datos técnicos Indicador de temperatura Rango de temperatura del punto de rocío Tolerancia Rango de humedad relativa Tolerancia Resolución de temperatura Resolución de humedad relativa Temperatura fuera del rango permisible: Temperatura del punto de rocío fuera del rango permisible: 0 °C a +50 °C 0 °C a +50 °C +/- 1 °C 20% a 95% +/- 5% 0,1 °C 1% HH.H/LL.L HH.H/LL.L Inicio Abra el compartimiento de las pilas en la parte posterior del termómetro/higrómetro, inserte las pilas que se incluyen (2 x 1,5 V AAA), y a continuación cierre el compartimento de nuevo. Tenga en cuenta la polaridad correcta de las pilas (+/-). El termómetro/higrómetro ya está listo. Configuración de la alarma de humedad 1. Para activar la alarma de humedad, mantenga pulsado el botón SET (Establecer) hasta que los símbolos ALERT y S aparecen simultáneamente en la parte superior de la pantalla y el indicador de humedad parpadea. Ahora pulse el botón S o T para establecer (en intervalos de 5%) el umbral de humedad superior. 2. Ahora pulse el botón SET una vez más y ALERT y T aparecerán en la parte inferior de la pantalla y el indicador de humedad parpadeará. Ahora pulse el 3 botón S o T para establecer (en intervalos de 5% ) el umbral de humedad inferior. 3. Pulse el botón SET de nuevo o espere 10 segundos aproximadamente; el indicador vuelve al modo normal otra vez. 4. Para activar la alarma de humedad, pulse el botón ON (Encendido).OFF (Apagado) una vez. ALERT aparece en la pantalla 5. Tan pronto como la humedad cae por debajo o supera los valores establecidos, el símbolo T o S y, al mismo tiempo, la señal de alarma LED roja parpadea (rápidamente). 6. Para detener el parpadeo de la señal de alarma y el símbolo, pulse cualquier botón. 7. Para desactivar la alarma de humedad, pulse el botón ON.OFF una vez. ALERT y S o T ya no aparecerán más. Comentarios: La duración de la alarma es de un minuto. Configuración de la alerta de moho 1. Para activar la alerta de moho, mantenga pulsado el botón T /°C/°F hasta que los símbolos MOLD ALERT MOLD RISK aparecen simultáneamente en la parte superior de la pantalla y el indicador de humedad parpadea. Ahora pulse el botón S o T para establecer el umbral superior de moho con un valor de 60%, 65%, 70%, o 75%. 2. Mantenga pulsado el botón T /°C/°F espere 10 segundos aproximadamente para volver al modo de visualización normal. 3. Tan pronto como la humedad supera el valor de alerta de moho establecido, existe un riesgo de formación de moho. Los símbolos MOLD ALERT MOLD RISK aparecen entonces en la pantalla y, simultáneamente, la señal de alarma LED roja parpadea (lentamente -– cada 5 segundos). 4. Pulse cualquier botón para detener la señal de alarma LED roja. Los símbolos MOLD ALERT MOLD RISK permanecerán visibles en la pantalla hasta que la humedad medida cae por debajo del valor del umbral del molde preestablecido. El valor predeterminado de fábrica para la alerta de moho es de 65%. Selección del indicador de temperatura (°C o °F) Para alternar entre unidades de temperatura °C y° F, pulse el botón °C/°F. 4 Lectura y restablecimiento máxima/mínima. del registro de temperatura y humedad Para leer la temperatura máxima o mínima y la humedad relativa desde la última vez que se reinicia el sistema, pulse el botón MAX.MIN respectivo una vez. Cuando aparece el símbolo MAX se pueden leer los valores máximos, y cuando aparece el símbolo MIN se pueden leer los valores mínimos. Cuando aparecen los valores máximos a través de MAX, se puede restablecer el registro y un nuevo registro comenzado manteniendo pulsado el botón MAX.MIN. Cuando aparecen los valores mínimos a través de MIN, se puede restablecer el registro y un nuevo registro comenzado al mantener pulsado el botón MAX.MIN. 5. Información importante ¿Cómo afecta la humedad su salud y su casa? El exceso de humedad en el interior provoca el crecimiento de organismos indeseables. Al mantener el rango de humedad entre 30% y 50% en el interior, contribuye a prevenir el crecimiento de moho, hongos y ácaros. El estar en habitaciones infestadas de moho puede dañar al sistema inmunológico humano, debilitar la resistencia a las alergias respiratorias, y se ha relacionado con infecciones. Aire excesivamente seco en interiores puede resecar la piel, irritar la garganta y los senos paranasales, y contribuye a una más fácil infección de estas zonas. En un clima seco o en invierno, cuando el aire interior es seco debido a la calefacción, se puede aumentar la humedad relativa con la ayuda de un humidificador. Un aire interior excesivamente seco puede causar que la madera se contraiga y divida, sobre todo madera fina, como la utilizada en la fabricación de guitarras y violines. Cuando se produce sequedad extrema durante un largo período de tiempo, la división de vigas de madera sólida o yeso también es posible. La calefacción y ventilación activa pueden contribuir a crear un clima confortable y saludable. Información sobre el punto de rocío El punto de rocío es una medida para determinar la humedad en el aire y se calcula a partir de la relación de humedad relativa a la temperatura. Define la temperatura a la que la humedad en el aire se condensa. Cuanto más caliente esté el aire, más humedad puede transportar. Si el punto de rocío y la temperatura son exactamente la misma, la humedad es 100%, es decir el aire está saturado y la humedad se condensa – por ejemplo, en el interior de las paredes, al aire libre conduce a la formación de niebla o precipitaciones. 5 El aire interior normal a 22 °C y 40% de humedad, que por general es el idóneo, tiene – por ejemplo – un punto de rocío de aproximadamente 8 °C. Esta información es especialmente útil para prevenir la formación de moho. Tan pronto como la temperatura de, por ejemplo, muros exteriores alcanza el punto de rocío o cae por debajo de el, la humedad se depositara; a largo plazo, esto puede conducir a la formación de moho. Comentarios: El rango de temperatura del punto de rocío del higrómetro se extiende desde 0 °C a 50 °C. Si la temperatura del punto de rocío es superior a 50 °C, aparece “HH.H” en la pantalla; si está por debajo de 0 °C, aparece “LL.L” en la pantalla. Representación gráfica de la humedad relativa durante las últimas 12 horas. En la representación gráfica, se puede leer fácilmente el registro de la humedad relativa y el nivel percibido en la habitación dentro de las últimas 12 horas. Nivel percibido (índice de confort) Humedad relativa Demasiado húmedo 81% a 90% Húmedo 61% a 80% Confortable 41% a 60% Seco 31% a 40% Demasiado seco 20% a 30% 6 6. Garantía WAAGEN-SCHMITT garantiza la corrección gratuita de los fallos que se produzcan por culpa de defectos del material o de fabricación, reparándolos o sustituyéndolos en un plazo de 3 años desde la fecha de compra. En caso de una reclamación de garantía, por favor devuelva el termo/higrómetro con el recibo a su distribuidor, especificando el motivo de la reclamación. Tenga en cuenta: Bajo influencias electromagnéticas extremas, por ejemplo, al utilizar un dispositivo de radio cerca de las inmediaciones del termo/higrómetro, puede afectar a los valores del indicador. Una vez que se ha detenido la influencia que alteraba, el producto se puede utilizar otra vez para lo que ha sido diseñado, aunque es posible que necesite activarlo de nuevo. Obligación legal de informar acerca de la eliminación de las baterías: No debe tirar las baterías a la basura doméstica. Como consumidor, tiene la obligación legal de devolver las baterías. Puede depositar las baterías usadas en un punto de recogida pública de su comunidad o en cualquier lugar donde se vendan baterías del mismo tipo. Tenga en cuenta: Se pueden encontrar en las baterías los siguientes símbolos: Li Al Mn = Baterías que contienen litio = Baterías que contienen álcalis = Baterías que contienen manganeso CR (Li); AA (Al, Mn); AAA (Al, Mn) Eliminación de aparatos eléctricos y electrónicos usados Este símbolo en el producto o en su embalaje indica que el producto no se debe eliminar como un desecho doméstico normal, sino que se debe entregar en un punto de reciclaje de aparatos eléctricos y electrónicos. Se puede obtener más información en su comunidad, en los servicios de gestión de residuos públicos o en el negocio donde adquirió el producto. 7 Declaración de conformidad por el fabricante Este termo/higrómetro ha sido fabricado en conformidad con las normas europeas armonizadas. Se adapta a las disposiciones de las siguientes directivas de la CE: - Directiva de CEM 2004/108/CE relativa a la compatibilidad electromagnética - Directiva de Restricción de Sustancias Peligrosas (RoHS) 2011/65/CE en las versiones válidas vigentes. Esta declaración pierde su validez si se realizan modificaciones a la báscula sin nuestra aprobación. Hamburgo, mayo de 2015 WAAGEN-SCHMITT GmbH Hammer Steindamm 27 – 29 D - 22089 Hamburg Operating Manual_N_WS1500_ES_150513_REV001 8 Thermo/hygromètre avec alerte de moisissures Modèle WS 1500 Guide d’utilisation 1. Affichage et paramètres 2. Caractéristiques 3. Spécifications techniques 4. Mise en marche 5. Informations importantes 6. Garantie Page 2 Page 3 Page 3 Page 3 Page 5 Page 7 Merci d’avoir choisi d’acheter ce produit de grande qualité fabriqué par la société Waagen-Schmitt. Vous avez acheté un thermomètre/hygromètre d’une grande sophistication technique et d’une qualité éprouvée. Ce thermomètre/hygromètre est un instrument de mesure idéal pour vérifier les caractéristiques du climat intérieur. Veuillez lire ce guide d’utilisation avec attention avant la première mise en route et gardez-le dans un endroit sûr afin que l’information suivante soit à votre disposition à chaque fois que vous en aurez besoin. 1. Indicateurs et paramètres Vue de face Alerte de présence de moisissure Indicateurs du niveau de confort Affichage de 12 heures d’humidité relative Point de rosée Indicateur du max. Humidité relative Indicateur de charge Température Indicateur du min. Indicateur de l’alarme Touche d’activation de l’alarme/du capteur de point de rosée Touche Max./Min. du capteur Touche d’activation/de Touche pour alterner entre désactivation de l’alarme °C et °F LED rouge du signal d’alarme 2 2. - - - 3. - 4. Caractéristiques Écran LCD extra large Indicateur de la température interne ambiante Indicateur de la température du point de rosée Affichage de l’humidité relative intérieure Indicateur de la température sélectionnée, en °C ou °F Indicateur de température et d’humidité relative max/min Affichage graphique de l’humidité relative des 12 dernières heures Alerte à la moisissure avec symbole d’avertissement et LED clignotant pour signaler l’alerte ainsi que des valeurs de seuil sélectionnable (60 %, 65 %, 70 %, 75 %) Alarme d’humidité avec symbole d’avertissement et LED clignotant pour signaler l’alarme, ainsi que des valeurs de seuil programmables pour le taux d’humidité relative supérieure/inférieure (de 30 à 95 % par intervalles de 5 %) Indice de confort coloré, facile à lire (niveau de confort) Fonctionnement contrôlé par les touches du capteur Spécifications techniques Indicateur de température Plage de la température du point de rosée Tolérance Plage de l’humidité relative Tolérance Résolution de la température Résolution de l’humidité relative Température en dehors de la plage admissible : Température du point de rosée en dehors de la plage admissible : De 0 °C à +50 °C De 0 °C à +50 °C +/- 1 °C De 20 % à 95 % +/- 5 % 0,1 °C 1% HH.H/LL.L HH.H/LL.L Mise en marche Enlevez le couvercle du compartiment à piles à l’arrière du thermomètre/hygromètre, insérez les piles fournies (2 x 1,5 V AAA) puis remettez le couvercle. Veuillez prendre garde à respecter la polarité des piles (+/-). Le thermomètre/hygromètre est maintenant prêt. Réglage de l’alarme d’humidité 1. Pour activer l’alarme d’humidité, maintenez appuyée la touche SET jusqu’à ce que les symboles ALERT et S s’affichent simultanément dans la partie supérieure de l’écran et que l’indicateur d’humidité clignote. Puis appuyez sur la touche S ou T afin de régler le seuil supérieur de l’humidité (par intervalles de 5 %). 2. Puis sur la touche SET une fois de plus, ALERT et T s’afficheront dans la partie inférieure de l’écran et l’indicateur d’humidité clignotera. Appuyez 3 maintenant sur la touche S ou T afin de régler le seuil inférieur de l’humidité (par intervalles de 5 %). 3. Appuyez sur la touche SET une fois de plus ou patientez environ 10 secondes pour que l’indicateur retourne au mode normal. 4. Pour activer l’alarme de l’humidité, appuyez une fois sur la touche ON.OFF. ALERT s’affiche 5. Aussitôt que l’humidité passe au-dessous ou au-dessus des valeurs que vous avez réglées, le symbole T ou S et la LED rouge du signal d’alarme clignotent (rapidement) en même temps. 6. Pour arrêter le clignotement du symbole ou du signal d’alarme, appuyez sur n’importe quelle touche. 7. Pour désactiver l’alarme de l’humidité, appuyez une fois sur la touche ON.OFF. ALERT et S ou T ne seront plus affichés. Remarques : L’alarme dure une minute. Réglage de l’alerte à la moisissure 1. Pour activer l’alerte à la moisissure, maintenez appuyée la touche T/°C/°F jusqu’à ce que les symboles MOLD ALERT MOLD RISK s’affichent simultanément dans la partie supérieure de l’écran et que l’indicateur d’humidité clignote. Appuyez maintenant sur la touche S ou T pour régler le seuil supérieur de moisissure avec la valeur 60 %, 65 %, 70 %, ou 75 %. 2. Maintenez appuyée la touche T/°C/°F ou patientez environ 10 secondes pour retourner au mode d’affichage normal. 3. Aussitôt que l’humidité dépasse la valeur réglée de l’alerte à la moisissure, le risque de formation de moisissure existe. Les symboles MOLD ALERT MOLD RISK s’affichent alors, et, simultanément, la LED rouge du signal d’alarme clignote (lentement : toutes les 5 secondes). 4. Appuyez sur n’importe quelle touche pour arrêter la LED rouge du signal d’alarme. Les symboles MOLD ALERT MOLD RISK demeurent affichés jusqu’à ce que l’humidité mesurée repasse au-dessous de la valeur seuil de moisissure préréglée. La valeur préréglée en usine de l’alerte à la moisissure est 65 %. Sélection de l’indicateur de température (°C ou °F) Pour alterner entre les unités de température °C et °F, appuyez sur la touche °C/°F. 4 Lecture et réinitialisation de l’enregistrement de température et d’humidité maximum/minimum. Pour lire la température et l’humidité relative maximum ou minimum depuis votre dernière réinitialisation du système, appuyez une fois sur la touche correspondante MAX.MIN. Lorsque le symbole MAX est affiché, vous pouvez lire les valeurs maximales, et lorsque le symbole MIN est affiché, vous pouvez lire les valeurs minimales. Quand les valeurs maximum sont affichées par MAX, l’enregistrement peut être réinitialisé et un nouvel enregistrement commence en maintenant appuyée la touche MAX.MIN. Quand les valeurs minimum sont affichées par MIN, l’enregistrement peut être réinitialisé et un nouvel enregistrement commence en maintenant appuyée la touche MAX.MIN. 5. Informations importantes Comment l’humidité affecte-t-elle votre santé et votre maison ? L’humidité intérieure excessive favorise la croissance d’organismes indésirables. Maintenir l’humidité dans une plage comprise entre 30 % et 50 % à l’intérieur contribue à prévenir la croissance de moisissures, de mildiou et de mites. Demeurer dans des pièces infestées de moisissures peut endommager le système immunitaire humain, affaiblit la résistance aux allergies respiratoires et est associé à des infections. Une atmosphère intérieure excessivement sèche peut assécher la peau, irriter la gorge et les sinus paranasaux et contribuer à faciliter l’infection de ces zones. Dans un climat sec ou en hiver, quand le chauffage assèche l’air intérieur, un humidificateur peut aider à augmenter l’humidité relative. Un air intérieur trop sec peut causer que bois se contracte et se fende, particulièrement les bois minces comme ceux utilisés dans la fabrication de guitares et de violons. En cas de sécheresse excessive sur une longue période de temps, les poutres en bois massif ou le plâtre peuvent également se fendre. Le chauffage actif et la ventilation peuvent contribuer à créer un climat de vie confortable et sain. Informations sur le point de rosée Le point de rosée est une mesure permettant de déterminer l’humidité de l’air ; elle est calculée à partir de la relation existant entre l’humidité relative et la température. Elle définit la température à laquelle l’humidité dans l’air se condense. Plus l’air est chaud, plus il peut transporter d’humidité. Si le point de rosée et la température sont exactement les mêmes, le taux d’humidité est de 5 100 %, autrement dit l’air est saturé et l’humidité se condense – p.ex., à l’intérieur. sur les murs, à l’extérieur, cela conduit à la formation de brouillard ou de précipitation. Un air intérieur normal à 22 °C avec 40 % d’humidité, que l’on trouve généralement confortable, possède – par exemple – un point de rosée d’environ 8 °C. Cette information est particulièrement utile lorsqu’il s’agit d’empêcher la formation de moisissures. Dès que la température des murs extérieurs, par exemple, atteint ou devient inférieure au point de rosée, l’humidité se dépose ; à long terme, cela peut conduire à la formation de moisissures. Remarques : La plage de température du point de rosée de l’hygromètre va de 0 °C à 50 °C. Si la température du point de rosée dépasse 50 °C, « HH.H » s’affiche ; si elle est inférieure à 0 °C, « LL.L » s’affiche. Représentation graphique de l’humidité des 12 dernières heures. Dans la représentation graphique, vous pouvez facilement lire la trace de l’humidité relative et le niveau perçu dans la pièce au cours des 12 dernières heures. Niveau perçu (indice de confort) Humidité relative Trop humide De 81% à 90% Humide De 61% à 80% Confortable De 41% à 60% Sec De 31% à 40% Trop sec De 20 % à 30% 6 6. Garantie WAAGEN-SCHMITT garantit une correction gratuite de défauts provenant du matériel ou de la fabrication, soit en réparant soit en échangeant pendant 3 ans à compter de la date d’achat. En cas de réclamation dans le cadre de la garantie, merci de retourner le thermo/hygromètre avec le reçu de votre revendeur, en précisant le motif de la réclamation. Veuillez remarquer : Lorsque les influences électromagnétiques sont élevées par exemple lorsqu’un dispositif radio fonctionne à proximité immédiate du thermo/hygromètre, elles peuvent provoquer des interférences avec l’affichage de l’indicateur. Lorsque l’influence perturbatrice s’arrête, le produit pourra de nouveau être utilisé comme prévu, même si une réactivation peut s’avérer nécessaire. Obligation légale d’informer sur la façon de se défaire des piles : Les piles ne sont pas des ordures ménagères. En tant que consommateur, vous êtes légalement tenu de retourner les piles. Vous pouvez déposer vos piles usagées au point de collecte publique de votre communauté ou partout où les piles du même type sont vendues. Veuillez remarquer : Ces symboles peuvent être trouvés sur les piles : Li Al Mn = Pile contenant du lithium = Pile contenant de l’alcali = Pile contenant du manganèse CR (Li) ; AA (Al, Mn) ; AAA (Al, Mn) Élimination des appareils électriques et électroniques usagés Ce symbole sur le produit ou son emballage indique que le produit ne doit pas être traité comme une ordure ménagère, mais doit être remis à un point de recyclage pour les appareils électriques et électroniques. De plus amples informations peuvent être obtenues auprès de votre communauté, des services d’élimination communaux ou de l’entreprise où vous avez acheté le produit. 7 Déclaration de conformité du fabricant Ce thermo/hygromètre est fabriqué en conformité avec les normes européennes harmonisées. Il est conforme aux dispositions des directives CE suivantes : - Directive CEM 2004/108/CE sur la compatibilité électromagnétique - Directive RoHS 2011/65/CE dans les versions applicables actuelles. Cette déclaration n’est plus applicable si des modifications sont apportées au thermo/hygromètre sans notre approbation. Hambourg, mai 2015 WAAGEN-SCHMITT GmbH Hammer Steindamm 27 - 29 D-22089 Hamburg Operating Manual_N_WS1500_FR_150513_REV001 8 Termometro/Igrometro con segnalazione di muffa Modello WS 1500 Manuale operativo 1. Display e Impostazioni 2. Caratteristiche 3. Dati tecnici 4. Per iniziare 5. Informazioni importanti 6. Garanzia Pagina 2 Pagina 3 Pagina 3 Pagina 3 Pagina 5 Pagina 7 Grazie per aver scelto questo prodotto di alta qualità realizzato dall’azienda Waagen-Schmitt. Avete acquistato un termometro/igrometro di comprovata qualità dotato del più elevato standard tecnico. Questo termometro/igrometro è uno strumento di misura ideale per controllare le caratteristiche del clima negli ambienti interni. Al primo utilizzo del dispositivo si raccomanda di leggere questo manuale operativo con estrema attenzione. Conservatelo in un luogo sicuro in modo che queste informazioni siano a portata di mano in caso di necessità. 1. Indicatori e Impostazioni Vista frontale Segnalazione muffa Indicatori del livello di comfort (gradevolezza) Punto di rugiada Visualizzazione in un intervallo di 12 ore dell’umidità relativa Indicatore Max. Umidità relativa Indicatore di batteria Temperatura Indicatore Min. Sensore a pulsante di attivazione allarme/punto di rugiada Indicatore della sveglia Sensore a pulsante Max./Min. Pulsante allarme on/off Pulsante a due posizioni °C/°F Segnale di allarme tramite LED rosso 2 2. - - 3. - 4. Caratteristiche Ampio schermo LCD Indicatore della temperatura ambiente interna Indicatore della temperatura del punto di rugiada Visualizzazione dell’umidità relativa negli interni Indicatore della temperatura da selezionare (in °C o °F) Indicatore max/min della temperatura e dell’umidità relativa Visualizzazione grafica dell’umidità relativa nelle ultime 12 ore Segnalazione di muffa con simbolo di avvertenza e segnale di allarme con LED lampeggiante; possibilità di selezionare i valori di soglia (60%, 65%, 70%, 75%) Allarme di umidità tramite simbolo di avvertimento e segnale di allarme con LED lampeggiante; possibilità di programmare i valori di soglia per una maggiore o minore umidità relativa (dal 30% al 95% in intervalli da 5%) Facile da leggere, indici di comfort differenziati tramite colori (livello di comfort/gradevolezza) Funzionamento mediante sensori a pulsante Dati tecnici Indicatore della temperatura Intervallo della temperatura del punto di rugiada Tolleranza Intervallo dell’umidità relativa Tolleranza Risoluzione della temperatura Risoluzione dell’umidità relativa Temperatura oltre l’intervallo ammesso: Temperatura del punto di rugiada oltre l’intervallo ammesso: Da 0 °C a +50 °C Da 0 °C a +50 °C +/- 1 °C Da 20% a 95% +/- 5% 0,1 °C 1% HH.H/LL.L HH.H/LL.L Per iniziare Aprire il vano batteria presente sulla parte posteriore del termometro/igrometro, inserire le batterie fornite in dotazione (2 unità da 1,5 V del tipo AAA) e chiudere nuovamente il vano batteria. Fare attenzione alla corretta polarità delle batterie (+/-). Il termometro/igrometro è pronto per l’uso. Impostare l’allarme di umidità 1. Per attivare l’allarme di umidità, premere e lasciare premuto il pulsante SET fino a quando verranno visualizzati contemporaneamente i simboli ALERT e S nella parte superiore del display; allo stesso tempo, l’indicatore dell’umidità lampeggerà. Premere, dunque, il pulsante S o T per impostare (in intervalli del 5%) la soglia maggiore di umidità. 2. Premere ancora una volta il pulsante SET. Verranno visualizzati ALERT e T nella parte inferiore del display mentre l’indicatore di umidità lampeggerà. 3 Premere il pulsante S o T per impostare (in intervalli del 5%) la soglia inferiore di umidità. 3. Premere il pulsante SET ancora una volta oppure attendere circa 10 secondi; l’indicatore ritornerà nuovamente nella normale modalità. 4. Al fine di attivare l’allarme di umidità premere una volta il pulsante ON.OFF. ALERT verrà visualizzato sul display 5. Non appena l’umidità diminuisce o aumenta rispetto ai valori impostati, lampeggeranno velocemente nello stesso tempo il simbolo T o S nonché il segnale di allarme contrassegnato dal LED rosso. 6. Per fermare il lampeggiamento del simbolo e del segnale di allarme premere un qualsiasi pulsante. 7. Per spegnere l’allarme dell’umidità premere una volta il pulsante ON.OFF. ALERT e S o T non verranno più visualizzati. Nota bene: La durata dell’allarme è di un minuto. Impostare la segnalazione di muffa 1. Per attivare la segnalazione di muffa, premere e lasciare premuto il pulsante T /°C/°F fino a quando verranno visualizzati contemporaneamente i simboli MOLD ALERT MOLD RISK nella parte superiore del display; allo stesso tempo, l’indicatore di umidità lampeggerà. Premere, dunque, il pulsante S o T per impostare la soglia di muffa maggiore con un valore del 60%, 65%, 70% o 75%. 2. Premere e lasciare premuto il tasto T /°C/°F oppure aspettare circa 10 secondi per ritornare alla normale modalità di visualizzazione. 3. Non appena l’umidità supera il valore di allerta muffa impostato, vi è rischio di formazione della muffa. I simboli MOLD ALERT MOLD RISK appaiono, dunque, sul display mentre contemporaneamente il segnale di allarme con LED rosso lampeggia (lentamente ogni 5 secondi). 4. Premere un qualsiasi pulsante per fermare il segnale di allarme con LED rosso. I simboli MOLD ALERT MOLD RISK rimangono visibili sul display fino a quando l’umidità misurata è inferiore rispetto al valore di soglia della muffa preimpostato. Il valore predefinito per la segnalazione di muffa è del 65%. Selezionare l’indicatore della temperatura (°C o °F) Per passare da un’unità di temperatura all’altra premere il pulsante °C/°F. 4 Leggere e reimpostare la registrazione della temperatura e dell’umidità. Per leggere la temperatura e l’umidità relativa in valori massimi o minimi dall’ultima volta in cui il sistema è stato reimpostato, premere una volta il rispettivo tasto MAX.MIN. Quando viene visualizzato il simbolo MAX è possibile leggere i valori massimi; di contro, quando viene visualizzato il simbolo MIN è possibile individuare i valori minimi. Quando i valori massimi sono visualizzati con MAX, è possibile reimpostare la registrazione; in questo modo, ha inizio una nuova registrazione premendo e lasciando premuto il pulsante MAX.MIN. Quando i valori minimi sono visualizzati con MIN, è possibile reimpostare la registrazione; in questo modo, ha inizio una nuova registrazione premendo e lasciando premuto il pulsante MAX.MIN. 5. Informazioni importanti In che modo l’umidità nuoce alla salute e all’ambiente domestico? L’umidità eccesiva negli interni promuove la crescita di organismi indesiderati. Mantenere il livello di umidità all’interno della casa nell’intervallo compreso tra il 30% e il 50% consente di prevenire la crescita di muffa, funghi e acari. Vivere in ambienti contaminati dalla muffa può danneggiare il nostro sistema immunitario, indebolire la resistenza alle allergie respiratorie e favorire le infezioni. L’aria eccessivamente secca negli ambienti interni può inaridire la pelle, irritare la gola e provocare sinusiti paranasali, oltre a contribuire alla diffusione di infezioni in queste aree. Durante una stagione asciutta oppure in inverno, quando l’aria degli interni è resa secca dai riscaldamenti, è possibile aumentare l’umidità relativa grazie a un umidificatore. L’aria degli interni che è eccessivamente secca può causare la contrazione e la spaccatura del legno e, in particolare, del legno sottile come quello utilizzato per la realizzazione di chitarre e violini. Se per un lungo lasso di tempo l’aria è estremamente secca, le travi solide in legno o gesso possono presentare delle spaccature. Un riscaldamento e una ventilazione attivi possono contribuire alla costituzione di un ambiente confortevole e salutare tutto da vivere. Informazioni sul punto di rugiada Il punto di rugiada è una misura utilizzata per determinare l’umidità dell’aria. È calcolato attraverso la relazione dell’umidità relativa con la temperatura. Definisce la temperatura in cui l’umidità dell’aria condensa. Più calda è l’aria, maggiore è il quantitativo di umidità che l’aria stessa è in grado di trasportare. Se il punto di rugiada e la temperatura coincidono perfettamente, l’umidità è del 100%, ovvero, l’aria è satura e l’umidità condensa (ad esempio, ciò 5 è visibile sulle pareti degli ambienti interni oppure all’esterno tale fenomeno determina la formazione di nebbia o precipitazioni). L’aria degli interni normalmente a 22°C e con il 40% di umidità – aspetto di solito gradevole – ha, ad esempio, un punto di rugiada di circa 8°C. Questa informazione è particolarmente importante per prevenire la formazione della muffa. Non appena la temperatura delle supposte pareti esterne raggiunge il punto di rugiada o è inferiore ad esso, verrà depositata l’umidità; a lungo andare ciò provoca la formazione della muffa. Nota bene: L’intervallo della temperatura del punto di rugiada dell’igrometro è contenuto tra 0°C e 50°C. Se la temperatura del punto di rugiada supera i 50°C, sul display verrà visualizzato“HH.H”; se, invece è inferiore a 0°C, “LL.L” apparirà sul display. Rappresentazione grafica dell’umidità delle ultime 12 ore. Nella rappresentazione grafica è possibile leggere facilmente la registrazione dell’umidità relativa e del livello percepito nell’ambiente nelle ultime 12 ore. Livello percepito (indice di comfort/gradevolezza) Umidità relativa Troppo umido Da 81% a 90% Umido Da 61% a 80% Gradevole Da 41% a 60% Secco Da 31% a 40% Troppo secco Da 20% a 30% 6 6. Garanzia WAAGEN-SCHMITT garantisce la modifica gratuita di prodotti con difetti risultanti dal materiale usato o difetti di fabbricazione mediante riparazione o sostituzione fino a 3 anni dalla data di acquisto. In caso di richiesta di garanzia, restituire il termometro/igrometro insieme al documento fiscale al rivenditore specificando il motivo di tale richiesta. Attenzione: In caso di forti influenze elettromagnetiche, ad esempio, quando è in funzione un dispositivo radio nell’immediata vicinanza al termometro/igrometro, può aver luogo un’interferenza che influenza i valori dell’indicatore. Conclusosi tale fenomeno, il prodotto può essere nuovamente utilizzato come previsto, anche se una riattivazione può risultare necessaria. Obbligo giuridico di informare sullo smaltimento delle batterie: Le batterie non costituiscono rifiuto domestico. In qualità di consumatori siete legalmente obbligati a restituire le batterie. È possibile consegnare le batterie usate al punto di raccolta pubblica del vostro territorio o laddove vengono vendute batterie dello stesso tipo. Attenzione: Sulle batterie è possibile trovare questi simboli: Li Al Mn = La batteria contiene litio = La batteria contiene alcalina = La batteria contiene manganese CR (Li); AA (Al, Mn); AAA (Al, Mn) Smaltimento di apparecchi elettrici ed elettronici usati Questo simbolo sul prodotto o sulla confezione indica che la bilancia non deve essere trattata come un normale rifiuto domestico, ma deve essere consegnata ad un punto di raccolta per il riciclaggio di apparecchi elettrici ed elettronici. Ulteriori informazioni sono disponibili nel vostro territorio di residenza, presso il servizio comunale o privato di smaltimento rifiuti. 7 Dichiarazione di conformità da parte del produttore Questo termometro/igrometro è stato prodotto in conformità delle norme europee armonizzate. Il prodotto è conforme alle disposizioni contenute nelle seguenti direttive dell’Unione Europea: - Direttiva CEM 2004/108/CE sulla compatibilità elettromagnetica - Direttiva RoHS 2011/65/CE nelle attuali versioni in vigore. La presente dichiarazione perde validità se vengono apportate modifiche non autorizzate allo statimetro. Amburgo, maggio 2015 WAAGEN-SCHMITT GmbH Hammer Steindamm 27 - 29 D–22089 Hamburg Operating Manual_N_WS1500_IT_150513_REV001 8 Thermo-/Vochtigheidsmeter met Schimmelwaarschuwing Model WS 1500 Handleiding 1. Display & Instellingen 2. Eigenschappen 3. Technische Gegevens 4. Starten 5. Belangrijke Informatie 6. Garantie Pagina 2 Pagina 3 Pagina 3 Pagina 3 Pagina 5 Pagina 7 Hartelijk bedankt voor het aanschaffen van dit kwaliteitsproduct van het Bedrijf Waagen-Schmitt. U hebt een thermometer/vochtigheidsmeter aangeschaft van de hoogste technische standaard en van bewezen kwaliteit. Deze thermometer/vochtigheidsmeter is een ideaal meetinstrument voor het controleren van de klimaatomstandigheden in uw huis. Lees deze gebruikshandleiding a.u.b. zorgvuldig door voordat u het apparaat voor het eerst in gebruik neemt en bewaar de instructies op een veilige plek zodat u deze informatie altijd bijdehand hebt wanneer u het nodig hebt. 1. Indicaties en Instellingen Vooraanzicht Schimmelwaarschuwing 12-uur weergave van de relatieve vochtigheidsgraad Indicaties comfortniveau Dauwpunt Temperatuur Indicator max. Rel. vochtigheidsgraad Batterijindicator Indicator min. Alarmindicator Alarm activeren/ sensortoets dauwpunt Sensortoets max./min. Alarm aan/uittoets °C/°F selectietoets Alarmsignaal rode LED 2 2. - - 3. - 4. Eigenschappen Extra grote LCD Indicator interne kamertemperatuur Indicator dauwpunttemperatuur Weergave van relatieve vochtigheidsgraad binnenshuis Selecteerbare temperatuurindicator, in °C of °F Indicatie van maximale/minimale temperatuur en relatieve vochtigheidsgraad Grafische weergave van de relatieve vochtigheidsgraad van de afgelopen 12 uur Schimmelwaarschuwing met alarmsymbool en knipperend LED-alarmsignaal, ook met selecteerbare drempelwaarden (60%, 65%, 70%, 75%) Vochtigheidwaarschuwing met alarmsymbool en knipperend LED-alarmsignaal, ook met programmeerbare drempelwaarden voor de hogere/lagere relatieve vochtigheidsgraad (30 - 95% in 5% intervallen) Eenvoudig te lezen, gekleurde comfortindex (comfortniveau) Bediening d.m.v. sensortoetsen Technische Gegevens Temperatuurindicator Bereik van dauwpunttemperatuur Tolerantie Bereik van relatieve vochtigheidsgraad Tolerantie Temperatuurresolutie Resolutie van relatieve vochtigheidsgraad Temperatuur buiten het toegestane bereik: Dauwpunttemperatuur buiten het toegestane bereik: 0 °C tot +50 °C 0 °C tot +50 °C +/- 1 °C 20% tot 95% +/- 5% 0,1 °C 1% HH.H/LL.L HH.H/LL.L Starten Open de batterijhouder op de achterzijde van de thermometer/vochtigheidsmeter, installeer de meegeleverde batterijen (2 x 1,5V AAA) en sluit de batterijhouder vervolgens weer. Let hierbij a.u.b. op de juiste polariteit van de batterijen (+/-). Uw thermometer/vochtigheidsmeter is nu gereed. Het vochtigheidsalarm instellen 1. Activeer het vochtigheidsalarm door de toets SET ingedrukt te houden totdat de symbooltjes ALERT en S gelijktijdig boven in de display verschijnen en de vochtigheidindicator knippert. Druk nu op de toets S of T om de hogere vochtigheidslimiet in te stellen (in 5% intervallen). 2. Druk nu nog een keer op de toets SET, ALERT en T zullen onder in de display verschijnen terwijl de vochtigheidindicator begint te knipperen. Druk nu 3 op de toets S of T om de lagere vochtigheidslimiet in te stellen (in 5% intervallen). 3. Druk nogmaals op de toets SET of wacht ca. 10 seconden; de indicator zal weer terugkeren naar de normale modus. 4. Druk eenmaal op de toets ON.OFF om het vochtigheidsalarm te activeren. ALERT zal op de display verschijnen. 5. Zodra de vochtigheidsgraad buiten de ingestelde waarden valt, zullen het symbooltje T of S en gelijkertijd het rode LED-alarmsignaal (snel) knipperen. 6. Druk op een willekeurige toets om het knipperende symbooltje en alarmsignaal te stoppen. 7. Druk eenmaal op de toets ON.OFF om het vochtigheidsalarm uit te schakelen. ALERT en S of T zullen niet meer worden weergegeven. Opmerkingen: De tijdsduur van het alarm is één minuut. De schimmelwaarschuwing instellen 1. Activeer de schimmelwaarschuwing door de toets T/°C/°F ingedrukt te houden totdat de symbooltjes MOLD ALERT MOLD RISK gelijkertijd boven in de display verschijnen en de vochtigheidsindicator begint te knipperen. Druk nu op de toets S of T om de hogere schimmellimiet in te stellen op de waarde 60%, 65%, 70% of 75%. 2. Houd de toets T/°C/°F ingedrukt of wacht ca. 10 seconden om terug te keren naar de normale weergavemodus. 3. Zodra de vochtigheidsgraad de ingestelde waarde van de schimmelwaarschuwing overschrijdt, bestaat er een risico op schimmelvorming. De symbooltjes MOLD ALERT MOLD RISK zullen vervolgens op de display verschijnen, terwijl het rode LED-alarmsignaal gelijkertijd begint te knipperen (traag – elke 5 seconden). 4. Druk op de willekeurige toets om het rode LED-alarmsignaal te stoppen. De symbooltjes MOLD ALERT MOLD RISK blijven aanwezig op de display totdat de gemeten luchtvochtigheid weer verlaagt tot onder de ingestelde drempelwaarde van de schimmelwaarschuwing. De standaard ingestelde fabriekswaarde voor de schimmelwaarschuwing is 65%. De temperatuurindicator selecteren (°C of °F) Druk op de toets °C/°F om te wisselen tussen temperatuureenheden °C en °F. 4 De geregistreerde maximale/minimale temperatuur en vochtigheidsgraad aflezen en terugstellen. Om de maximale en minimale temperatuur en relatieve vochtigheidsgraad te lezen sinds de laatste keer dat u het systeem hebt teruggesteld, drukt u eenmaal op de corresponderende toets MAX.MIN. Wanneer het symbooltje MAX wordt weergegeven, leest u de maximale waarden af en wanneer het symbooltje MIN wordt weergegeven, leest u de minimale waarden af. Wanneer de maximale waarden worden weergegeven door MAX, kunt u de registratie terugstellen en een nieuwe registratie starten door de toets MAX.MIN ingedrukt te houden. Wanneer de minimale waarden worden weergegeven door MIN, kunt u de registratie terugstellen en een nieuwe registratie starten door de toets MAX.MIN ingedrukt te houden. 5. Belangrijke Informatie Hoe beïnvloedt de luchtvochtigheidsgraad uw gezondheid en uw huis? Een te hoge vochtigheidsgraad binnenshuis bevordert de groei van ongewenste organismes. Door de luchtvochtigheidsgraad binnenshuis binnen het bereik van 30% tot 50% te behouden, helpt u de groei van schimmel, meeldauw en huismijten tegen te gaan. Door in met schimmel geïnfecteerde kamers te blijven, kunt u uw immuunsysteem aantasten, uw weerstand tegen ademhalingsallergieën verzwakken en sneller infecties oplopen. Een te hoge binnenlucht kan de huid uitdrogen, de keel en neusholtes irriteren en deze delen gevoeliger maken voor infecties. In droge klimaten of in de winter, wanneer de binnenlucht droger wordt gemaakt door verwarming, kan de relatieve luchtvochtigheid worden verhoogd d.m.v. een luchtbevochtiger. Een te hoge binnenlucht kan zelfs hout laten samentrekken en barsten, voornamelijk dun hout zoals gebruikt voor de fabricage van gitaren en violen. Het is zelfs mogelijk dat massief houten balken of pleister barst tijdens langdurige extreme droogte. Actieve verwarming of ventilatie kan u helpen een comfortabele en gezonde leefomgeving te creëren. Informatie over het dauwpunt Het dauwpunt is een maat voor het uitdrukken van de hoeveelheid vocht in de lucht en wordt berekend door de relatieve vochtigheidsgraad te vergelijken met de temperatuur. Het bepaalt de temperatuur waarop vocht in de lucht condenseert. Hoe warmer de lucht, hoe meer vocht het kan bevatten. Als het dauwpunt en de temperatuur precies gelijk zijn aan elkaar, is de vochtigheidsgraad 100%, d.w.z. 5 de lucht is verzadigd en het vocht condenseert – bijv. binnenshuis op muren, buitenshuis leidt dit tot de vorming van mist of neerslag. Een normale binnenlucht bij 22°C en met 40% vochtigheidsgraad, wat gewoonlijk als comfortabel wordt beschouwd, heeft bijvoorbeeld een dauwpunt van ca. 8°C. Deze informatie is voornamelijk nuttig ter voorkoming van schimmelvorming. Zodra de temperatuur van bijvoorbeeld buitenmuren het dauwpunt bereikt of verlaagt tot onder dit punt, zal er vocht worden afgezet; dit kan na verloop van tijd leiden tot schimmelvorming. Opmerkingen: Deze vochtigheidsmeter heeft een temperatuurbereik van 0°C tot 50°C voor het dauwpunt. Als de dauwpunttemperatuur hoger is dan 50°C, verschijnt “HH.H” op de display; als de temperatuur lager is dan 0°C, zal “LL.L” op de display verschijnen. Grafische vertegenwoordiging van de vochtigheidsgraad van de afgelopen 12 uur. U kunt in deze grafische vertegenwoordiging zeer eenvoudig de registratie van de relatieve vochtigheidsgraad en het waargenomen niveau in de kamer van de afgelopen 12 uur aflezen. Waargenomen niveau (comfortindex) Relatieve vochtigheidsgraad Te nat 81% tot 90% Nat 61% tot 80% Comfortabel 41% tot 60% Droog 31% tot 40% Te droog 20% tot 30% 6 6. Garantie WAAGEN-SCHMITT garandeert de kosteloze correctie van defecten als gevolg van materiaal- of fabricagefouten middels reparatie of inwisseling, binnen 3 jaar vanaf de aankoopdatum. In het geval van een claim onder garantie, kunt u de thermo-/vochtigheidsmeter terugbrengen naar het verkooppunt, samen met het aankoopbewijs en de reden voor uw claim. Opgelet a.u.b.: De indicatiewaarden kunnen worden verstoord door krachtige elektromagnetische invloeden, bijvoorbeeld wanneer u de thermo/vochtigheidsmeter te dicht in de buurt van radioapparatuur gebruikt. Nadat de verstorende bron is gestopt, kan het product weer op normale wijze worden gebruikt, al moet deze mogelijk opnieuw worden ingeschakeld. Wettelijk verplichte informatie over het afvoeren van batterijen: Batterijen behoren niet tot huishoudelijk afval. U bent als consument wettelijk verplicht batterijen in te zamelen. U kunt uw oude batterijen inleveren bij openbare inzamelpunten in uw gemeenschap of op willekeurige plaatsen waar batterijen van hetzelfde type worden verkocht. Opgelet a.u.b.: Batterijen kunnen zijn gemarkeerd met de volgende symbolen: Li Al Mn = Batterij bevat lithium = Batterij bevat alkali = Batterij bevat mangaan CR (Li); AA (Al, Mn); AAA (Al, Mn) Afvoeren van elektrische en elektronische apparatuur Dit symbool op het product of op de verpakking ervan betekent dat het product niet als normaal huishoudelijk afval mag worden behandeld, maar echter moet worden ingeleverd bij een inzamelpunt voor de recycling van elektrische en elektronische apparatuur. Nadere inlichtingen zijn verkrijgbaar in uw gemeenschap, bij gemeentelijke diensten voor afvalverwerking of in de winkel waar u het product hebt aangeschaft. 7 Conformiteitverklaring van de fabrikant Deze thermo-/vochtigheidsmeter is gefabriceerd in overeenstemming met de geharmoniseerde Europese richtlijnen. Dit product voldoet aan de bepalingen van de volgende EC-richtlijnen: - EMC Richtlijn 2004/108/EC m.b.t. elektromagnetische compatibiliteit - RoHS-richtlijn 2011/65/EC in de momenteel geldige versies. Deze verklaring is niet langer geldig zodra dit product zonder onze goedkeuring wordt gemodificeerd. Hamburg, mei 2015 WAAGEN-SCHMITT GmbH Hammer Steindamm 27 - 29 D-22089 Hamburg Operating Manual_N_WS1500_NL_150513_REV001 8
