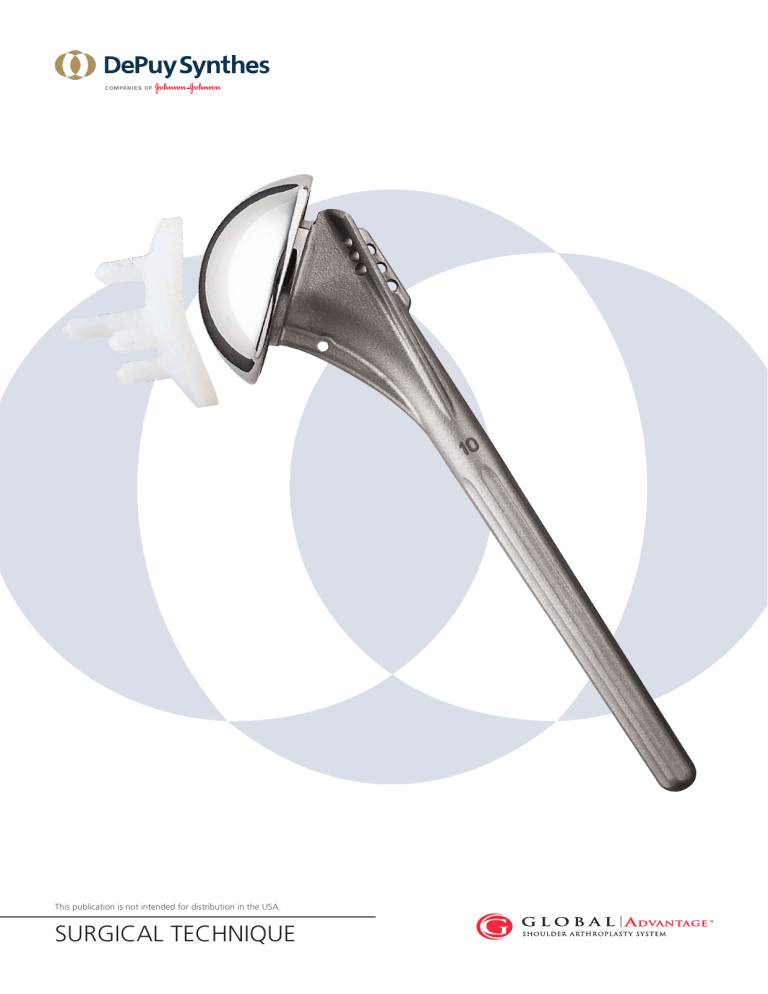
This publication is not intended for distribution in the USA. SURGICAL TECHNIQUE CONTENTS Design Rationale The Glenoid The GLOBAL ADVANTAGE™ Humeral Body The GLOBAL ADVANTAGE Humeral Head The Technique 1 1 2 2 2 Surgical Technique Patient Positioning Surgical Incision Incision Pectoralis Major Tendon Release Anterior Humeral Circumflex Vessels Management Nerve Identification Musculocutaneous Nerve Axillary Nerve Subscapularis Tendon Release Capsule Release and Humeral Head Resection Humeral Head Resection Technique for Head Removal Using the Intramedullary Humeral Resection Guide Sizing the Resected Humeral Head Medullary Canal Preparation and Broaching the Humerus Medullary Canal Reaming Using the Body Sizing Osteotome Broaching the Humerus Removal of Osteophytes Glenoid Preparation Pegged Glenoid Trial Keeled Glenoid Trial Humeral Head Trials Use of the Eccentric Trial Heads Glenoid Prosthesis Insertion Pegged Glenoid Insertion Keeled Glenoid Insertion Attaching the Head to the Humeral Prosthesis Seating the Standard Head Seating the Eccentric Humeral Head Insertion of the Humeral Head/Stem Assembly Removal of the Prosthetic Humeral Head Removal of the Cemented Humeral Body Joint Reduction and Repair of the Subscapularis Tendon Wound Closure 3 3 4 4 5 5 6 6 6 7 8 8 10 12 13 13 14 15 15 16 18 19 20 20 22 22 23 24 24 24 25 26 26 26 28 Postoperative Protocol 29 DePuy Synthes GLOBAL ADVANTAGE Surgical Technique ANATOMIC SHOULDER ARTHROPLASTY Frederick A. Matsen, III, MD Charles A. Rockwood, Jr., MD Design Rationale The multiple sizes of the glenoids, humeral bodies and heads allow the GLOBAL ADVANTAGE Shoulder System to be used worldwide. Its design is based on the detailed investigations of the structure and mechanics of normal and prosthetic glenohumeral joints conducted at the University of Texas at San Antonio, University of Washington, University of Pennsylvania and DePuy Synthes, Warsaw, Indiana. The challenges encountered by shoulder arthroplasty surgeons include surgical exposure, soft tissue balancing and component fixation. The instruments, technique and components of this arthroplasty system are designed to address these challenges. The Glenoid In a glenohumeral arthroplasty, the surgeon seeks to restore the glenoid articulating surface with minimal compromise of joint volume and glenoid bone stock. Overstuffing the joint (using prostheses that are bigger than the amount of bone removed) can contribute to impaired range of motion, loss of bone stock and the compromise of support provided to the component. The fit of the GLOBAL® glenoid component to the bone minimises the amount of bone cement needed. Direct support of the component by bone reinforces component stability. Specialised techniques and instrumentation, including retractors, straight and angled drill shafts and reamers, facilitate the exposure, orientation and preparation of the glenoid. The combination of custom spherical reaming of the bony surface and five-peg or keel fixation provides excellent stability for the component with minimal sacrifice of bone stock. Laboratory research indicates that having the diametral curvature of the glenoid slightly greater than that of the humeral head offers the advantages of enabling translation and shock absorption without loading the glenoid component rim. For this reason, the surface geometry of all GLOBAL glenoids are designed with a 6 mm larger diametral curvature than the corresponding humeral head. This degree of diametral “mismatch” was selected after extensive investigation of the mechanics of the normal joint and the mechanical properties of prosthetic materials. The GLOBAL ADVANTAGE Humeral Body The GLOBAL ADVANTAGE humeral component achieves versatility through its two parts: the body and the head. Through extensive cadaveric evaluation, the body was designed to optimise the fit and fill of the proximal humerus. From this evaluation, a family of humeral body sizes was designed to fit the wide range of humeral canals. A total of six body sizes are available with stem diameters ranging from 6 to 16 mm. The humeral body is constructed of high strength titanium alloy; that affords exceptional biocompatibility. Proper fit in the humeral canal aids in proper varus-valgus alignment. Proper fit in the metaphysis, combined with the collar, provides stability against subsidence. The four fins provide additional rotational control. A system of humeral cutting and broaching instruments helps achieve optimal alignment and stability with minimal bone resection. The GLOBAL ADVANTAGE Humeral Head The GLOBAL ADVANTAGE shoulder offers a full range of 15 standard and 8 eccentric humeral head components that fit all body configurations. When impacted on the humeral body, the GLOBAL ADVANTAGE humeral heads fit over the collar. This feature is designed to optimise the articulating surface area for a close anatomic replacement. The eccentric heads are designed to ensure complete coverage of the cut surface of the proximal humerus and maintain the head 5 to 10 mm above the top of the greater tuberosity. This is an important feature since proper selection of the head diameter and neck length is critical in balancing the soft tissue. The GLOBAL ADVANTAGE humeral head is constructed of cobalt chrome alloy, that provides superior wear characteristics. The head is joined to the body by a reverse taper lock. By having the stem of this taper lock on the humeral head, the surgeon is afforded optimal working space in the joint after the humeral body has been implanted. This feature is particularly valuable in the revision of a hemiarthroplasty to a total arthroplasty. GLOBAL ADVANTAGE Surgical Technique DePuy Synthes 1 The Technique Recognising that a successful shoulder arthroplasty is critically dependent on soft tissue balancing, this document provides a detailed guide to the techniques of tendon lengthening and capsular releases, that are integral parts of this procedure. These steps cannot be effected with jigs and guides, but rather require an understanding of the principles of shoulder mechanics. With the aim that each shoulder arthroplasty is adapted to the patient’s combination of soft tissue and bone anatomy, the system is designed to maximise the surgeon’s flexibility in matching a wide variety of anatomic requirements. Because patients have high expectations of the function and durability of the arthroplasty, a premium has been placed on secure fixation, conservation of bone and optimisation of mechanics. Surgical technique is a critical variable in the success of any arthroplasty; this document seeks to optimise surgical technique through detailed technique descriptions and advanced instrumentation. 2 DePuy Synthes GLOBAL ADVANTAGE Surgical Technique SURGICAL TECHNIQUE Charles A. Rockwood, Jr., MD Patient Positioning Place the patient in a semi-Fowler position on the operating table (Fig. 1). Remove the standard headrest portion of the table and replace it with a special headrest such as the Mayfield or the McConnell (McConnell, Greenville, TX). Position the patient so that the involved shoulder extends over the top corner of the table (Figs. 1, 2 and 3). Secure the patient’s head with tape. Drape to isolate anesthesia equipment from sterile field. Special headrest Figure 1 Figure 2 Figure 3 GLOBAL ADVANTAGE Surgical Technique DePuy Synthes 3 SURGICAL INCISION Musculocutaneous and Axillary Nerve Identification and Pectoralis Major and Subscapularis Tendon Release Incision Make an incision running from the clavicle over the top of the coracoid down the anterior aspect of the arm (Figs. 4 and 5). Once the incision has been made, locate the cephalic vein on the deltoid muscle near the deltopectoral interval (Fig. 6). The cephalic vein is usually intimately associated with the deltoid because there are many feeders from the deltoid into the cephalic vein. For this reason, it is recommended that the vein be taken laterally with the deltoid muscle. Clamp and tie feeders coming from the region of the pectoralis major muscle, allowing retraction of the deltoid with the vein laterally. Free the deep surface of the deltoid from the underlying tissues, from its origin on the clavicle down to its insertion in the humeral shaft. To obtain more exposure, it may be necessary to partially free the insertion of the deltoid from the humeral shaft, but it rarely is necessary to release the deltoid from the clavicle. Figure 4 When the anterior margin of the deltoid has been completely freed from its origin to its insertion, especially along its deep surface, abduct and externally rotate the arm, which will allow the deltoid to be gently retracted laterally with two Richardson retractors. Medially retract the conjoined tendon. It is not necessary to release the conjoined tendon or to divide the coracoid process for additional exposure. Cephalic Vein Figure 5 Cephalic Vein Figure 6 4 DePuy Synthes GLOBAL ADVANTAGE Surgical Technique Pectoralis Major Tendon Release Release the upper 25 percent of the pectoralis major tendon from its insertion on the humerus with an electro-cautery cutting blade. This will aid in the exposure of the inferior aspect of the joint (Fig. 7). Richardson retractor If the patient has marked internal rotation contracture, release most of the pectoralis major tendon from its insertion. This tendon release should not be repaired at the completion of the operation since it will limit external rotation postoperatively. Pectoralis major tendon Figure 7 Anterior Humeral Circumflex Vessels Management Isolate, clamp and ligate or coagulate the anterior humeral circumflex vessels lying across the anterior/ inferior surface of the subscapularis tendon (Fig. 8). Anterior humeral circumflex artery & vein Figure 8 GLOBAL ADVANTAGE Surgical Technique DePuy Synthes 5 NERVE IDENTIFICATION Musculocutaneous Nerve It is important to identify the musculocutaneous and axillary nerves. Palpate the musculocutaneous nerve as it comes from the plexus into the medial and posterior aspect of the conjoined tendon (Fig. 9). Usually, the nerve penetrates the muscle approximately 4 to 5 cm - or - 3.8 to 5.1 cm. down from the tip of the coracoid, but in some instances the nerve has a higher penetration into the conjoined muscle tendon unit. Remember the proximity of this nerve to the tendon during the retraction of the conjoined tendon. Coracoid process Conjoined tendon Musculocutaneous nerve Figure 9 Axillary Nerve Locate the all-important axillary nerve by passing the volar surface of the index finger down along the anterior surface of the subscapularis muscle (Fig. 10). Rotate and hook finger anteriorly to identify the axillary nerve (Fig. 11). Occasionally, secondary to previous dislocations, scarring and adhesions, the nerve will be plastered onto the anterior surface of the subscapularis and is difficult to locate. When this occurs, pass a periosteal elevator along the anterior surface of the muscle to create an interval between the muscle and the nerve. Always identify the axillary nerve and carefully retract it out of the way, especially during the critical steps of releasing the subscapularis tendon and resecting the anterior/inferior capsule. A Scoffield retractor can be used for protecting the nerve. Axillary nerve Figure 10 Figure 11 6 DePuy Synthes GLOBAL ADVANTAGE Surgical Technique SUBSCAPULARIS TENDON RELEASE If when under anesthesia the shoulder has zero degrees or more of external rotation, release the subscapularis tendon from its insertion on the lesser tuberosity (Fig. 12) or divide the tendon. We believe that the ultimate repair of the tendon back to bone is stronger than a tendon to tendon repair. We prefer to free the tendon from the underlying thickened capsule and continue to free up the tendon until it is clear of any adhesions from the back of the coracoid process and from the capsule as it attaches on the anterior glenoid rim. This process requires that the subscapularis muscle tendon unit be released 360 degrees around its circumference. During this dissection, protect the axillary nerve as it crosses the inferior portion of the muscle tendon unit. It is important to have a free, dynamic and functioning subscapularis muscle tendon unit at the time of its repair. Subscapularis tendon Biceps tendon Figure 12 At the time of closure, repair the tendon back to the cut surface of the neck or humerus using 1 mm nonabsorbable tape. This will allow 40 degrees or more of external rotation of the arm (Fig. 13). If the shoulder has minus 20 degrees of external rotation or less, perform a coronal Z-plasty to lengthen the tendon (Figs. 14 and 15). Each centimeter of tendon lengthening will equal approximately 20 degrees of additional external rotation. When the coronal Z-plasty procedure is performed, include the thickened capsule in its repair for additional strength. 1 mm nonabsorbable tape Glenohumeral joint superior view Figure 13 Figure 14 Figure 15 GLOBAL ADVANTAGE Surgical Technique DePuy Synthes 7 CAPSULE RELEASE AND HUMERAL HEAD RESECTION Occasionally, the capsule will be released from the neck of the humerus with the subscapularis tendon. If that occurs, dissect the anterior capsule from the posterior surface of the subscapularis to maintain a free, dynamic subscapularis tendon. Use a Scoffield retractor to retract the previously identified axillary nerve anteriorly/ inferiorly away from the inferior capsule. Externally rotate the arm, which will place tension on the capsule, and then release the capsule from its attachment to the humerus all the way down inferiorly to at least the six o’clock position (Fig. 16). Failure to release the capsule all the way down inferiorly will make it very difficult to bring the head up and out of the glenoid fossa. Use either a knife, electro-cautery blade or scissors to release the capsule. Once the capsule has been released, pass a small bone hook around and under the neck of the humerus (Fig. 17). Place the large plastic Darrach retractor in the joint and use it as a skid. Use the bone hook to deliver the head out of the glenoid fossa so that the arm can be extended and externally rotated away from the side of the operating table (Figs. 18 and 19). Capsule Scoffield retractor protecting axillary nerve Figure 16 Richardson retractor Bone hook Note: Remember to release the capsule all the way down inferiorly to the six o’clock position and sometimes a bit further. Failure to complete the inferior capsular release will make delivery of the proximal humerus up and out of the wound quite difficult. The combination of lifting with the bone hook and prising with the large Darrach retractor, along with externally rotating and extending the arm away from the side of the table, will produce adequate exposure. Humeral Head Resection Preoperative evaluation of the humerus with templates helps determine the size of the prosthesis and level of head resection. The resection of the humeral head is a very critical part of the procedure. When there is no posterior glenoid erosion, remove the humeral head with the arm in 20 to 25 degrees of external rotation. Flex the elbow 90 degrees and then externally rotate the arm 20 to 25 degrees (Fig. 20). Darrach retractor Scoffield retractor Figure 17 Figure 18 Figure 19 20-25˚ Determine the varus-valgus angle of the head to be removed by using the humeral osteotomy template. Figure 20 8 DePuy Synthes GLOBAL ADVANTAGE Surgical Technique Curved crego retractor Place the template along the anterior aspect of the arm parallel to the shaft of the humerus, and mark the angle at which the head will be removed with an osteotome or the electro-cautery blade (Fig. 21). The plastic template prevents arcing from the electro-cautery knife. Use of the template ensures the proper seating of the prosthesis on the bone (Fig. 22). In many instances, the inferior portion of the mark will be above the inferior osteophyte of the flattened and deformed head of the humerus. If the resection is made in line with an articular surface which is in varus, support for the collar of the prosthesis will be compromised (Fig. 23). The superior lateral portion of the mark should be at the junction of the articular surface with the attachment of the rotator cuff on the greater tuberosity (Fig. 24). Scoffield retractor Template If the preoperative axillary lateral x-ray and/or the CAT scan demonstrates posterior glenoid erosion, several options are available. If the glenoid is concentric and consists of dense cortical bone and has only five to 10 degrees of posterior slope as compared to the normal glenoid, resect the head with the arm externally rotated only 10 to 15 degrees. Compensate for some of the posterior glenoid erosion by decreasing the amount of external rotation of the arm at the time of head removal. If the posterior glenoid slope is 25 degrees or more and the glenoid has a flat surface and the head is posteriorly subluxated, ream the glenoid back to normal version and use a glenoid prosthesis. Glenoid replacement will usually be required when there is anterior or posterior erosion or flattening of the glenoid fossa. In this situation of posterior glenoid erosion, it will be necessary to use air burrs and rongeurs to remove the prominent anterior lip of the glenoid before the glenoid reamers can be used. Figure 21 Cut A (correct) Figure 22 Cut B (incorrect) Figure 23 Curved crego retractor Before removal of the head, some surgeons recommend removing the osteophytes from the head and neck of the humerus, which assists with better sight of the anatomic neck of the humerus. Before the oscillating saw or osteotome is used to remove the head, protect the biceps tendon and the insertions of the supraspinatus, infraspinatus and teres minor into the proximal humerus. Pass the modified Crego retractor under the biceps and curl it around posteriorly to protect these structures during humeral head removal (Fig. 24). With the large Darrach retractor in the joint, use a sagittal power saw or osteotome to remove the humeral head at the predetermined angle. Scoffield retractor Figure 24 GLOBAL ADVANTAGE Surgical Technique DePuy Synthes 9 TECHNIQUE FOR HEAD REMOVAL USING THE INTRAMEDULLARY HUMERAL RESECTION GUIDE An alternative humeral resection guide has been developed to remove the head. It requires a more extensive exposure, especially the release of the inferior capsule, to be able to deliver the proximal part of the humerus up and out of the wound (Fig. 25). Create a pilot hole at the top of the humerus, in line with the long axis of the humerus just lateral to the articular surface of the head of the humerus and medial to the attachment of the rotator cuff. Use a 6 mm reamer to ream the intramedullary canal under hand power, followed by subsequent reamers (i.e., 8 mm, 10 mm, 12 mm, etc.) until one of the reamers begins to bite into the cortical bone (Fig. 26). Pilot hole Figure 25 6 mm reamer Figure 26 10 DePuy Synthes GLOBAL ADVANTAGE Surgical Technique Pass the reamer down the intramedullary canal until the prominent circular mark on the reamer is at the level of the pilot hole. Leave the reamer in place and clamp the resection guide around the reamer shank above the cutting flutes (Fig. 27). Tighten the resection guide to the reamer using the circular locking nuts. There are two saw cutting guides that are marked for use with either the right or the left shoulder. Insert the appropriate guide into the slot of the resection guide and adjust it up and down to the level where the head will be removed, which will be at the top of the varus-valgus angle of the 135 degrees (Fig. 28). The superior portion of the cut will be in the sulcus between the articular surface of the head of the humerus and the most medial aspect of the greater tuberosity. In order to remove the head in the proper amount of retroversion, externally rotate the forearm until it is in alignment with the version rod on the saw cutting guide (Fig. 29). The rod is in 30 degrees of external rotation. If more or less retroversion is required, rotate the forearm in relation to the rod position. Before the saw blade (33 x 0.8 mm) is placed along the flat surface of the saw cutting guide, drill two pins (3.2 mm) (0.125 in.) through the saw guide and into the underlying bone that will stabilise the guide (Fig. 28). Resection guide Locking nuts Proper depth mark when using long stem Proper depth mark when using standard length stem Resection guide Figure 27 Stabilising Cutting guide Figure 28 30ϒ Figure 29 GLOBAL ADVANTAGE Surgical Technique DePuy Synthes 11 Place the oscillating saw blade along the flat surface of the guide and cut the bone down to the level of the retained intramedullary reamer (Fig. 30). Then, two options exist. First, the entire intramedullary reamer, cutting guide, pins and saw guide can be removed and the saw cut completed freehand down through the remaining neck of the humerus. The second option is to remove the intramedullary reamer and resection guide clamp but leave the guide in place so that the blade can continue to pass along the flat surface of the guide (Fig. 31). Note: Following removal of the head, be sure to pass the reamer down the intramedullary canal until the prominent circular mark on the reamer is at the cut surface of the bone. Figure 30 Figure 31 15 8 1 1 2 15 8 1 1 2 Sizing the Resected Humeral Head Use the two templates available in the set of instruments to measure the resected head diameter and thickness (Fig. 32). One will measure the common sizes of 44, 48 and 52 mm heads and the second will measure the 40 and 56 mm heads. After selecting the humeral head component, place the humeral head on the back table to remove the cancellous bone. Use the cancellous graft later in the procedure if impaction bone grafting is used for the humeral stem. In the case of a total shoulder arthroplasty (TSA), the humeral head size (40, 44, 48, 52 and 56 mm), but not the height, is determined by the glenoid size (see page 16). GLOBAL ADVANTAGE Heads Figure 32 12 DePuy Synthes GLOBAL ADVANTAGE Surgical Technique MEDULLARY CANAL PREPARATION AND BROACHING THE HUMERUS Medullary Canal Reaming Once the head has been removed, place a large Darrach retractor in the joint and place a bone hook under the neck of the humerus. Externally rotate and extend the arm on the side of the table, that will deliver the proximal humerus up and out of the incision (Fig. 33). Unless the arm can be externally rotated and extended away from the side of the table (Figs. 34 and 35), it is very difficult to insert the medullary canal reamers as well as the body sizing osteotome and the prosthesis. Darrach retractor Note: The primary reason for having difficulty in delivering and exposing the proximal humerus up and out of the incision is the failure to divide the inferior capsule as described in the section on capsular release. Using the 6 mm reamer, make a pilot hole into the cancellous surface of the bone eccentrically and as superior as possible so that the reamer will pass directly down into the intramedullary canal (Figs. 36 and 37). Perform the reaming of the medullary canal by using the T-handle on the reamer. Power reaming of the canal should not be done as it may remove more bone than necessary. When using the standard length of prosthesis, pass the reamer down the intramedullary canal until the prominent circular mark on the reamer is at the level of the cut surface of bone. When using the long stem prosthesis, pass the entire length of the cutting flutes down the intramedullary canal. Figure 33 Figure 34 Following passage of the 6 mm reamer down the canal, continue sequential reaming until a reamer begins to bite on cortical bone of the intramedullary canal of the humerus. The final reamer size chosen will determine the stem size of the body sizing osteotome, final broach and implant. For example, if the 12 mm reamer begins to secure purchase in the intramedullary cortical bone, use a 12 mm humeral trial and final component. Figure 35 Proper depth mark when using standard length stem Osteophyte Figure 36 Figure 37 GLOBAL ADVANTAGE Surgical Technique DePuy Synthes 13 Using the Body Sizing Osteotome Next, select the body sizing osteotome of the appropriate size. As in the previous example, if reaming stopped at 12 mm, insert the 12 mm body sizing osteotome into the reamed hole (Fig. 38). To assemble the osteotome collar on to the osteotome, hold the collar at a 45-degree angle with the word “top” clearly visible, align the fins to the collar and slide the collar onto the osteotome (Fig. 39). Use the body sizing osteotome collar to determine proper rotation prior to cutting the bone (Fig. 40). When the lateral fin on the osteotome touches the greater tuberosity, slide the collar down the osteotome and rotate the entire unit until the collar lies flat on the cut bone surface (Figs. 41 and 42). Slide the collar above the fins before driving down the osteotome. If the collar is not used, simply ensure that the anterior and posterior fin tips of the body sizing osteotome contact the cut surface simultaneously (Fig. 43). It is only necessary to drive the body sizing osteotome down a few millimeters into the cancellous bone, just enough to outline the amount of bone to be removed. Driving the body sizing osteotome down into the cancellous bone does three things. First, it cuts out the appropriate amount of bone to receive the lateral fin of the broach in the area of the greater tuberosity. Second, it creates the anterior, posterior and medial fin tracks. Lastly, it outlines the amount of bone that will need to be removed before seating the broach and the prosthesis. Osteophyte 45ϒ Figure 38 Figure 39 Body sizing osteotome Osteophyte Figure 40 Figure 41 Use a small osteotome to remove the cancellous bone prior to inserting the broach (Fig. 44). Figure 43 Anterior and posterior fin tips touch resection simultaneously. 14 DePuy Synthes GLOBAL ADVANTAGE Surgical Technique Figure 42 Broaching the Humerus The correct stem and body size has already been determined from reaming and using the body sizing osteotome. For example, if a 12 mm intramedullary canal reamer and body sizing osteotome were used, use a 12 mm broach. Attach the driver/extractor to the broach for this part of the procedure (Figs. 45 and 46). While driving the broach into place, carefully align the fins on the broach to the fin tracks created by the body sizing osteotome. The final humeral prosthesis is approximately 1 mm larger than the corresponding broach size to obtain a press-fit. Seat the broach until the collar sits flush on the cut surface of the neck of the humerus. Do not drive the collar down into the cancellous bone. Note: If the broach collar does not sit flush on the cut surface, do not try to aggresively drive it down. Preferably, remove the broach and then pass the reamer deeper into the canal. Then seat the broach again. Open Open Closed Closed Figure 45 Figure 46 Removal of Osteophytes With the broach in place, remove the osteophytes extending from around the cut surface of the neck of the humerus using an osteotome and/or rongeurs (Fig. 47). During preparation of the glenoid, we recommend leaving the broach in place to protect the proximal humerus from compression fracture or deformation by the retractor. Figure 47 GLOBAL ADVANTAGE Surgical Technique DePuy Synthes 15 GLENOID PREPARATION Note: The decision to use the glenoid prosthesis is up to the discretion of the surgeon. If the glenoid, as determined by axillary and/or CAT scans, is concentric and consists of dense cortical bone, some surgeons perform a hemiarthroplasty while others routinely perform a total shoulder replacement. However, if the glenoid is eroded, flattened or grossly irregular, replace the glenoid. Both pegged and keeled type prostheses are available. In some patients, because of heavy muscle mass, previous scarring or previous arthroplasty procedures, it is impossible to insert the power instruments necessary for implanting the five-pegged glenoid. In that case, use the keeled glenoid prosthesis (see keeled glenoid procedure on page 19). Using a humeral head retractor [Fukuda style (Cat. No. 2587-01-000 or 2587-02-000), Rowe or GLOBAL (Cat. No.2235-60-000)], displace the proximal humerus posteriorly to expose the glenoid fossa (Fig. 48). We recommend leaving one of the broaches in place to protect the proximal humerus from compression fracturing or deformation by the retractor. Before working on the glenoid fossa, remove the labrum and soft tissue scarring around the glenoid fossa. Since the capsule has already been resected from the humeral side, completely excise the anterior/inferior capsule from the glenoid rim and protect the axillary nerve. If the shoulder has limited external rotation and the capsule is left in place and re-attached to the humerus, the capsule would again restrict external rotation. Usually, the capsule is thickened and scarred; moreover, its resection should not lead to any instability of the joint. If the posterior capsule is thickened and tight, it may be necessary to release it from the posterior rim of the glenoid. Figure 48 56XL 56 52 48 44 40 40XS Figure 49 Head 52 52 Glenoid Figure 50 The selection of the proper size glenoid is very important. A set of seven glenoid sizer disks (40XS, 40, 44, 48, 52, 56, 56XL) is available (Fig. 49). These amber sizer disks determine the size of the glenoid, that also determines the size of the humeral head. The 40XS glenoid is an extra small prosthesis that is required for the very small glenoid fossa in some juvenile rheumatoid arthritic shoulder cases. Select the sizer disk that best fits the size of the glenoid fossa. Since the normal shoulder joint accomodates translation of the head in the glenoid fossa, each of the glenoid prostheses have been developed with a 6 mm larger diametral curvature than the corresponding humeral head (Fig. 50). The number on the glenoid prosthesis does not indicate its size in millimeters. 16 DePuy Synthes GLOBAL ADVANTAGE Surgical Technique The number simply indicates that it should be used with the same size humeral head that is measured in millimeters. If a number 52 glenoid were selected, use a 52 mm head, providing a 6 mm diametral mismatch between the prosthetic head and the glenoid (chart below). Glenoid Sizes Humeral Head Sizes (mm) Colour of Trial Humeral Heads & Glenoid Trials 40 and 40XS 15, 18, 21 Brown 44 15, 18, 21 Blue 48 15, 18, 21 Black 52 15, 18, 21 Green 56 and 56XL 15, 18, 21 Grey Figure 51 Despite the variation in curvature of the articulating surface of the glenoid prosthesis, the nonarticulating back side of all sizes of glenoid components has the same diametral curvature, that is the same curvature as the glenoid reamer. If there is a question over which size glenoid to use, use the smaller and not the larger size. A glenoid prosthesis that is just a bit too large irritates and interferes with normal rotator cuff function. If the proximal humerus can be sufficiently displaced to use the powered glenoid preparation instruments, create a hole in the centre of the glenoid fossa using either a punch or air burr (Fig. 51). With the appropriate sizer disk held against the glenoid, the hole in the centre of the sizer disk can help determine and mark the centre of the glenoid fossa. Three types of driver shafts are available: straight, articulated or 45-degree angle (Fig. 52). The drill bit has a special sharp pilot tip, that helps prevent the drill bit from wandering. To create the central hole in the glenoid, attach the drill bit to the driver of choice. Using the central drill guide, drill until the bit bottoms out (Fig. 53). Over-reaming the centre hole could cause the peripheral drill guide to seat loosely, resulting in improper alignment of the peg holes. Attach the appropriately sized glenoid reamer to the power drill. If a 48 sizer disk was selected, use the 48 glenoid reamer. Figure 52 Central drill guide R Sharp pilot tip Figure 53 GLOBAL ADVANTAGE Surgical Technique DePuy Synthes 17 There are five different sizes of standard reamers, including the smallest for the 40 and 40 mm extra small; one each for the 44, 48 and 52 mm; and the largest for the 56 and 56 mm extra large. Each of these reamers will properly and completely ream the glenoid fossae. A sixth reamer has no central hub and can be used in preparing the glenoid for a hemiarthroplasty. Note: The GLOBAL ADVANTAGE glenoid remears are very sharp and may cut faster than other reamers. Start reaming by hand using either the straight or 45-degree driver shaft and the ratchet T-handle. If power reaming is necessary, engage the power to the glenoid reamer whilst the tip of the reamer is in the pilot hole, but before it comes in contact with the bone. If the reamer is held tightly against the glenoid before the power is started, the reamer may bind up, grab the bone and cause damage to the power drill and bone. Figure 54 Peripheral drill guide Derotation peg With the reamer engaged, insert the central peg into the pilot hole in the glenoid and apply gentle pressure to the reamer (Fig. 54). Gradually increase the pressure on the reamer. The open-backed reamers allow sight of the glenoid surface. Use the reamer only until the surface of the glenoid fossa is smooth. Be careful not to over-ream the glenoid fossa. Pegged Glenoid Trial Following the glenoid reaming, place the post of the peripheral drill guide into the central hole in the glenoid (Fig. 55). Using the same sharp pilot tipped drill bit, drill the superior hole first and place the anti-rotation peg to prevent any rotation of the guide whilst the other holes are being drilled. Drill the remaining holes in the same fashion. Insert the previously selected trial pegged glenoid prosthesis and keep it in place during sizing of the trial humeral heads (Fig. 56). The pegs of the trial glenoid prostheses are a little larger than the pegs on the final prosthesis, which allows for the appropriate cement mantle. The holes in the trial glenoids help the surgeon to see if the prosthesis is sitting flush on the reamed glenoid fossae. This very important step ensures the desired fit between the back of the glenoid prosthesis and the face of the glenoid fossa. Figure 55 Glenoid grasper Figure 56 18 DePuy Synthes GLOBAL ADVANTAGE Surgical Technique Keeled Glenoid Trial If using the keeled glenoid, prepare the glenoid fossae as previously described. Drill the central hole and then ream the glenoid until it is smooth. To manage the patient with a hemiarthroplasty, use the glenoid reamer without the hub to smooth out the glenoid fossae. A B Two glenoid templates are available to indicate the keel slot size to be made in the glenoid. Use one for the smaller glenoid sizes (40/40XS, 44 and 48) and the other for larger sizes (52, 56 and 56XL). Place the central hub of the appropriate sized template into the central hole in the glenoid. Place the pilot tipped drill bit into the two holes in the template and drill out (Fig. 57). Remove the template and use an air burr, rongeur or curette to connect the holes for the keel of the prosthesis (Fig. 58). Excavate the bone in the base of the coracoid and down the lateral border of the scapula to help lock the keeled prosthesis with cement. Figure 57 Two different sizes of glenoid keel tamps are available that can be used to impact the bone in the glenoid fossae for a proper fit of the trial keeled glenoid prosthesis (Fig. 59). The keeled glenoid trials have slots in them to indicate that the back of the prosthesis will sit flush on the bone of the glenoid fossae (Fig. 60). The keel on the trial prosthesis is larger than the keel on the final prosthesis, which allows for the appropriate cement mantle. Figure 58 Figure 59 Figure 60 GLOBAL ADVANTAGE Surgical Technique DePuy Synthes 19 With the trial glenoid prosthesis and appropriate size humeral broach in place, select the appropriate trial humeral head (15, 18 or 21 mm) (Fig. 61). Each of the trial humeral heads is identified with a specific colour code. These colours correspond with the appropriate glenoid trials (chart on page 17). Remember that the size of the head is determined by the glenoid sizer selection. It is important to balance the soft tissue tension with the appropriate size trial humeral head. With the proper size trial head in place, it should be possible to fully internally rotate the arm across the chest so that the hand of the involved shoulder can easily rest on the top of the opposite shoulder without the involved shoulder being elevated off the table. It should also be possible to externally rotate the arm 30-40 degrees and be able to re-approximate the subscapularis tendons back to the cut surface of the neck of the humerus and sublux the humeral head 50 percent posteriorly out of the glenoid trial. If the fit of the humeral head is so tight that the functional internal or external rotation or posterior subluxation cannot be obtained, use a smaller head. For example, if the 21 mm size head does not provide the proper soft tissue balance, try the 18 or 15 mm head. If the 15 mm head also prevents proper soft tissue balance, it may be necessary to remove more of the neck of the humerus or release the entire posterior capsule from the glenoid. Figure 61 Bone Head Figure 62 Use of the Eccentric Trial Heads If after reaming and broaching the proximal humerus the prepared cavity is centralised, a standard humeral head will cover the proximal humerus (Figs. 62 and 63). However, if it is off centre (Fig. 64), a standard head will leave part of the proximal humerus uncovered (Fig. 65). The eccentric head, with its 4 mm offset taper, will allow the head to be rotated into an infinite number of dialable head positions to attain maximum coverage of the proximal humerus (Fig. 66). Bone Head Figure 64 20 DePuy Synthes GLOBAL ADVANTAGE Surgical Technique Figure 63 Figure 65 Figure 66 The head may be rotated superiorly to place the head (5 to 10 mm) above the top of the greater tuberosity (Figs. 67 and 68). There are four eccentric head sizes ranging from 44 to 56 mm. In each size there is an 18 and 21 mm head height. Eccentric head Standard head ECCENTRIC HUMERAL HEADS Head Sizes (mm) Head Heights (mm) Colours 44 18, 21 Blue 48 18, 21 Black 52 18, 21 Green 56 18, 21 Grey Figure 67 Each eccentric head has a 4 mm offset taper. If the standard head prosthesis allows proper soft tissue balance but there is uncovered head or the greater tuberosity sits above the top of the standard head, use an eccentric head of the same size. For example, if the 52x18 mm head gives a proper soft tissue balance, use a 52x18 mm eccentric head. Each of the eccentric trial heads has a notch on the edge of the articular surface denoting the maximum offset (Figs. 69 and 70). Notch Notch Figure 69 In the articular surface of the trial eccentric head trial is a screw. Using the 3.5 mm hex driver, secure the head to the broach/trial (Fig. 71). Rotate the trial head to the approximate desired position and tighten the screw (Fig. 72). Trial the prosthesis into the glenoid and adjust as necessary. There are two options. If the arm can be externally rotated and the trial head easily accessed, simply loosen the screw, reposition the head and retighten the screw. If access is limited, remove the trial assembly and then adjust. When the final position of the eccentric head is achieved, tighten the head securely in place so that the head position can be similarly reproduced in the final prosthesis. Figure 68 Figure 70 Hex driver Screw Trial eccentric head Figure 71 GLOBAL ADVANTAGE Trial eccentric head Figure 72 Surgical Technique DePuy Synthes 21 GLENOID PROSTHESIS INSERTION Pegged Glenoid Insertion With the humeral head displaced posteriorly out of the way, prepare the glenoid fossa for insertion of the glenoid prosthesis. Insert a probe into each of the drilled holes to determine if the holes have exited out of the anterior or posterior cortex of the glenoid. It is important to be aware of any exit hole to avoid the insertion of an excessive amount of cement into the holes, that could extrude out and possibly damage the soft tissue. There are many techniques to remove the blood and dry the peg holes. Using irrigation, pulse lavage or similar techniques, remove any clotted blood from the five holes. One technique to create hemostasis after the holes have been irrigated is to use thrombin spray and place a piece of SURGICEL® gauze in the five holes (Fig. 73). Mix cement (DePuy 1 or 2 if packing by hand, DePuy 3 or ENDURANCE™ if using a syringe) and, when the cement is ready for insertion, remove the gauze from the holes. Thrombin spray SURGICEL gauze Figure 73 Place a small amount of cement into each of the holes using fingertip pressure (Fig. 74). Only a small amount of cement is necessary in each hole to create the proper cement mantle around each peg. An alternative technique is to use a catheter-tip syringe, that will allow the introduction of cement into each of the holes. Do not fill the holes completely, as the cement will extrude from the holes when the pegs of the glenoid prosthesis are inserted. Use pressure on the catheter-tip syringe to force the cement into the cancellous bone, and then remove a small amount of the cement to prevent extrusion. Excessive cement extruding from the hole and lying between the prosthesis and the glenoid fossa is undesirable for two reasons. It may either create an uneven seat for the glenoid prosthesis or the thin pieces of cement may become dislodged from between the prosthesis and the bone and enter the articulation, this can damage the polyethylene prosthesis. 22 DePuy Synthes GLOBAL ADVANTAGE Surgical Technique Figure 74 Insert the glenoid prosthesis and hold it in position with finger pressure until the cement is set and the prosthesis is secure (Fig. 75). Alternatively, a glenoid pusher instrument is available to hold the prosthesis in place whilst the cement is setting (Fig. 76). Keeled Glenoid Insertion If the keeled prosthesis is to be used, obtain hemostasis in the keel hole. Irrigate the slot to remove any clots and achieve hemostasis. Spray the slot with thrombin, pack with Surgicel gauze and press a lap sponge into place for pressure. Mix cement (DePuy 1 or 2 if packing by hand, DePuy 3 or ENDURANCE if using a syringe) and, when the cement is ready for insertion, remove the gauze from the holes. When the cement is ready, remove the gauze and sponge and pressurise the cement into the slot with finger pressure. Divide the cement into three or four small batches to enable firm compression of the cement into the bone by finger pressure. This will ensure a good cement mantle in the slot to receive and secure the keeled prosthesis. Use an instrument to remove some of the cement in the trough to prevent the cement from extruding out of the trough when the prosthesis is inserted. Excessive cement extruding from the hole and lying between the prosthesis and the glenoid fossa is undesirable for two reasons. It may create an uneven seat for the glenoid prosthesis or the thin pieces of cement may become dislodged from between the prosthesis and the bone and enter the articulation, which can damage the polyethylene prosthesis. Figure 75 Figure 76 Insert the keeled prosthesis and hold it in position with finger pressure until the cement is set and the prosthesis is secure (Fig. 77). Alternatively, a glenoid pusher is available to hold the prosthesis in place whilst the cement is setting. Figure 77 GLOBAL ADVANTAGE Surgical Technique DePuy Synthes 23 GLENOID PROSTHESIS INSERTION Seating the Standard Head When the final combination of the properly sized trial body and head has been determined, place the final body into the Delrin impaction stand. It is not necessary to do any trialling with the final body and head combination. Humeral body sizes 6, 8 and 10 fit into one end of the stand and sizes 12, 14 and 16 fit into the other end. If the long revision stem is used, move the impaction stand to the edge of the table so the stem of the prosthesis can hang off the table. With the prosthesis in the stand, the collar of the prosthesis will be parallel with the table top and the head may be driven down perpendicular to the table top, ensuring proper seating of the taper (Fig. 78). With the final head in place, impact it into the body using the Delrin tipped impactor and a half kilogramme or one kilogramme (one or two pounds) mallet. Impact the head three to four times to ensure proper seating. The pull out strength of a properly inserted head exceeds 6.23 kN (1,400 lbf). Seating the Eccentric Humeral Head Remove the broach/head assembly from the humerus with the trial extractor tool. Place the assembly into the impaction block. Reference the position of the notch on the edge of the articular surface to the nearest marking on the top of the impaction block (Figs. 78 and 79). Place the same sized final prosthesis into the impaction block and insert the same sized eccentric head into the humeral stem. There is an etching on the nonarticular surface on the final head that corresponds to the notch marking on the trial head. Line the etching up to the referenced position as noted. It may be helpful to use a skin marker to place a mark on the articular surface near the etching. This technique ensures that the final prosthesis will have the same orientation as the trial assembly. Firmly impact the head by placing the Delrin tipped impactor on the humeral head and striking the impactor three to four times with a half kilogramme or one kilogramme (one or two pounds) mallet. Delrin tipped impactor Standard head Delrin impaction stand Figure 78 Delrin tipped impactor Eccentric head Figure 79 24 DePuy Synthes GLOBAL ADVANTAGE Surgical Technique INSERTION OF THE HUMERAL HEAD/STEM ASSEMBLY Press-Fit, Impaction Bone Grafting or Cement Before the final component assembly is inserted, plan how to repair the subscapularis tendon. If the tendon has been divided or a coronal Z-plasty lengthening the tendon has been done, proceed with the insertion of the humeral component. However, if the tendon was taken directly from its insertion into the lesser tuberosity, drill three or four holes into the anterior neck of the remaining humerus to use to reattach the tendon to bone. Use a suture passer to pull loops of the sutures through these drill holes and later use it to pull the heavy nonabsorbable sutures in the subscapularis out through the neck of the humerus (Fig. 80). The final prosthesis is 1 mm larger than the trial broach so that in the majority of cases, a firm press-fit without cement can be obtained. If the trial broach was slightly loose after humeral canal preparation, use either autogenous bone graft from the resected head of the humerus or cement for fixation of the final prosthesis. As a general rule following the resection of the head, we prefer that all of the cancellous bone be removed and saved on the back of the operating table. If bone graft is used, place the cancellous bone down in the medullary canal, particularly into the inter-tuberosity region, and repeatedly impact it in place using the broach/trial on the driver extractor tool. Do not advance the broach beyond the level of resection. In the case of the patient with severe osteoporotic humerus, use small pieces of the resected head as bone graft, that can produce a firm press-fit of the final prosthesis. The decision to use cement or a press-fit technique is up to the individual surgeon. In some instances, such as previous surgical procedures, fractures, osteoporosis or a degenerative cyst in the humerus, it may be necessary to use cement. Figure 80 The cement technique will vary from case to case. Since the stem of the prosthesis fills the reamed out medullary canal, it is rarely necessary to place the cement deep down the canal of the proximal humerus. If defects exist in the proximal humerus and the fins of the prosthesis are not in contact with the bone, fill that area with cement. GLOBAL ADVANTAGE Surgical Technique DePuy Synthes 25 Regardless of the method used, place the final humeral head/stem assembly down the intramedullary canal by hand. Use the Delrin tipped impactor to insert the assembly to the final seating position. Note: Long stem humeral components are available for revisions or fractures of the humeral shaft (Fig. 81). 138mm Removal of the Prosthetic Humeral Head If you need to remove the femoral head, a head removal instrument is available. Place the wedged tipped driver into the slot anteriorly or posteriorly between the head of the prosthesis and the collar. Tapping on the end of the driver will pop off the humeral head. Removal of the Cemented Humeral Body If a cemented prosthesis needs to be removed, a special slap hammer is available. The top of the standard driver extractor tool incorporates a threaded coupling for attachment of a slap hammer (Slap Hammer Cat. No. 2046-10-000). First, remove the humeral head as described above. Remove the Delrin tip on the driver extractor and replace it with the steel tip (Fig. 82). Attach the driver extractor onto the prosthesis, attach the slap hammer onto the driver extractor and remove the prosthesis. It may be necessary to use small osteotomes or specialised equipment to loosen the cement around the prosthesis. 210 mm 10 mm standard stem 10 mm long stem Figure 81 Joint Reduction and Repair of the Subscapularis Tendon Using the plastic Darrach retractor as a skid, with gentle traction, internal rotation and finger pressure on the humeral prosthesis, reduce the head into the glenoid fossa (Fig. 83). Following irrigation, pass the previously placed 1 mm nonabsorbable tape in the subscapularis tendon into the loop of sutures in the proximal humerus. Figure 82 Figure 83 26 DePuy Synthes GLOBAL ADVANTAGE Surgical Technique Pull the loops of sutures with the 1 mm nonabsorbable tape out through the bone and use the tapes to secure the tendon back to the bone (Fig. 84). If the tendon was previously divided or was lengthened with a coronal Z-plasty technique, repair and secure it with 1 mm nonabsorbable tape. Use of the heavy sutures allows immediate passive movement beginning the day of surgery without fear of detaching the subscapularis tendon. Before wound closure, palpate the axillary nerve a final time to assure that it is in its normal position and is intact. Figure 84 GLOBAL ADVANTAGE Surgical Technique DePuy Synthes 27 WOUND CLOSURE Thoroughly irrigate the wound with antibiotic solution and infiltrate the soft tissue with a local anesthetic that will last six to eight hours (Fig. 85). The SEPTER™ Closed Wound Drainage System is recommended to prevent formations of postoperative hematoma. The wound may be closed according to surgeon preference. Our preference is to close the deep layer of fat with a 2-0 Vicryl suture (Ethicon); the subcuticular fat as a separate layer and finally the skin with a running subcuticular nylon structure. Careful attention to wound closure will result in a cosmetically acceptable incision (Fig. 86). After the dressing and shoulder immobiliser are in place, the use of a cold wrap is recommended. This prefrozen wrap can be placed on the shoulder in the operating room and replaced with another unit every three hours. The combination of the local anesthetic and the immediate cooling seems to decrease the amount of postoperative pain. Figure 85 Figure 86 28 DePuy Synthes GLOBAL ADVANTAGE Surgical Technique POSTOPERATIVE PROTOCOL 1) Beginning the Afternoon of the Day of Surgery: a) Remove the shoulder immobiliser on the afternoon of the day of surgery. With the shoulder sling immobiliser removed, the patient may gently move the arm into comfortable positions. b) Perform passive flexion of the patient’s arm up to 90 or 120 degrees or as far as is comfortable for the patient. c) An alternative technique uses CPM, that is instituted when the patient is transferred from the operating room table onto the recovery room bed. This allows continuous passive flexion of the arm up to 90 or 120 degrees or more. 4) R emove the running subcutaneous sutures at two weeks. 2) On the First Postoperative Day: a) Instruct the supine patient on how to perform passive flexion of the arm using the other arm as a power source and/or through the use of a pulley and rope system attached to the overhead bed frame. At the extreme of flexion, hold the arm for a count of five. Each passive exercise should include five repetitions and be performed three to four times per day. b) Instruct the supine patient in how to develop passive external rotation stretching exercises with a three-foot stick. c) Instruct the erect patient in performing the pendulum exercises three to four times per day. d) Encourage the patient to use the hand and arm for gentle everyday activities such as eating, brushing teeth, drinking liquids, etc. 6) Subsequent Follow-up Visit (Six to Eight Weeks): a) Continue the stretching exercise of the shoulder three to four times per day. b) When the patient has sufficient passive range of motion, such as 120 to 140 degrees of flexion and 20 to 40 degrees of external rotation, institute strengthening exercises of the deltoid and rotator cuff muscles with Therabands. Gradually increase the resistance by using the different colors and strengths of Therabands. Strengthen the scapular stabiliser muscle, such as the trapezius muscle, by performing shoulder shrug exercises against weight. Strengthen the serratus anterior and rhomboid muscles by using wall push-ups and progressing to knee push-ups as indicated. 3) On the Second and Third Postoperative Days: a) Continue the patient with passive flexion and external rotation exercises. In the erect position, the patient can use an overhead pulley to increase passive flexion and continue to use the arm for gentle living activities. b) Usually, dismiss the patient on the third day or when 90 to 120 degrees of passive flexion and external rotation of 10 to 15 degrees are achieved. Instruct the patient to continue exercises three to four times per day, seven days a week. c) Encourage the patient to continue using the arm for gentle daily living activities. 5) First Follow-up Visit (Four to Six Weeks): a) If the patient does not have sufficient passive motion, institute more stretching exercises, such as overhead stretching with the pulley, the three-foot stick, etc. b) Encourage the patient to use the arm for progressive everyday activities. c) If the patient has weakness of the anterior deltoid, institute a specific exercise program that will strengthen the anterior deltoid in the supine position. 7)Carefully instruct the patient that keeping their shoulders loose and strong is a life-long, ongoing rehabilitation program. GLOBAL ADVANTAGE Surgical Technique DePuy Synthes 29 Total shoulder arthroplasty with GLOBAL ADVANTAGE prosthesis and an eccentric humeral head. Hemiarthroplasty with GLOBAL ADVANTAGE prosthesis. The third-party trademarks used herein are trademarks of their respective owners. Johnson & Johnson Medical Limited PO BOX 1988, Simpson Parkway, Livingston, West Lothian, EH54 0AB, United Kingdom. Incorporated and registered in Scotland under company number SC132162. DePuy Orthopaedics, Inc. 700 Orthopaedic Drive Warsaw, IN 46582 USA Tel: +1 (800) 366 8143 Fax: +1 (574) 267 7196 DePuy International Ltd St Anthony’s Road Leeds LS11 8DT England Tel: +44 (0)113 270 0461 Fax: +44 (0)113 272 4101 depuysynthes.com ©Johnson & Johnson Medical Limited. 2015. All rights reserved. CA#DSEM/JRC/0815/0329 Issued: 10/15 DePuy (Ireland) Loughbeg Ringaskiddy Co. Cork Ireland Tel: +353 21 4914 000 Fax: +353 21 4914 199 0086
