MTPAD-M Manual Videx_vb1.cdr
Anuncio
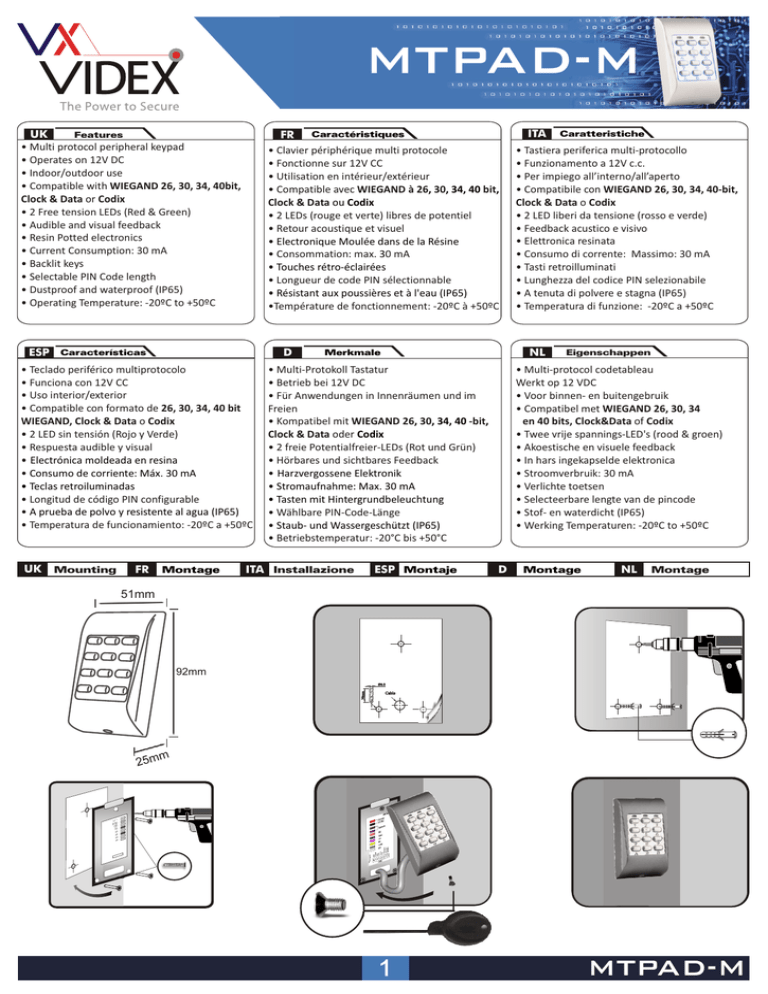
MTPAD-M Features UK • Multi protocol peripheral keypad • Operates on 12V DC • Indoor/outdoor use • Compatible with WIEGAND 26, 30, 34, 40bit, Clock & Data or Codix • 2 Free tension LEDs (Red & Green) • Audible and visual feedback • Resin Potted electronics • Current Consumption: 30 mA • Backlit keys • Selectable PIN Code length • Dustproof and waterproof (IP65) • Operating Temperature: -20ºC to +50ºC ESP Caractéristiques FR • Clavier périphérique multi protocole • Fonctionne sur 12V CC • Utilisation en intérieur/extérieur • Compatible avec WIEGAND à 26, 30, 34, 40 bit, Clock & Data ou Codix • 2 LEDs (rouge et verte) libres de potentiel • Retour acoustique et visuel • Electronique Moulée dans de la Résine • Consommation: max. 30 mA • Touches rétro-éclairées • Longueur de code PIN sélectionnable • Résistant aux poussières et à l'eau (IP65) •Température de fonctionnement: -20ºC à +50ºC D Características • Teclado periférico multiprotocolo • Funciona con 12V CC • Uso interior/exterior • Compatible con formato de 26, 30, 34, 40 bit WIEGAND, Clock & Data o Codix • 2 LED sin tensión (Rojo y Verde) • Respuesta audible y visual • Electrónica moldeada en resina • Consumo de corriente: Máx. 30 mA • Teclas retroiluminadas • Longitud de código PIN configurable • A prueba de polvo y resistente al agua (IP65) • Temperatura de funcionamiento: -20ºC a +50ºC Mounting FR Montage • Multi-Protokoll Tastatur • Betrieb bei 12V DC • Für Anwendungen in Innenräumen und im Freien • Kompatibel mit WIEGAND 26, 30, 34, 40 -bit, Clock & Data oder Codix • 2 freie Potentialfreier-LEDs (Rot und Grün) • Hörbares und sichtbares Feedback • Harzvergossene Elektronik • Stromaufnahme: Max. 30 mA • Tasten mit Hintergrundbeleuchtung • Wählbare PIN-Code-Länge • Staub- und Wassergeschützt (IP65) • Betriebstemperatur: -20°C bis +50°C ESP Montaje ITA Installazione Caratteristiche • Tastiera periferica multi-protocollo • Funzionamento a 12V c.c. • Per impiego all’interno/all’aperto • Compatibile con WIEGAND 26, 30, 34, 40-bit, Clock & Data o Codix • 2 LED liberi da tensione (rosso e verde) • Feedback acustico e visivo • Elettronica resinata • Consumo di corrente: Massimo: 30 mA • Tasti retroilluminati • Lunghezza del codice PIN selezionabile • A tenuta di polvere e stagna (IP65) • Temperatura di funzione: -20ºC a +50ºC NL Merkmale Eigenschappen • Multi-protocol codetableau Werkt op 12 VDC • Voor binnen- en buitengebruik • Compatibel met WIEGAND 26, 30, 34 en 40 bits, Clock&Data of Codix • Twee vrije spannings-LED's (rood & groen) • Akoestische en visuele feedback • In hars ingekapselde elektronica • Stroomverbruik: 30 mA • Verlichte toetsen • Selecteerbare lengte van de pincode • Stof- en waterdicht (IP65) • Werking Temperaturen: -20ºC to +50ºC D Montage NL Montage 51mm 92mm Ø6.0 30mm UK ITA Cable m 25m + V21 dng 0d 1d xx xx xx xx 1 MTPAD-M UK Wiring FR ITA Câblage Cablaggio ITA ESP Cableado ESP D Verdrahtung D NL 12V DC Red Black Pink Violet Orange Green GND Tamper Tamper LED Red LED Green Codix Gray Yellow D1/ data White D0/ clock Connection/ Connexion/ Connessione/ Conexión/ Anschluß/ Aansluiting Colour/ Couleur/ Colore/ Color/ Farbe/ Kleur Red/ Rouge/ Rosso/ Rojo/ Rot/ Rood Black/ Noir/ Nero/ Negro/ Schwarz/ Zwart Aansluiting POR 12V DC GND Pink/ Rose/ Rosa/ Rosado/ Rosa/ Roze Violet/ Violet/ Violetto/ Morado/ Violett/ Paars Orange/ Orange/ Arancione/ Naranja/ Orange/ Oranje Green/ Vert/ Verde/ Verde/ Grün/ Groen Grey/ Gris/ Grigio/ Gris/ Grau/ Grijs Yellow/ Jaune/ Giallo/ Amarillo/ Gelb/ Geel White/ Blanc/ Bianco/ Blanco/ Weiß/ Wit UK Redefining Master code ESP Redefinición del código Maestro Tamper Free tension LED - Red Free tension LED - Green Codix D1/ data D0/ clock FR Redéfinition du code Maître ITA Ridefinizione del codice Master D Mastercode neu definieren NL Opnieuw definiëren Master Code 1. Disconnect Power 2. Press and hold “A” and reconnect Power. 3. Hold the “A” Key for at least 3 seconds. 1. Coupez l’alimentation. 2. Appuyez longuement sur la touche « A » et rebranchez le courant. 3. Maintenez la touche « A » enfoncée pendant au moins 3 secondes. 1. Scollegare dall'alimentazione 2. Tenere premuto "A" e ricollegare all'alimentazione. 3. Tenere premuto il tasto "A" per almeno 3 secondi. 1. Desconecte la alimentación eléctrica. 2. Mantenga pulsada la tecla “A” y vuelva a conectar la alimentación. 3. Mantenga pulsada la tecla “A” durante al menos 3 segundos. 1. Versorgungsunterbrechung 2. “A” gedrückt halten und Versorgung wiederherstellen. 3. Taste „A“ mindestens drei Sekunden lang halten. 1. Koppel de voeding los 2. Houd "A" ingedrukt en sluit de voeding opnieuw aan. 3. Houd de toets "A" ten minste 3 seconden ingedrukt. 2 MTPAD-M UK PROGRAMMING FLOWCHART B + 000000 Enter “Master Code” Error Beep (3 short beeps) No Validation OK? Yes 1 small beep + 1 long beep + Orange LED is ‘ON’ Change Master Code Select Output Protocol Presets 3 6 1 1 Enter New Master Code Press 6 Digits 2 3 4 Single Double Clock & Wiegand Wiegand Data 1 3 2 Enter Site Code 8 4 5 5 digits Wiegand Wiegand Wiegand Wiegand Codix 26bit 34bit 34bit 26bit EWS normal normal EWS Codix Select Type of Wiegand PIN Code Length Site Code Length Backlight 2 4 7 9 1 2 3 0 4 Wiegand Wiegand Wiegand Wiegand 26bit 30bit 34bit 40bit for any length with “A” in the end 1 1-8 for lengths between 1 to 8 digits No Site Code 2 3 4 0 Site Code Site Code Site Code between between between 0 to 255 0 to 65535 0 to 15 1 Backlight Backlight ON OFF Press “A” to validate and exit the menu (orange LED OFF) Direct Menu exit Entering Menu is always done with B + 000000 if the Master Code is not changed. Submenu 1 - Change Master Code. The Master Code must be 6 digits. After enrolling new Master Code the MTPAD-M automatically exits the Menu and the new master code must be typed to enter the menu. Submenu 2 - Select Type of Wiegand. With this the Keypad can be adjusted to send 4 different Wiegand Outputs. The Wiegand selected must be the same as the controller’s Wiegand Input where the MTPAD-M Keypad is being connected. Example: If you use a controller that recognizes Wiegand 34bit, then enter the menu of MTPAD-M, press 2, then press 3. Submenu 3 - Select Output Protocol. The Keypad can send the Code by different Protocols. Use “Single Wiegand” when connected to third party controllers. When “Single Wiegand” is selected, what is typed on the Keypad the same will be sent as Wiegand Number. Use Double Wiegand when connected to EWS, use Clock&Data when connected to controller with Clock&Data input, use Codix when connected to Vi200, EX5, EX7, INOX99 or VKP99. Submenu 4 - PIN Code Length. If “0” is selected, then any PIN Code with any length can be sent, but the PIN Code is typed with “A” for confirmation( ex. 123 + A). If 1 to 8 is selected the PIN Code length is determinated by the number selected. Submenu 6 - Presets. The Presets are set of preprogrammed parameters for easy programming. 6-1 “Wiegand 26bit Normal” 6-2 “Wiegand 34bit Normal” 6-3 “Wiegand 34bit EWS Mode” 6-4 “Wiegand 26bit EWS Mode” 6-5 “Codix” - Type: Wiegand 26bit; Output: Single Wiegand; PIN Length: 4 digits; Entry Mode: Card or PIN Code Type: Wiegand 34bit; Output: Single Wiegand; PIN Length: 4 digits; Entry Mode: Card or PIN Code Type: Wiegand 34bit; Output: Double Wiegand; PIN Length: 4 digits; Entry Mode: Card or PIN Code Type: Wiegand 26bit; Output: Double Wiegand; PIN Length: 4 digits; Entry Mode: Card or PIN Code Output: Codix; PIN Length: any length with “A” in the end; Entry Mode: Card or PIN Code Presets 6-3 and 6-4 to be used always when MTPAD-M is connected to EWS firmware ver.2.42 or higher. Submenu 7 - Site Code Length. Set the code length sent to Host. Defaul is “0”. To be used only in specific cases. Submenu 8 - Enter Site Code. Put the site code always in 5 digit format (ex. 00170). Submenu 9 - Backlight. Turns ON/OFF the backlight. 3 MTPAD-M FR SCHÉMA DE PROGRAMMATION Entrez le code principal B + 000000 Non Signal sonore d’erreur (3 bips courts) Validation OK? Oui 1 bip court + 1 bip long + LED orange allumé Sélection du protocole de sortie Modification du code principal 1 6 3 Entrez le nouveau code principal Entrez 6 chiffres 1 2 3 Simple Double Clock & Wiegand Wiegand Data 4 1 Longueur du code PIN 2 4 1 2 3 4 26bit 30bit 34bit 40bit Sortie du menu direct 0 3 2 8 4 5 5 chiffres Wiegand Wiegand Wiegand Wiegand Codix 26bit 34bit 34bit 26bit EWS normal normal EWS Codix Sélection du type Wiegand Wiegand Wiegand Wiegand Wiegand Saisie du code de site Préréglages Longueur du code de site Rétroéclairage 7 9 1 1-8 Pas de code de site pour toute pour toutes longueur de les longueurs code suivi de “A” comprises entre 1 et 8 chiffres 2 Code de site entre 0 et 15 3 4 Code de Code de site entre site entre 0 et 255 0 et 65535 0 1 Rétroéclairage Rétroéclairage désactivé activé Validez par (A) (LED orange s'éteint) Pour entrer dans le menu, toujours entrer B + 000000 si le code principal n’a pas été changé. Sous-menu 1 - Modification du code principal. Le code principal doit comporter 6 chiffres. Une fois l’enregistrement du nouveau code principal terminé, le MTPAD-M quitte automatiquement le menu et le nouveau code principal doit être saisi pour entrer à nouveau dans le menu. Sous-menu 2 - Sélection du type Wiegand. Le clavier peut être paramétré pour envoyer 4 sorties Wiegand différentes. Le type Wiegand sélectionné doit être identique à celui de l’entrée Wiegand du contrôleur auquel le clavier du MTPAD-M est raccordé. Exemple : Si vous utilisez un contrôleur qui reconnaît le type Wiegand 34 bits, vous devez entrer dans le menu du MTPAD-M, appuyer sur la touche 2, puis sur 3. Sous-menu 3 - Sélection du protocole de sortie. Le clavier peut envoyer le code à travers différents protocoles. Utilisez l’option Simple Wiegand en cas de connexion à des contrôleurs tiers. Si l'option Simple Wiegand est sélectionnée, ce qui est saisi sur le clavier est envoyé comme numéro Wiegand. Utilisez l'option double Wiegand en cas de connexion à l'EWS, utilisez Clock & Data en cas de connexion à un contrôleur à saisie Clock & Data et utilisez Codix en cas de connexion à Vi200, EX5, EX7, INOX99 ou VKP99. Sous-menu 4 - Longueur du code PIN. Si vous sélectionnez « 0 », n’importe quel code PIN de n’importe quelle longueur peut être envoyé, mais le code PIN doit être suivi de la lettre « A » pour confirmation (ex. 123 + A). Si vous choisissez un chiffre compris entre 1 et 8, la longueur du code PIN correspond au chiffre sélectionné. Sous-menu 6 - Préréglages. Les préréglages sont des ensembles de paramètres prédéfinis pour faciliter la programmation. 6-1 “Wiegand 26bit Normal” 6-2 “Wiegand 34bit Normal” 6-3 “Wiegand 34bit EWS Mode” 6-4 “Wiegand 26bit EWS Mode” 6-5 “Codix” - Type: Wiegand 26bit; Sortie: Simple Wiegand; Longueur du code PIN: 4 chiffres; Mode d’entrée: Carte ou code PIN Type: Wiegand 34bit; Sortie: Simple Wiegand; Longueur du code PIN: 4 chiffres; Mode d’entrée: Carte ou code PIN Type: Wiegand 34bit; Sortie: Double Wiegand; Longueur du code PIN: 4 chiffres; Mode d’entrée: Carte ou code PIN Type: Wiegand 26bit; Sortie: Double Wiegand; Longueur du code PIN: 4 chiffres; Mode d’entrée: Carte ou code PIN Sortie: Codix; Longueur du code PIN: toute longueur de code suivi de “A”; Mode d’entrée: Carte ou code PIN Les préréglages 6-3 et 6-4 doivent être toujours utilisés lorsque le MTPAD-M est connecté à l’EWS, firmware version 2.42 ou supérieure. Sous-menu 7 - Longueur du code de site. Définissez la longueur du code envoyé à l’hôte. La valeur par défaut est « 0 ». À n’utiliser que dans des cas particuliers. Sous-menu 8 - Saisie du code de site. Le format du code de site doit toujours avoir 5 chiffres (ex. 00170). Sous-menu 9 - Rétroéclairage. Permet d'activer et de désactiver le rétroéclairage. 4 MTPAD-M ITA PROGRAMMAZIONE Immettere “Master Code” B + 000000 Convalida OK? No Beep di errore (3 beep brevi) Si 1 beep breve + 1 beep lungo + LED arancione 'ON' Selezionare il protocollo di output Modifica del Master Code 1 3 2 Selezionare il tipo di Wiegand 2 2 30bit Codix 26bit normal 34bit normal 26bit EWS 34bit EWS Lunghezza del codice PIN 3 4 34bit 40bit Uscita diretta menu 0 Lunghezza del codice sito Retroilluminazione 9 7 1 1-8 per qualsiasi lunghezza con per lunghezze tra 1 e 8 cifre “A" alla fine 5 cifre Codix 4 Wiegand Wiegand Wiegand Wiegand 26bit 8 1 2 3 4 5 Wiegand Wiegand Wiegand Wiegand 4 Singolo Doppio Clock & Wiegand Wiegand Data Immettere codice sito 6 3 1 Immettere il nuovo Master Code Immettere 6 cifre 1 Preset 2 Nessun Codice sito codice sito tra 0 e 15 3 4 Codice sito Codice sito tra 0 e tra 0 e 65535 255 0 Retroilluminazione OFF 1 Retroilluminazione ON Convalidare con (A) (LED arancione si spegne) L'ingresso nel menu si effettua sempre con B + 000000 se il Master Code non è stato cambiato. Submenu 1 - Modifica Master Code. Il Master Code deve essere di 6 cifre. Dopo aver immesso un nuovo Master Code l'MTPAD-M esce automaticamente dal menu ed è quindi necessario immettere il nuovo master code per accedere nuovamente. Submenu 2 - Selezionare tipo di Wiegand. Da questo menu la tastiera può essere impostata in modo che invii 4 output Wiegand differenti. Il protocollo Wiegand selezionato deve essere lo stesso dell'input Wiegand del controller a cui è collegata la tastiera MTPAD-M. Esempio: Se si utilizza un controller che riconosce Wiegand 34bit, è quindi necessario accedere al menu di MTPAD-M, premere 2, quindi premere 3. Submenu 3 - Selezionare protocollo di output. La tastiera può inviare il codice tramite diversi protocolli. Utilizzare “Singolo Wiegand” se la tastiera è connessa a controller di terze parti. Selezionando “Singolo Wiegand” quello che viene inserito sulla tastiera è lo stesso che viene inviato come numero Wiegand. Utilizzare Doppio Wiegand se la tastiera è connessa ad un EWS, utilizzare Clock&Data se connessa ad un controller con input Clock&Data, utilizzare Codix se connessa a Vi200, EX5, EX7, INOX99 o VKP99. Submenu 4 - Lunghezza codice PIN. Selezionando “0”, sarà possibile inviare un codice PIN di qualsiasi lunghezza, ma il codice PIN deve essere inserito con "A" per conferma (es. 123 + A). Selezionando da 1 a 8, la lunghezza del codice PIN è determinata dal numero selezionato. Submenu 6 - Preset. I Preset sono set di parametri preprogrammati per semplificare la programmazione. 6-1 “Wiegand 26bit Normal” 6-2 “Wiegand 34bit Normal” 6-3 “Wiegand 34bit EWS Mode” 6-4 “Wiegand 26bit EWS Mode” 6-5 “Codix” - Tipo: Wiegand 26bit; Output: Singolo Wiegand; Lunghezza del codice PIN: 4 cifre; Modalità immissione: Tessera o codice PIN Tipo: Wiegand 34bit; Output: Singolo Wiegand; Lunghezza del codice PIN: 4 cifre; Modalità immissione: Tessera o codice PIN Tipo: Wiegand 34bit; Output: Doppio Wiegand; Lunghezza del codice PIN: 4 cifre; Modalità immissione: Tessera o codice PIN Tipo: Wiegand 26bit; Output: Doppio Wiegand; Lunghezza del codice PIN: 4 cifre; Modalità immissione: Tessera o codice PIN Output: Codix; Lunghezza del codice PIN: qualsiasi lunghezza con “A" alla fine; Modalità immissione:Tessera o codice PIN I preset 6-3 e 6-4 devono essere utilizzati quando MTPAD-M è connesso ad un firmware EWS ver.2.42 o successiva. Submenu 7 - Lunghezza codice sito. Imposta la lunghezza del codice inviata all'Host. Il valore di default è “0”. Da utilizzare solo in casi specifici. Submenu 8 - Immettere codice sito. immettere sempre il codice sito in formato 5 cifre (es. 00170). Submenu 9 - Retroilluminazione. Accende/Spegne la retroilluminazione. 5 MTPAD-M ESP PROGRAMACIÓN Introducir el “Código maestro” B + 000000 No ¿Validación correcta? Pitido de error (3 pitidos cortos) Si 1 pitido corto + 1 pitido largo + LED naranja activado Seleccionar protocolo de salida Cambiar código maestro 6 3 1 Especificar el nuevo código maestro Introducir 6 dígitos 1 2 3 Simple Doble Clock & Wiegand Wiegand Data Introducir código de sitio Ajustes predeterminados 4 1 3 2 8 4 5 5 dígitos Wiegand Wiegand Wiegand Wiegand Codix 26bit 34bit 34bit 26bit EWS normal normal EWS Codix Seleccionar tipo de Wiegand Longitud del código PIN Longitud del código de sitio Retroiluminación 2 4 7 9 2 1 3 0 4 Wiegand Wiegand Wiegand Wiegand 26bit 30bit 34bit 40bit Salida directa del Menú para cualquier longitud con “A” al final 1-8 1 para longitudes de entre 1 y 8 dígitos 2 3 4 Código de Código de Código de Sin código sitio entre sitio entre sitio entre de sitio 0 y 255 0 y 65535 0 y 15 0 Retroiluminación OFF 1 Retroiluminación ON Presionar A para validar (LED naranja OFF) Al menú siempre se accede con B + 000000 si no se ha modificado el código maestro. Submenú 1: Cambiar código maestro. El Código maestro debe tener 6 dígitos. Tras registrar un nuevo código maestro, el MTPAD-M sale automáticamente del menú y resulta necesario introducir el nuevo código maestro para acceder a dicho menú. Submenú 2: Seleccionar tipo de Wiegand. Con este submenú, el teclado se puede ajustar para enviar cuatro salidas de Wiegand distintas. El tipo de Wiegand seleccionado debe ser el mismo que la entrada de Wiegand del controlador al que se conecta el teclado MTPAD-M. Ejemplo: si usa un controlador que reconozca Wiegand de 34 bits, acceda al menú de MTPAD-M, pulse 2 y, a continuación, pulse 3. Submenú 3: Seleccionar protocolo de salida. El teclado puede enviar el código mediante diferentes protocolos. Use “Wiegand sencillo” cuando se conecte a controladores de otros fabricantes. Cuando la opción “Wiegand sencillo” esté seleccionada, se enviará como número de Wiegand exactamente lo que se escriba en el teclado. Use Wiegand doble cuando se conecte a EWS, use Clock&Data cuando se conecte a un controlador con entrada de Clock&Data y use Codix cuando se conecte a Vi200, EX5, EX7, INOX99 o VKP99. Submenú 4: Longitud del código PIN. Si se selecciona “0”, se podrá enviar cualquier código PIN con cualquier longitud, pero se añadirá “A” al código PIN como confirmación (por ejemplo, 123 + A). Si se selecciona de 1 a 8, la longitud del código PIN vendrá determinada por el número seleccionado. Submenú 6: Ajustes predeterminados. Los ajustes predeterminados son un conjunto de parámetros preprogramados que facilitan la programación. 6-1 “Wiegand 26bit Normal” 6-2 “Wiegand 34bit Normal” 6-3 “Wiegand 34bit EWS Mode” 6-4 “Wiegand 26bit EWS Mode” 6-5 “Codix” - Tipo: Wiegand 26bit; Salida: Simple Wiegand; Longitud del código PIN:4 dígitos; Modo de entrada: tarjeta o código PIN Tipo: Wiegand 34bit; Salida: Simple Wiegand; Longitud del código PIN:4 digitos; Modo de entrada: tarjeta o código PIN Tipo: Wiegand 34bit; Salida: Doble Wiegand; Longitud del código PIN: 4 digitos; Modo de entrada: tarjeta o código PIN Tipo: Wiegand 26bit; Salida: Doble Wiegand; Longitud del código PIN: 4 digitos; Modo de entrada: tarjeta o código PIN Salida: Codix; Longitud del código PIN: cualquier longitud con “A” al final; Modo de entrada: tarjeta o código PIN Los ajustes predeterminados 6-3 y 6-4 se utilizan siempre cuando el MTPAD-M se conecta a EWS con versión de firmware 2.42 o superior. Submenú 7: Longitud del código de sitio. Defina la longitud del código enviada a Host. El valor predeterminado es “0”. Solo se usa en casos concretos. Submenú 8: Introducir el código de sitio. Utilice siempre 5 dígitos para el código de sitio (por ejemplo, 00170). Submenú 9: Retroiluminación. Activa y desactiva la retroiluminación. 6 MTPAD-M D PROGRAMMIERUNG „Master-Code“ eingeben B + 000000 Nein Validierung OK? Fehlermeldung (drei kurze Pieptöne) Ja 1 kurzer Piepton + 1 langer Piepton + orangefarbene LED ist „EIN“ Master-Code ändern Ausgabeprotokoll wählen Voreinstellungen 3 6 1 Neuen MasterCode eingeben 6 Ziffern drücken 1 2 3 Einzel Doppel Clock & Wiegand Wiegand Data 1 4 2 3 8 5 4 Wiegand Wiegand Wiegand Wiegand 26bit 34bit 34bit 26bit EWS EWS normal normal Codix Standortcode eingeben 5 Ziffern Codix Wiegand-Typ wählen PIN-Code-Länge Standortcode-Länge Beleuchtung 2 4 7 9 1 2 3 0 4 Wiegand Wiegand Wiegand Wiegand 26bit 30bit 34bit 40bit Direkt-Menu verlassen 1 1-8 2 3 4 Kein Standort- SStandort- StandortStandort- code von code von code von 0 bis 255 0 bis 65535 code 0 bis 15 für jede Länge für Längen von mit „A“ 1 bis 8 Ziffern am Ende 0 1 Beleuchtung Beleuchtung AUS EIN Abschlußtaste A drücken (orangefarbene LED OFF) Das Menü wird immer mit B + 000000 aufgerufen, sofern der Master-Code nicht geändert wurde. Untermenü 1 - Master-Code ändern. Der Master-Code muss sechsstellig sein. Nach dem Erfassen eines neuen Master-Codes wird das Menü automatisch vom MTPAD-M beendet, und der neue Master-Code muss eingegeben werden, um das Menü erneut aufzurufen. Untermenu 2 - Wiegand-Typ wählen. Hiermit kann das Tastenfeld so konfiguriert werden, dass es vier verschiedene WiegandAusgangssignale sendet. Der gewählte Wiegand-Typ muss mit dem Wiegand-Eingang des Controllers übereinstimmen, an dem das MTPADM-Tastenfeld angeschlossen ist. Beispiel: Wenn Sie einen Controller verwenden, der Wiegand 34bit erkennt, dann rufen Sie das MTPAD-MMenü auf, drücken „2“ und dann „3“. Untermenu 3 - Ausgangsprotokoll wählen. Das Tastenfeld kann zum Senden des Codes verschiedene Protokolle verwenden. Wählen Sie “Single Wiegand” beim Anschluss an Controller von Drittherstellern. Bei Auswahl von “Single Wiegand” wird die Eingabe am Tastenfeld als Wiegand-Nummer gesendet. Wählen Sie „Double Wiegand“ beim Anschluss an EWS, „Clock&Data“ beim Anschluss an Controller mit Clock&Data-Eingang, „Codix“ beim Anschluss an Vi200, EX5, EX7, INOX99 oder VKP99. Untermenü 4 - PIN-Code-Länge. Bei Auswahl von „0“ kann ein PIN-Code beliebiger Länge gesendet werden, aber der PIN-Code wird mit „A“ als Bestätigung eingegeben (Bsp. 123 + A). Bei Auswahl von 1 bis 8 wird die PIN-Code-Länge durch die gewählte Zahl festgelegt. Untermenü 6 - Voreinstellungen. Die Voreinstellungen sind vorgegebenen Parameter für eine vereinfachte Programmierung. 6-1 “Wiegand 26bit Normal” 6-2 “Wiegand 34bit Normal” 6-3 “Wiegand 34bit EWS Mode” 6-4 “Wiegand 26bit EWS Mode” 6-5 “Codix” - Typ: Wiegand 26bit; Output: Einzel Wiegand; PIN-Code-Länge: 4 ziffern; Zutrittsmodus: Karte oder PIN-Code Typ: Wiegand 34bit; Output: Einzel Wiegand; PIN-Code-Länge: 4 ziffern; Zutrittsmodus: Karte oder PIN-Code Typ: Wiegand 34bit; Output: Doppel Wiegand; PIN-Code-Länge: 4 ziffern; Zutrittsmodus: Karte oder PIN-Code Typ: Wiegand 26bit; Output: Doppel Wiegand; PIN-Code-Länge: 4 ziffern; Zutrittsmodus: Karte oder PIN-Code Output: Codix; PIN-Code-Länge: jede Länge mit „A“ am Ende; Zutrittsmodus: Karte oder PIN-Code Die Voreinstellungen 6-3 und 6-4 sind immer zu benutzen, wenn das MTPAD-M an EWS-Firmware Vers. 2.42 oder höher angeschlossen ist. Untermenü 7 - Standort-Code-Länge. Einstellung der zum Host übertragenen Code-Länge. Standardvorgabe ist „0“. Nur in bestimmten Fällen zu benutzen. Untermenü 8 - Standort-Code eingeben. Der Standort-Code muss immer fünfstellig ein (Bsp. 00170). Untermenü 9 - Beleuchtung. Schaltet die Hintergrundbeleuchtung EIN/AUS. 7 MTPAD-M NL PROGRAMMEER OVERZICHT "Mastercode" B + 000000 invoeren Nee Validatie OK? Fouttoon (3 korte tonen) Ja 1 korte toon + 1 lange toon + oranje LED is 'AAN’ Mastercode wijzigen Uitgangsprotocol selecteren Standaardinstellingen 3 Locatiecode invoeren 6 8 1 Nieuwe mastercode invoeren 6 cijfers invoeren 2 1 Enkelvoudig Tweevoudig Wiegand Wiegand Type van Wiegand selecteren 3 4 Clock & Data Codix 1 2 3 26bit 30bit 34bit 40bit Menu direct afsluiten 3 5 4 5 cijfers Codix Lengte locatiecode 4 7 0 4 2 Lengte pincode 2 Wiegand Wiegand Wiegand Wiegand 1 Wiegand Wiegand Wiegand Wiegand 26bit 34bit 34bit 26bit EWS EWS normal normal 1 1-8 2 Achtergrondverlichting 9 3 4 Geen Locatiecode Locatiecode Locatiecode tussen locatie tussen tussen 0 en 255 0 en 65535 code 0 en 15 voor lengten voor willekeurige lengten afgesloten tussen 1 tot en met een "A" met 8 cijfers 0 1 Achtergrond- Achtergrondverlichting verlichting AAN UIT Toets A om te bevestigen (oranje LED UIT) Het menu wordt altijd geopend met B + 000000 (mits de mastercode niet is gewijzigd). Submenu 1 - Mastercode wijzigen. De mastercode moet uit 6 cijfers bestaan. Na registratie van een nieuwe mastercode wordt het menu automatisch door MTPAD-M gesloten en moet de nieuwe mastercode worden ingevoerd om het menu te openen. Submenu 2 - Type van Wiegand selecteren. Hiermee kan het toetsenpaneel worden aangepast om 4 verschillende Wiegand-uitgangen te verzenden. De geselecteerde Wiegand moet identiek zijn aan de Wiegand-ingang van de controller waarop het MTPAD-M-toetsenpaneel wordt aangesloten. Voorbeeld: als u gebruik maakt van een controller die Wiegand 34 bits herkent, opent u het menu van MTPAD-M, drukt u op 2 en vervolgens op 3. Submenu 3 - Uitgangprotocol selecteren. Het toetsenpaneel kan de code via verschillende protocollen verzenden. Gebruik "Enkelvoudige Wiegand" bij aansluiting op controllers van derden. Bij "Enkelvoudige Wiegand" komt de waarde die op het toetsenpaneel wordt ingevoerd, overeen met de waarde die als Wiegand-nummer wordt verzonden. Gebruik Tweevoudige Wiegand bij aansluiting op EWS, Klok&gegevens bij aansluiting op een controller met een klok&gegevensingang, en gebruik Codix bij aansluiting op Vi200, EX5, EX7, INOX99 of VKP99. Submenu 4 - Lengte pincode. Als hier "0" wordt geselecteerd, kan er een pincode van elke gewenste lengte worden verzonden. Wel moet ter bevestiging na de pincode een "A" worden ingevoerd (bijv. 123 + A). Als hier een waarde tussen 1 en 8 wordt geselecteerd, wordt de lengte van de pincode bepaald door de geselecteerde waarde. Submenu 6 - Standaardinstellingen. De standaardinstellingen bestaan uit een set voorgeprogrammeerde parameters voor een eenvoudige programmering. 6-1 “Wiegand 26bit Normal” 6-2 “Wiegand 34bit Normal” 6-3 “Wiegand 34bit EWS Mode” 6-4 “Wiegand 26bit EWS Mode” 6-5 “Codix” - Type: Wiegand 26bit; Uitgang: Enkelvoudig Wiegand; Lengte pincode: 4 cijfers; Toegangsmodus: Kaart of pincode Type: Wiegand 34bit; Uitgang: Enkelvoudig Wiegand; Lengte pincode: 4 cijfers; Toegangsmodus: Kaart of pincode Type: Wiegand 34bit; Uitgang: Tweevoudig Wiegand; Lengte pincode: 4 cijfers; Toegangsmodus: Kaart of pincode Type: Wiegand 26bit; Uitgang: Tweevoudig Wiegand; Lengte pincode: 4 cijfers; Toegangsmodus: Kaart of pincode Uitgang: Codix; Lengte pincode: willekeurige lengten afgesloten met een "A"; Toegangsmodus: Kaart of pincode Standaardinstellingen 6-3 en 6-4 worden altijd gebruikt wanneer MTPAD-M op EWS firmware versie 2.42 of hoger wordt aangesloten. Submenu 7 - Lengte locatiecode. Bepaalt de lengte van de code die naar de host wordt verzonden. De standaardwaarde is "0". Gebruik alleen in specifieke gevallen een andere waarde. Submenu 8 - Locatiecode invoeren. Voer de locatiecode altijd in 5-cijferig formaat in (bijv. 00170). Submenu 9 - Achtergrondverlichting. Zet achtergrondverlichting AAN/UIT. 8 MTPAD-M FR UK Connecting MTPAD-M to EWS controller When MTPAD-M is connected to EWS Controller, settings must be done in the Portal Plus Software and in the MTPAD-M Keypad. Example: Create a User to access with Card or PIN Code. The Card Number is 8744987 and the PIN Code 12345. Settings in the Portal Plus Software 1. In the Portal Plus Software, right click on the Reader and select properties. In the Properties window select for Type: “MTPAD-M” (1.1) 2. Select the Wiegand 26bit (1.2) 3. Press Save & Exit. In the event window a confirmation message will appear as shown in fig.2 4. Adjust the PIN Length. Go to Settings/ System parameters. For Keycode length select 5 digits. (fig3) 5. Go To Users Menu and select the user. In the Field User ID (Card Number) write 8744987. In the Field ”Keycode” write the PIN Code 12345. Save the User. (fig.4) Settings in the MTPAD-M 1. Enter the Menu of MTPAD-M. Press B+000000. 2. Press 6, press 4. The Preset, programs the MTPAD-M Keypad to work with EWS controller in Wiegand 26bit. 3. Adjust the PIN Length. Press 4, then press 5. Type 12345 and access will be granted. Connexion du MTPAD-M au contrôleur EWS Lorsque le MTPAD-M est connecté au contrôleur EWS, les paramètres doivent être définis dans le logiciel Portal Plus et à l’aide du clavier du MTPAD-M. Exemple: Création d’un utilisateur avec accès à l’aide de la carte ou du code PIN. Le numéro de la carte est 8744987 et le code PIN est 12345. Configuration dans le logiciel Portal Plus 1. Dans le logiciel Portal Plus, cliquez avec le bouton droit de la souris sur le lecteur et sélectionnez les propriétés. Dans la fenêtre des propriétés, sélectionnez le type : MTPAD-M (1.1) 2. Sélectionnez Wiegand 26 bits (1.2) 3. Cliquez sur Enregistrer et quitter. Dans la fenêtre d’événement, un message de confirmation identique à celui de la figure 2 s’affiche 4. Définissez la longueur du PIN. Accédez à Configuration / Paramètres système. Sélectionnez 5 chiffres comme longueur du code clavier. (fig. 3) 5. Accédez au menu Utilisateurs et sélectionnez l’utilisateur. Dans le champ ID utilisateur (Numéro de carte), tapez 8744987. Dans le champ Code clavier, entrez le code PIN 12345. Enregistrez l’utilisateur. (fig. 4) Configuration sur le MTPAD-M 1. Entrez dans le menu du MTPAD-M. Entrez B+000000. 2. Appuyez sur la touche 6, puis sur 4. Les préréglages programment le clavier du MTPAD-M afin qu’il fonctionne avec le contrôleur EWS en Wiegand 26 bits. 3. Réglez la longueur du PIN. Appuyez sur 4, puis sur 5. Saisissez 12345 et l’accès est accordé. fig.2 fig.2 fig.3 fig.3 fig.4 fig.4 9 MTPAD-M ITA Connessione della MTPAD-M ad un controller EWS ESP Conexión del MTPAD-M a un controlador EWS Quando la tastiera MTPAD-M è collegata ad un controller EWS, le impostazioni devono essere eseguite nel software Portal Plus e nella tastiera MTPAD-M. Cuando el MTPAD-M se conecta al controlador EWS, se deben configurar los ajustes en el software Portal Plus y en el teclado MTPAD-M. Esempio: Creare un utente con accesso a tessera o codice PIN (doppia sicurezza). Il numero della tessera è 8744987 ed il codice PIN 12345. Ejemplo: Cree un usuario para acceder con tarjeta o código PIN. El número de la tarjeta será 8744987 y el código PIN 12345. Impostazioni nel software Portal Plus 1. Nel software Portal Plus, fare doppio clic sul Reader e selezionare le proprietà. Nella finestra Proprietà, selezionare come tipo: “MTPAD-M” (1.1) 2. Selezionare il Wiegand 26 bit (1.2) 3. Fare clic su Salva e Esci. Nella finestra evento apparirà un messaggio di conferma come mostrato nella fig.2 4. Impostare la lunghezza del PIN. Accedere ai parametri Impostazioni/Sistema. Per la lunghezza del codice chiave selezionare 5 cifre. (fig. 3) 5. Accedere al Menu utenti e selezionare l'utente. Nel campo ID utente (numero tessera) scrivere 8744987. Nel campo ”Codice chiave” scrivere il codice PIN 12345. Salvare l'utente.(fig.4) Impostazioni sulla MTPAD-M 1. Accedere al menu della MTPAD-M. Premere B+000000. 2. Premere 6, premere 4. Il preset programma la tastiera MTPAD-M per funzionare con un controller EWS in Wiegand 26 bit. 3. Impostare la lunghezza del PIN. Premere 4, quindi premere 5. Ajustes en el software Portal Plus 1. En el software Portal Plus, haga clic con el botón derecho en el lector y seleccione Propiedades. En la ventana Propiedades, seleccione el tipo: “MTPAD-M” (1.1) 2. Seleccione el Wiegand de 26 bits (1.2) 3. Pulse Guardar y salir. En la ventana de eventos, aparecerá un mensaje de confirmación, tal y como se muestra en la fig. 2. 4. Ajuste la longitud del PIN. Vaya a Configuración/Parámetros del sistema. Para la longitud del código, seleccione 5 dígitos. (fig. 3). 5. Vaya al menú Usuarios y seleccione el usuario. En el campo Id. de usuario (número de tarjeta) escriba 8744987. En el campo “Código”, escriba el código PIN 12345. Guarde el usuario, (fig. 4). Ajustes en el MTPAD-M 1. Acceda al menú de MTPAD-M. Pulse B+000000. 2. Pulse 6 y, a continuación, pulse 4. El valor predeterminado programa el teclado MTPAD-M para que funcione con el controlador EWS con Wiegand de 26 bits. 3. Ajuste la longitud del PIN. Pulse 4 y, a continuación, pulse 5. Introduzca 12345 y se le concederá el acceso. Immettere 12345. Verrà consentito l'accesso. fig.2 fig.2 fig.3 fig.3 fig.4 fig.4 10 MTPAD-M NL DE MTPAD-M mit EWS-Controller verbinden MTPAD-M op EWS aansluiten Wenn das MTPAD-M an einen EWS-Controller angeschlossen ist, müssen die Einstellungen in der Portal Plus-Software und im MTPAD-M-Tastenfeld vorgenommen werden. Als MTPAD-M op een EWS-controller is aangesloten, moeten instellingen in de Portal Plus-software en op het MTPAD-Mtoetsenpaneel worden opgegeven. Beispiel: Einrichten eines Benutzers für den Zutritt mit Karte oder PIN-Code (doppelte Sicherheit). Die Kartennummer lautet „8744987“ und der PIN-Code „12345“. Voorbeel: Maak een gebruiker aan voor toegang met Kaart of pincode. Het kaartnummer is 8744987 en de pincode is 12345. Einstellungen in der Portal Plus-Software: 1. In der Portal Plus-Software den Leser mit der rechten Maustaste anklicken und Eigenschaften wählen. Im Eigenschaftenfenster den Typ wählen: „MTPAD-M“ (1.1) 2. Wiegand 26bit wählen (1.2) 3. Speichern & Beenden wählen. Im Ereignisfenster erscheint eine Bestätigungsmeldung wie in Abb. 2 gezeigt. 4. PIN-Länge einstellen. Einstellungen / Systemparameter aufrufen. Als Tastencodelänge fünf Ziffern wählen (Abb. 3) 5. Das Benutzermenü aufrufen und den Benutzer auswählen. Im Feld Benutzer-ID (Kartennummer) „8744987“ eingeben. Im Feld „Tastencode“ den PIN-Code „12345“ eingeben. Den Benutzer speichern (Abb.4). Einstellungen im MTPAD-M 1. Das MTPAD-M-Menü aufrufen. „B+000000“ drücken. 2. „6“ und dann „4“ drücken. Die Voreinstellung programmiert das MTPAD-M-Tastenfeld für den Betrieb mit EWS-Controller in Wiegand 26bit. 3. PIN-Code-Länge festlegen. Erst „4“ und dann „5“ drücken. Instellingen in de Portal Plus-software 1. Klik in de Portal Plus-software met de rechtermuisknop op de lezer en selecteer Eigenschappen. Selecteer in het venster Eigenschappen bij Type: "MTPAD-M” (1.1) 2. Selecteer Wiegand 26 bits (1.2) 3. Druk op Opslaan en afsluiten. In het venster Gebeurtenis verschijnt een bevestigingsbericht zoals in fig. 2 is weergegeven 4. Stel de lengte van de pincode in. Ga naar de Instellingen/Systeemparameters. Selecteer voor Lengte pincode 5 cijfers. (fig. 3) 5. Ga naar het menu Gebruikers en selecteer de gebruiker. Voer in het veld Gebruikers-ID (kaartnummer) de waarde 8744987 in. Voer in het veld "Pincode" de pincode 12345 in. Sla de gebruiker op. (Fig.4) Instellingen in MTPAD-M 1. Open het menu van MTPAD-M. Druk op B+000000. 2. Druk op 6 en vervolgens op 4. De standaardinstelling programmeert het MTPAD-M-toetsenpaneel voor gebruik in combinatie met EWScontroller en Wiegand 26 bits. 3. Pas de lengte van de pincode aan. Druk op 4 en vervolgens op 5. Typ vervolgens 12345 om toegang te verkrijgen. 12345 eingeben, um Zutritt zu erhalten. 1.1 1.2 fig.2 fig.2 fig.3 fig.3 fig.4 fig.4 11 MTPAD-M UK FR Connecting MTPAD-M to VI200, EX5, EX7, INOX99, VKP99 or KPR9 Connexion du MTPAD-M au VI200, EX5, EX7, INOX99, VKP99 ou KPR9 ITA Connessione della MTPAD-M a VI200,EX5,EX7,INOX99,VKP99 o KPR9 ESP Conexión del MTPAD-M a VI200, EX5, EX7, INOX99, VKP99 o KPR9 D MTPAD-M mit VI200, EX5, EX7, INOX99, VKP99 oder KPR9 verbinden NL MTPAD-M op VI200, EX5, EX7, INOX99, VKP99 of KPR9 aansluiten CODIX Connection GND 12 VDC Codix 16 17 18 MTPAD-M Vi200 If MTPAD-M needs to be connected to VI200, EX5, EX7, INOX99, VKP99 or KPR9, then Codix protocol should be applied to the Keypad. 1. Enter the Menu of MTPAD-M. Press B+000000. 2. Press 6, press 5. The Preset, programs the MTPAD-M Keypad to work in Codix Protocol compatible with VI200, EX5, EX7, INOX99 or VKP99. 3. Adjust the PIN Length. Press 4, then press 5. (in this case the length will be 5 digits). Note: The Keypad can work with any length if it is set with pressing 4 then 0. In this case the PIN Code must be typed with “A” in the end. (example: if the PIN code is 123, in operation must be pressed 123+A). Ones the Keypad is set, enroll the User in the Master Unit (VI200, EX5, EX7, INOX99, VKP99 or KPR9) as described in the manual of this Master Units . Press 000+B. Press 0 Press 01 Enter the Code Confirm with A Exit the Menu with B Si le MTPAD-M doit être connecté au VI200, EX5, EX7, INOX99, VKP99 ou KPR9, le protocole Codix doit être appliqué au clavier. 1. Entrez dans le menu du MTPAD-M. Entrez B+000000. 2. Appuyez sur la touche 6, puis sur 5. Les préréglages programment le clavier du MTPAD-M afin qu’il fonctionne à travers le protocole Codix compatible avec VI200, EX5, EX7, INOX99 ou VKP99. 3. Réglez la longueur du PIN. Appuyez sur la touche 4, puis sur 5 (dans ce cas, la longueur sera de 5 chiffres). Remarque: le clavier peut fonctionner avec n’importe quelle longueur si cette option est définie en appuyant sur la touche 4, suivie de la touche 0. Dans ce cas, le code PIN doit être saisi suivi de la lettre « A » à la fin du code. (Exemple : si le code PIN est 123, 123+A doit être saisi.) Une fois le clavier défini, enregistrez l’utilisateur sur l'unité principale (VI200, EX5, EX7, INOX99, VKP99 ou KPR9) comme indiqué dans le manuel de ces unités. Entrez 000+B. Entrez 0 Entrez 01 Entrez le code Confirmez le code en entrant la lettre A 12 MTPAD-M UK FR Connecting MTPAD-M to VI200, EX5, EX7, INOX99, VKP99 or KPR9 Connexion du MTPAD-M au VI200, EX5, EX7, INOX99, VKP99 ou KPR9 ITA Connessione della MTPAD-M a VI200,EX5,EX7,INOX99,VKP99 o KPR9 ESP Conexión del MTPAD-M a VI200, EX5, EX7, INOX99, VKP99 o KPR9 D MTPAD-M mit VI200, EX5, EX7, INOX99, VKP99 oder KPR9 verbinden NL MTPAD-M op VI200, EX5, EX7, INOX99, VKP99 of KPR9 aansluiten CODIX Connection GND 12 VDC Codix 16 17 18 MTPAD-M Vi200 Se la tastiera MTPAD-M deve essere connessa a VI200, EX5, EX7, INOX99, VKP99 o KPR9, il protocollo Codix deve essere applicato alla tastiera. 1. Accedere al menu della MTPAD-M. Premere B+000000. 2. Premere 6, premere 5. Il preset programma la tastiera MTPAD-M per funzionare con protocollo Codix compatibile con VI200, EX5, EX7, INOX99 o VKP99. 3. Impostare la lunghezza del PIN. Premere 4, quindi premere 5. (in questo caso la lunghezza sarà di 5 cifre). Nota: La tastiera può funzionare con qualsiasi lunghezza premendo prima 4, poi 0. In questo caso il codice PIN deve essere inserito con una "A" al termine. (esempio: se il codice PIN è 123, deve essere inserito 123+A). Una volta che la tastiera è impostata, immettere l'utente nell'unità principale (VI200, EX5, EX7, INOX99, VKP99 o KPR9) come descritto nel rispettivo manuale. Premere 000+B. Premere 0 Premere 01 Immettere il codice Confermare con A Uscire dal menu con B Si es necesario conectar el MTPAD-M a VI200, EX5, EX7, INOX99, VKP99 o KPR9, se debe aplicar el protocolo Codix al teclado. 1. Acceda al menú del MTPAD-M. Introduzca B+000000. 2. Pulse 6 y, a continuación, 5. El ajuste predeterminado programa el teclado MTPAD-M para que funcione con el protocolo Codix compatible con VI200, EX5, EX7, INOX99 o VKP99. 3. Ajuste la longitud del PIN. Pulse 4 y, a continuación, 5 (en este caso la longitud será de 5 dígitos). Nota: el teclado puede funcionar con cualquier longitud, lo que se define pulsando 4 y, a continuación, 0. (ejemplo: si el código PIN es 123, al operar se deberá introducir 123+A). Una vez definido el teclado, registre el usuario en la unidad maestra (VI200, EX5, EX7, INOX99, VKP99 o KPR9), tal y como se describe en el manual de estas unidades maestras. Pulse 000+B. Pulse 0 Pulse 01 Introduzca el código Confirme con A Salga del menú con B 13 MTPAD-M UK FR Connecting MTPAD-M to VI200, EX5, EX7, INOX99, VKP99 or KPR9 Connexion du MTPAD-M au VI200, EX5, EX7, INOX99, VKP99 ou KPR9 ITA Connessione della MTPAD-M a VI200,EX5,EX7,INOX99,VKP99 o KPR9 ESP Conexión del MTPAD-M a VI200, EX5, EX7, INOX99, VKP99 o KPR9 D MTPAD-M mit VI200, EX5, EX7, INOX99, VKP99 oder KPR9 verbinden NL MTPAD-M op VI200, EX5, EX7, INOX99, VKP99 of KPR9 aansluiten CODIX Connection GND 12 VDC Codix 16 17 18 MTPAD-M Vi200 Für die Verbindung von MTPAD-M mit VI200, EX5, EX7, INOX99, VKP99 oder KPR9 muss das Codix-Protokoll beim Tastenfeld angewandt werden. 1. Das MTPAD-M-Menü aufrufen. „B+000000“ drücken. 2. „6“ und dann „5“ drücken. Die Voreinstellung programmiert das MTPAD-M-Tastenfeld für den Betrieb im Codix-Protokoll für VI200, EX5, EX7, INOX99 oder VKP99. 3. PIN-Code-Länge festlegen. Erst „4“ und dann „5“ drücken (in diesem Fall ist der Code fünfstellig). Hinweis: Das Tastenfeld funktioniert mit jeder Länge, wenn man „4“ und dann „0“ drückt. In diesem Fall muss der PIN-Code mit „A“ am Ende eingegeben werden. (Beispiel: Lautet der PIN-Code „123“, muss „123+A“ eingegeben werden). Nachdem das Tastenfeld konfiguriert ist, wird der Benutzer an der Master-Einheit (VI200, EX5, EX7, INOX99, VKP99 oder KPR9) wie im entsprechenden Handbuch beschrieben erfasst. „000+B“ drücken. „0” drücken. „01“ drücken. Code eingeben. Mit „A“ bestätigen. Menü mit „B“ verlassen. Als MTPAD-M op VI200, EX5, EX7, INOX99, VKP99 of KPR9 moet worden aangesloten, moet het Codix-protocol op het toetsenpaneel worden toegepast. 1. Open het menu van MTPAD-M. Druk op B+000000. 2. Druk op 6 en vervolgens op 5. De standaardinstelling programmeert het MTPAD-M-toetsenpaneel voor gebruik in combinatie met het Codix-protocol dat met VI200, EX5, EX7, INOX99 of VKP99 compatibel is. 3. Pas de lengte van de pincode aan. Druk op 4 en vervolgens op 5. (In dit geval wordt een lengte van 5 cijfers gebruikt.) Opmerking: het toetsenpaneel kan met elke gewenste lengte werken als het wordt ingesteld door op 4 en vervolgens op 0 te drukken. In dit geval moet na de pincode een "A" worden ingevoerd. (Voorbeeld: als de pincode 123 is, moet tijdens het gebruik 123+A worden ingevoerd.) Nadat het toetsenpaneel is ingesteld, registreert u de gebruiker in de mastereenheid (VI200, EX5, EX7, INOX99, VKP99 of KPR9). Volg hiervoor de beschrijving in de handleiding van de desbetreffende mastereenheid. Druk op 000+B. Druk op 0 Druk op 01 Voer de code in Druk op A om deze te bevestigen Druk op B om het menu te sluiten 14 MTPAD-M Northern Office Videx Security Ltd Unit 4-7 Chillingham ind Est Newcastle Upon Tyne NE6 2XX Tel: 0870 300 1240 Fax: 0191 224 5678 Southern Office 1 Osprey Trinity Park Trinity Way London E4 8TD Fax: 0208 523 5825 Technical Support [email protected] Tel: 0191 224 3174 Fax: 0191 224 4938 http://www.videx-security.com As per the European Directive’s 2002 / 95 / EC & 2002 / 96 / EC This product is in compliance to the restriction of hazardous substance - ROHS under (Directive 2002 / 95 / EC) and this product should not be disposed in the municipal waste stream but should be handed over to any designated collection facilities appointed by the government or the local authorities to enable recovery & recycling as per weee (Directive 2002/96/EC). w.e.f 1st july’2006 Selon les Directives Européennes 2002/95/EC et 2002/96/EC Ce produit est en conformité avec la norme ROHS pour la restriction des substances dangereuses (Directive 2002/95/CE) et ce produit ne doit pas être depose avec les ordures municipales mais doit être remis aux organismes gouvernementaux ou municipaux indiqués et designes a cet effet pour permettre leur récuperation et leur réutilisation selon la directive weee (Directive 2002/96/CE). In conformità alle direttive europee 2002 / 95 / CE e 2002 / 96 / CE Questo prodotto è in conformità con la restrizione d'utilizzo delle sostenze pericolose - ROHS (Direttiva 2002 / 95 / CE) e questo prodotto non deve essere gettato nella raccolta rifiuti indifferenziata ma deve essere portato alle apposite raccolte rifiuti realizzate dal governo o dalle autorità municipali per permettere il recupero e il riciclo dei materiali come da normativa weee (Direttiva 2002/96/CE). w.e.f 1st july'2006 A partir de las Directivas Europeas 2002/95/EC y 2002/96/EC Este producto cumple con la restricción de sustancias peligrosas- bajo ROHS (Directiva 2002/95/EC) y este producto no puede eliminarse en la red minicipal de basuras y debe manipularse según las instrucciones del gobierno o autoridades locales para permitir su recuperación y reciclado a partir de weee (Directiva 2002/96/ec) w.e.f. 1º de julio de 2006 Gemäß EU Richtlinie 2002 / 95 / EC & 2002 / 96 / EC Dieses Produkt erfüllt die Vorschriften zur Beschränkung gefährlicher Substanzen gemäß - RoHS (Richtlinie 2002 / 95 / EC). Es darf nicht mit dem Hausmüll entsorgt werden, sondern ist zwecks Aufbereitung und Verwertung gemäß WEEE (Richtlinie 2002/96/EC) bei einer dafür behördlich eingerichteten Sammelstelle abzugeben. w.e.f 1. Juli 2006 Volgens de Europese Richtlijnen 2002 / 95 / EC & 2002 / 96 / EC Dit product is overeenkomstig met het risicobeperkingswezen volgens de Richtlijnen 2002 / 95 / EC en dit product mag niet verloren gaan in de gemeentelijke afvalstroom maar zal moeten worden overhandigd aan een aangestelde inzamelvoorziening aangewezen door regering of gemeente voor herstel en recycling volgens (wee?) (Richtlijn 2002/96/EC). (w.e.f.) 1 juli 2006 15 MTPAD-M UK Applications FR Applications ITA Applicazioni ESP Aplicaciones D Anwendungen NL Applicatie Door strike Gâche de porte Innesco su porta Cerradura Türöffner Deur slot Lights Lumières Luci Lámparas Lampen Lichten Alarm Alarme Allarme Alarma Alarm Alarm Push button Bouton-poussoir Pulsante Pulsador Drucktaste Drukknop Blinds Volets Serramenti Persianas Sonnenschutz Zonwering Gates Portails Cancelli Cancelas Gatter Poort An ISO 9001:2000 Certified Company 16 MTPAD-M
