Workshop
Anuncio
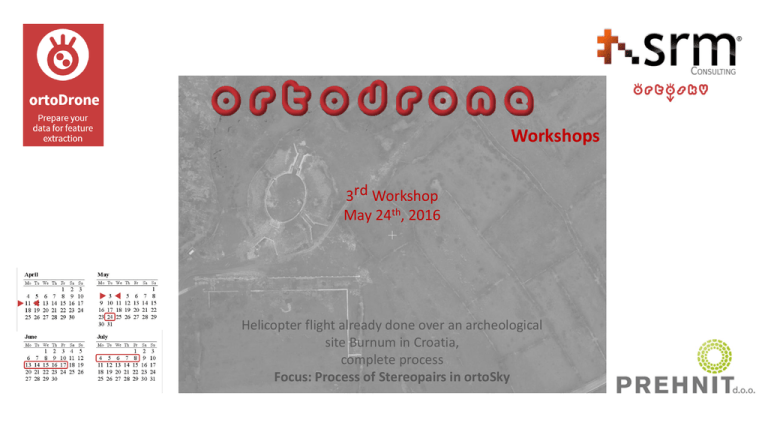
Workshops 3rd Workshop May 24th, 2016 Helicopter flight already done over an archeological site Burnum in Croatia, complete process Focus: Process of Stereopairs in ortoSky • • a high-tech company established in 2009 • prehnit.hr [email protected] primary business activities in the field of planning, design, implementation, and maintenance of GIS • providing educational and consulting services for the usage of GIS technologies • • providing services in geospatial data collection and organization, project management, geospatial analysis implementation, and cartographic visualization multidisciplinary team: geoinformatic experts, software developers, and specialists of natural and technical sciences customers all over Europe; in Mongolia, Botswana, etc. ortoDrone uno de los módulos interconectados de ortoSky2.0 ortoDrone is one of the ortoSky2.0 interconnected modules 1st Workshop April 11th Flight already done, complete process Focus: Internal and Relative Orientation 2nd Workshop May 𝟑rd Realization of mission and flight, in México with Tecnavix, complete process Focus: External Orientation and GCPs 3𝐫𝐝 Workshop 4th Workshop 5th Workshop Fourth week of May Third week of June Second week of July Realization of mission and flight, complete process Focus: Process of Stereopairs in ortoSky Realization of mission and flight, complete process Focus: Point Cloud Realization of mission and flight, complete process Focus: Orthoimage, Digitizing, and Restitution with ortoSky 3rd Workshop 3rd Flight parameters: Workshop The flight was conducted by Vektra Ltd. and Krka National Park on December 14th, 2014 by a helicopter Eurocopter EC120B using a photocamera Hasselblad H39, LiDAR system Riegl LMSQ780, and GPS receiver Novatel OEV/OEM4 internal. http://www.np-krka.hr/ Speed 60 kts Altitude 500 - 600 m Laser frequency 400 kHZ Focal length 50 mm Camera orientation Across Image Capture Interval 5s Vuelo y pasadas realizado por Vektra y Krka Parque Nacional (http://www.np-krka.hr/) Conducted flight passes done by Vektra Ltd. and Krka National Park (http://www.np-krka.hr/) Phase0. Initial Data Phase1. Internal orientation Phase2. Aerotriangulation Phase3. Products (stereoscopic pairs) Workshop En 4 sencillos pasos, partiendo de los datos de vuelo, obtenemos productos como pares estereoscópicos, nube de puntos y ortoimágenes stereoscopic pairs, point cloud, and orthoimages can be obtained in 4 simple steps, starting from the flight data Initial Data Phase1. Internal orientation Phase2. Aerotriangulation en www.ortoSky.com se pueden seguir los primeros workshops donde se trataban las Fase0, 1 y 2. Phases 0, 1, and 2 were thoroughly explained through first two workshops (available at www.ortosky.com) ortoDrone.exe ortoDrone.exe primero analizamos la información que tienen las imágenes en el Exif. first of all, we have to analyze Exif images information En éste caso son imágenes tomadas con un helicóptero y no hay información GPS, tendremos que usar GCPs o coordenadas de los fotocentros. images were taken from a helicopter and there is no GPS information, so we have to use GCPs or photocenters coordinates 32614 (Otro ejemplo con coordenadas GPS en el Exif) seleccionando todas las imágenes, ortoDrone recomienda un EPSG para el proyecto, acorde a la zona de vuelo según coordenadas GPS. Y podremos obtener un KML con dichas coordenadas (another example with Exif GPS coordinates) By selecting all images ortoDrone recommends a project EPSG, corresponding to the flight area according to GPS coordinates (a KML file can be obtained with these coordinates) (México) podemos ver el KML en ortoSky y comprobar la posición y si hay superposición de las imágenes (Mexico) we can see a KML file in ortoSky and check images positions and overlays (volvemos a Croacia) consultamos la información proporcionada. Sistema de coordenadas, info fotocentros, parámetros de la cámara (back to Croatia) we refer to the provided info about coordinate system, photocenters info, and camera parameters Fase0, datos iniciales necesarios. Crear cámara nueva Phase0, initial data needed. Creating new camera añadir las imágenes y el sistema de coordenadas add images and coordinate system en primer lugar el sistema de coordenadas EPSG del proyecto (debe ser proyectadas), aunque los Fotocentros vengan en otro first we choose a project’s coordinate system (it must be projected), even though photocenters have another one ahora seleccionar las imágenes now select the images ahora seleccionar las imágenes now select the images cargados los datos iniciales en la Fase 0, iniciamos el Workflow once initial data is loaded in Phase 0, open the Workflow el proyecto se sincronizará con los datos cargados the project must be synchronized with the loaded data Fase 1, la ejecutamos con los valores por defecto Phase 1 – run with the default values al terminar la Fase 1, en la pestaña de los pares podemos ver los pares generados y los Tie Points, vemos uno con doble click at the end of Phase 1, we can see generated pairs and Tie Points in Image pairs tab (double-click to see each pair) En este caso tenemos un fichero con la orientación de los fotocentros Phase 2 – we have a photocenters orientation file seleccionamos el fichero con las orientaciones. Elegimos las unidades angulares en centesimal (giro Kappa) select the orientations file and choose Centesimal degree as angular unit – see Kappa column (Field 7) elegimos el sistema de coordenadas EPSG en el que están los datos (no tiene por qué coincidir con el del proyecto) choose data coordinate system (could be different than the project coordinate system) lanzamos la Fase 2 generando la carpeta sin distorsión para obtener los pares estereoscópicos run Phase 2 to generate an undistorted folder to obtain stereoscopic pairs obtenemos la información necesaria para cargar los pares estereoscópicos en ortoSky. Como veremos después we obtain the necessary information to load stereoscopic pairs in ortoSky (we will see it later) seleccionar los productos deseados y ejecutar Fase 3. Cambiamos el número de imágenes requeridas a 2 para generar el nube de puntos y la orto. Ya que en alguna zona sólo había solape de 2 imágenes mark products we want to obtain and run Phase 3: change a required number of visible images to 2 to obtain point cloud and orthophoto, because, in some areas, only 2 images overlap productos obtenidos obtained products si en la Fase 3 dejamos por defecto el valor de 3 imágenes requeridas con solape obtendríamos una nube de puntos y ortomosaico como en la izquierda. Si bajamos al solape de 2 imágenes el resultado es el de la derecha Phase 3: if we use a default value of 3 visible images required, we will obtain the orthomosaic in the left. If we modify the overlap of 2 images, the result will be as the right image. vemos los pares estereoscópicos sin distorsión obtenidos en ortoSky de forma sencilla we see the obtained stereoscopic pairs in ortoSky easily ortoSky.exe ortoSky.exe el primer paso es importar la cámara de la carpeta sin distorsión the first step is importing the camera from the Undistorted folder el segundo paso es cargar las imágenes sin distorsión generadas en ortoDrone. Seleccionar el sistema de coordenadas de las imágenes the second step is to add undistorted images generated in ortoDrone. Select the images coordinate system el tercer paso añadir el fichero de aerotriangulación the third step is to add the aerotriangulation file cargamos el fichero de texto de la aerotriangulación obtenido load aerotriangulation form text file las unidades angulares son en grados centesimales (la diferencia de valores en kappa es alrededor de 200 grados) angular units are in centesimal degree (Kappa values differences are around 200°) ya tenemos el vuelo lo siguiente es generar las pasadas we have the flight, now we have to generate the pass seleccionamos las fotos de una pasada. Si van de derecha a izquierda (3469-3473) viendo como se remarcan en la ventana principal, será una pasada invertida select images from a pass. If the images numbers increase from right to left (34693473, as highlighted in the main window), it will be an inverted pass para ver un par estéreo, seleccionamos uno en la parte inferior de la ventana y pulsamos al botón de mostrar el par to see a stereopair, select one of them in the bottom of the window and click on the Show pair button automáticamente se carga el par y se gira la imagen para la imagen izquierda con el ojo izquierdo y la derecha con el ojo derecho. La forma óptima de trabajar es en estéreo 3D compatible con Nvidia, pero para poder ver las capturas de pantalla y a través de internet, lo cambiamos al modo anaglifo. En la pestaña Adicional the pair is automatically loaded and the images are rotated to see the left image with the left eye and the right image with the right eye. The optimal way of working is using Nvidia 3D Stereo, but we changed the view to anaglyph for the workshop (to see 3D via Internet and from screenshots) activamos Auto load pair, para ir cambiando de par automáticamente al desplazarnos por el proyecto press Auto load pair button to automatically change pairs along the project nos acercamos al anfiteatro romano y podemos hacer mediciones zoom to the Roman Amphitheatre so we could do measurements medidas planimétricas planimetric measurements así como altura de elementos con mucha precisión elements height with high precision la coordenada Z de cualquier elemento Z coordinate of any element y podremos restituir cualquier geometría como curvas de nivel fácilmente como veremos en el 5º workshop and we can easily retrieve various geometries (e.g. contour lines), as we will see in the 5th workshop Burnum, Croatia the helicopter project shown in the workshop vemos nuestra zona del proyecto con un servicio WMS we can visualize our project area with a WMS Tomroden, Germany an UAV project shown in the first workshop Burnum, Croatia the helicopter project shown in this workshop podemos ver simultaneamente diferentes vuelos de UAV/drone, helicóptero o avión en un mismo proyecto we can automatically see different images obtained by an UAV, a helicopter, or an airplane in the same project Tomroden, Germany an UAV project shown in the first workshop podemos ver simultaneamente diferentes vuelos de UAV/drone, helicóptero o avión en un mismo proyecto we can automatically see different images obtained by an UAV, a helicopter, or an airplane in the same project proyecto Tomroden Alemania Tomroden project, Germany Workshops Thanks for the flight data for this course provided by AirRotorMedia and CopterSystems. [email protected] [email protected] Workshops Thanks for the flight data for this course Provided By Krka National Park and Vektra. http://www.np-krka.hr/ Workshops 4th Workshop Third week of June Realization of mission and flight, complete process Focus: Point Cloud [email protected]
