owner`s manual - Electric Violin Shop
Anuncio

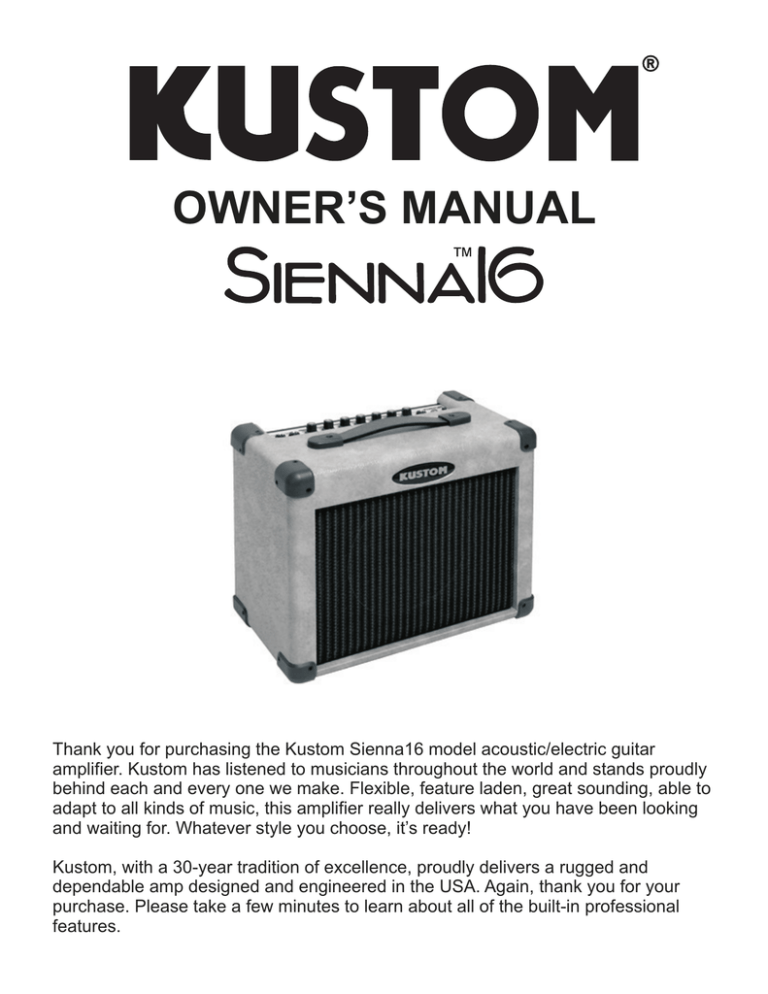
OWNER’S MANUAL Thank you for purchasing the Kustom Sienna16 model acoustic/electric guitar amplifier. Kustom has listened to musicians throughout the world and stands proudly behind each and every one we make. Flexible, feature laden, great sounding, able to adapt to all kinds of music, this amplifier really delivers what you have been looking and waiting for. Whatever style you choose, it’s ready! Kustom, with a 30-year tradition of excellence, proudly delivers a rugged and dependable amp designed and engineered in the USA. Again, thank you for your purchase. Please take a few minutes to learn about all of the built-in professional features. Model Power Equalizer Channels Impedance Effects Amplifier Type Dimensions Sienna16 16 W 4 Band Two 8 Ohms Reverb Bi-Polar Transistor 40.6 x 21.5 x 32.4 cm ENGLISH 8.5 kg IMPORTANT SAFETY INSTRUCTIONS Danger Exposure to extremely high noise levels may cause a permanent hearing loss. Individuals vary considerably to noise induced hearing loss but nearly everyone will lose some hearing if exposed to sufficiently intense noise for a sufficient time. The U.S. Government's Occupational Safety and Health Administration (OSHA) has specified the following permissible noise level exposures: 1. 2. 3. 4. 5. 6. 7. DURATION PER DAY (HOURS) 8 6 4 3 2 1 SOUND LEVEL (dB) Weight 90 93 95 97 100 103 8. According to OSHA, any exposure in the above permissible limits could result in some hearing loss. Ear plugs or protectors in the ear canal or over the ears must be worn when operating this amplification system in order to prevent a permanent hearing loss. If exposure in excess of the limits as put forth above, to insure against potentially harmful exposure to high sound pressure levels, it is recommended that all persons exposed to equipment capable of inducing high sound pressure levels, such as this amplification system, be protected by hearing protectors while this unit is in operation. 9. 10. CAUTION RISK OF ELECTRIC SHOCK DO NOT OPEN 11 . 12. CAUTION: TO REDUCE THE RISK OF ELECTRIC SHOCK, DO NOT REMOVE CHASSIS. NO USER-SERVICEABLE PARTS INSIDE. REFER SERVICING TO QUALIFIED SERVICE PERSONNEL. 13. AVIS: RISQUE DE CHOC ELECTRIQUE-NE PAS OUVRIR. THIS SYMBOL IS INTENDED TO ALERT THE USER TO THE PRESENCE OF NON-INSULATED "DANGEROUS VOLTAGE" WITHIN THE PRODUCT'S ENCLOSURE THAT MAY BE OF SUFFICIENT MAGNITUDE TO CONSTITUTE A RISK OF ELECTRIC SHOCK TO PERSONS. 14. 15. THIS SYMBOL IS INTENDED TO ALERT THE USER TO THE PRESENCE OF IMPORTANT OPERATING AND MAINTENANCE (SERVICING) INSTRUCTIONS IN THE LITERATURE ACCOMPANYING THE UNIT. APPARATUS SHALL NOT BE EXPOSED TO DRIPPING OR SPLASHING AND THAT NO OBJECTS FILLED WITH LIQUIDS, SUCH AS VASES, SHALL BE PLACED ON THE APPARATUS. 16. Read all safety and operating instructions before using this product. All safety and operating instructions should be kept for future reference. Read and understand all warnings listed on the operating instructions. Follow all operating instructions to operate this product. This product should not be used near water, i.e. Bathtub, sink,swimming pool, wet basement, etc. Only use dry cloth to clean this product. Do not block any ventilation openings, It should not be placed flat against a wall or placed in a built-in enclosure that will impede the flow of cooling air. Do not install this product near any heat sources ;such as,radiators, heat registers, stove or other apparatus (including heat producing amplifiers) that produce heat. Do not defeat the safety purpose of the polarized or grounding-type plug. A polarized plug has two blades with one wider than the 0ther.A grounding-type plug has two blades and a third grounding prong. The wide blade or the third prong are provided for your safety If the provided plug does not fit into your outlet, consult an electrician for replacement of the obsolete outlet. Protect the power cord being walked on or pinched, particularly at Plugs, convenience receptacles and the point where they exit from the apparatus. Do not break the ground pin of the power supply cord. Only use attachments specified by the manufacturer. Use only with the cart, stand, tripod, bracket, or table specified by the manufacturer or sold with the apparatus. When a cart is used, use caution when moving cart/apparatus combination to avoid injury from tip-over. Unplug this apparatus during lightning storms or when unused for long periods of time. Care should be taken so that objects do not fall and liquids are not spilled into the unit through the ventilation ports or any other openings. Refer all servicing to qualified service personnel. Servicing is required when the apparatus has been damaged in any way; such as, powersupply cord or plug is damaged, liquid has been spilled or objects have fallen into the apparatus, the apparatus has been exposed to rain or moisture, does not operate normally or has been dropped. WARNING: To reduce the risk of fire or electric shock, do not expose this apparatus to rain or moisture. Kustom Inc., 4940 Delhi Pike, Cincinnati, OH • USA (800) 999-5558 Fax: (513) 347-2192 / www.kustom.com 2 1 6 W A T T A CO U S T I C G U I T A R A M P L I F I E R 1.) Mic/Line Input - this is a 1/4” 2 conductor input jack for plugging in Hi-Z microphones. It is intended for microphones but will accept other instruments as well. 2.) Guitar Input - this is a 1/4” 2 conductor input jack for plugging in your instrument. It is intended for guitar or Hi-Z microphones but will accept other instruments as well. 3.) Mic/Line Volume - this control is the volume control for the mic/line input. Slowly increase the control to increase the volume. If you are using a high impedance microphone, be careful when increasing the volume. Depending on mic position, it may feedback if mic is in front of speaker. 4.) Guitar Volume - this control is the volume control for the guitar input. Slowly increase the control to increase the volume. If you are using a guitar with an on-board preamp, set its level for a mid position before increasing this control otherwise distortion may occur. 5.) Low - this control is the bass control. It is active and set to boost or cut frequencies at 60 Hz. This will affect the low frequency signals. Turning it counterclockwise, the low will be rolled off -18db. Clockwise, increases those frequencies up to +18db. 6.) Lo Mid - this control is the Low Midrange control. It is active set to boost or cut frequencies at 350 Hz. This will effect the mid-low frequency signals. Turning it counterclockwise, the low-mids will be rolled off 12db. Clockwise, increases those frequencies up to +12db. 7.) Hi Mid - this control is the High Midrange control. It is active and set to boost or cut frequencies at 2.5KHz. This will effect the mid-high frequency signals. Turning it counterclockwise, the low-mids will be rolled off -12db. Clockwise, increases those frequencies up to +12db. 8.) High - this is the high frequency tone control. It is active and set to boost or cut frequencies at 8KHz. This will affect the high frequency signals. Turning it counterclockwise, the highs will be rolled off -18db. Clockwise, increases those frequencies up to +18db. 9.) Reverb Level - this control adds the spring reverb and mixes it into the main signal. Reverberation creates a trail like effect with the sound. It lets the notes “hang in the air” longer, extending the sound. 10.) Headphone Jack - this is a 1/4” 3 conductor jack for plugging in headphones. It will sum the signal and put the sound in both ears, thereby creating a pseudo-stereo sound. Volume will be determined by the volume control on the channel you are on. It will disconnect the internal speaker when in use. This will allow quiet practicing. 11.) Jewel Light - this jewel light lets you know that the amplifier is on. 12.) Power - this switch turns on and off the AC power to the amp. Back Panel - this is a 2 conductor 1/4” speaker output jack. This will disconnect the internal speaker and allow an external speaker cabinet to be employed. Rating is 8 ohms. 3 Suggested Settings (These settings are general starting points. They are designed to get you close to the sound you are looking for. If the control is not shown, then it doesn’t apply to this particular sound. ) 1 6 W A T T A CO U S T I C G U I T A R A M P L I F I E R Standard Single Input Setup - in this setup your acoustic/electric guitar is plugged into input 1. (Remember, if you are using an active guitar or pre-amplified guitar, you may need to lower the guitar’s volume control if you encounter distortion. We suggest that you turn its output level to about mid-way up and this will give you a cleaner sound as well as giving you available headroom for leads.) The tone controls follow both inputs. Of course, you can adjust the tone controls to any desired sound but in this setup, we suggest these tone control settings. It will deliver a clear, clean sound that has enough top end clarity to cut through. Add low and low mid for a beefier presence but be careful as this can “muddy up” the sound. Adjust the reverb to suit the music or to your taste. 1 6 W A T T A CO U S T I C G U I T A R A M P L I F I E R Standard Dual Input Setup - in this setup two inputs are utilized. Guitar is plugged into guitar input jack and a Hi-Z microphone is plugged into mic/line Input. Assuming you are also using a microphone, plug it into the mic/line jack and slowly turn up the mic/line volume control. Balancing the two types of inputs gives you a much more natural acoustic guitar sound. You could also plug in any combination of inputs such as: keyboards, microphones or other guitars. This can also be a basic mini-PA system. It could be used for plugging in a CD player or cassette deck and a microphone for singing. It can be used for playing over prerecorded tapes with mixing capabilities. As mentioned earlier, you can adjust the tone controls to any desired sound, but in this setup we suggest these tone control settings. Of course it depends on the listening environment. It will deliver a clear, clean sound that has enough top end clarity to let the acoustic sound cut through. Adjust the reverb to suit the music or to your taste. 4 OWNER’S MANUAL Le modèle KUSTOM Sienna16 est un amplificateur pour guitares acoustiques et électriques. Etant toujours à l’écoute des musiciens à travers le monde, Kustom a conçu ses amplis en respectant les besoins et les desiderata de ces guitaristes. Compact, efficace, possédant des options intéressantes et des capacités sonores optimales, pouvant être utilisé dans toutes les circonstances et restant très polyvalent, c’est un ampli sur lequel vous pourrez compter à chaque instant. Derrière le nom «KUSTOM» se dresse 30 années de tradition et d’améliorations technologiques constantes afin de présenter des amplis de la meilleure qualité et surtout de satisfaire pleinement l’utilisateur final qu’est le musicien. Merci de prendre connaissance de ce manuel. 5 Modèle Puissance Equalizer Canaux Impédance Effets Type d’ampli Sienna16 16 W 4 Bandes 2 8 Ohms Réverbe Transistor Bi-Polar Kustom Inc., 4940 Delhi Pike, Cincinnati, OH • USA (800) 999-5558 Fax: (513) 347-2192 / www.kustom.com 6 Dimensions 40.6 x 21.5 x 32.4 cm Poids 8.5 1 6 W A T T A CO U S T I C G U I T A R A M P L I F I E R 1.) Entrée micro/ligne: entrée jack 6.35 pour micro haute impédance. Accepte également d’autres instruments. 2.) Entrée guitare: entrée jack 6.35 pour guitare. Accepte également d’autres instruments. 3.) Volume pour entrée micro/ligne (1) : montez ce volume progressivement. Si vous utilisez un micro haute impédance augmentez le volume très progressivement et éloignez celui-ci du haut-parleur afin d’éviter le larsen. 4.) Volume pour entrée guitare (entrée 2): montez ce volume progressivement. Si votre guitare dispose d’un préamplificateur, réglez celui-ci à la moitié de son volume avant de monter le volume de l’ampli. 5.) Réglage des graves: annule ou augmente les fréquences à 60Hz. Affecte donc uniquement les fréquences graves de -18db à +18db. 6.) Réglage des médiums/graves : annule ou augmente les fréquences à 3.5KHz. Affecte donc uniquement les fréquences graves de -12db à +12db. 7.) Réglage des médiums/aigus : annule ou augmente les fréquences à 2.5KHz. Affecte donc uniquement les fréquences graves de -12db à +12db. 8.) Réglage des aigus: annule ou augmente les fréquences à 8KHz. Affecte donc uniquement les fréquences graves de -18db à +18db. 9.) Volume de la réverbe: rajoute un effet de réverbe au son naturel de l’instrument. Cela rend le son plus rond, plus large et plus long. 10.) Entrée casque: entrée jack 6.35. Le volume se règle díaprès líentrée utilisée. L’utilisation de l’entrée casque déconnecte le haut-parleur. Cela permet de jouer de son instrument sans déranger les personnes alentours. 7 Suggestions de réglages sonores (Ces réglages sont donnés à titre indicatif pour vous aider à connaître mieux votre amplificateur) 1 6 W A T T A CO U S T I C G U I T A R A M P L I F I E R Réglage standard pour une guitare - Dans ce cas de figure votre instrument est connecté dans l’entrée 1 (mic/line). N’oubliez pas que si vous utilisez une guitare prámplifiée, il faut d’abord régler le volume du préampli de la guitare à la moitié de son rendement sous peine de saturation ou de larsen. Ce rélgage donne un son clair et propre auquel on peut ajouter des graves afin d’augmenter la «présence». Ajustez la réverbe selon votre oreille. 1 6 W A T T A CO U S T I C G U I T A R A M P L I F I E R Réglage standard pour deux entrées - Dans cet exemple, 2 entrées sont utilisées. La guitare est connectée dans l’entrée 2 (guitar) et un micro haute impédance est connecté dans l’entrée 1 (micro/line). Ce réglage donne un son clair et propre. Ajustez la réverbe selon votre oreille. vous pouvez insérer d’autres combinaisons d’instruments: clavier, micro ou d’autres guitares. Un mixage peut également être connecté pour brancher un lecteur CD ou K7 et un micro afin de chanter avec la musique ou pour un enregistrement. 8 MANUAL DEL USUARIO Gracias por comprar el modelo KUSTOM KAA 16 de amplificador de guitarra acústica / eléctrica. Kustom ha escuchado a músicos de todo el mundo y siempre ha intentado estar a su lado en todo lo que ha hecho. Todos nuestros productos se han diseñado pensando en tus necesidades. Flexible y de gran sonido, se adapta a cualquier estilo musical, este amplificador estará realmente a la altura de tus expectativas. Kustom, con una tradición de 30 años de excelencia en el diseño de amplificadores, se complace en presentarte este excelente amplificador diseñado en USA. Una vez más gracias por tu compra. Por favor tomate unos minutos para leer este manual que te introducirá en el uso y te ayudará a sacar el máximo partido de las prestaciones profesionales que posee este amplificador. 9 Modelo Poder Ecualizador Canales Impedancia Effectos Tipo De Amplificador Dimenciones Sienna16 16 W 4 Bandas Dos 8 Ohms Reverb Bi-Polar Transistor 40.6 x 21.5 x 32.4 cm Kustom Inc., 4940 Delhi Pike, Cincinnati, OH • USA (800) 999-5558 Fax: (513) 347-2192 / www.kustom.com 10 Peso 8.5 kg 1.) Mic/line input - Entrada de Jack mono de ¼” para conectar micrófonos de alta impedancia o instrumentos. 2.) Guitar input - Entrada de Jack mono de ¼” para conectar tu instrumento. Aunque está pensada para guitarra o micrófonos de alta impedancia, aceptará cualquier otro tipo de instrumento. 3.) Mic/Line Volume - Este control es el volumen de entrada para la entrada de mic/line. Gire lentamente el mando para subir el volumen. Si se está usando micrófonos de alta impedancia, tenga cuidado cuando suba el volumen. Dependiendo de la posición del micrófono se pueden producir acoples, sobre todo si se coloca frente al altavoz, si esto ocurre pruebe a alejarse o reduzca el nivel de agudos. 4.) Guitar Volume - Este control es el volumen de entrada para la entrada de guitarra. Gire lentamente el mando para subir el volumen. Si se está usando una guitarra con preamplifcador integrado, ajuste el volumen de la guitarra a la mitad antes de subir el volumen del amplificador o puede aparecer distorsión. 5.) Low - Este es el control de graves. Dicho control es activo a permite aumentar o cortar afectando a las frecuencias graves, centradas sobre 60 Hz. El rango de ganancia o atenuación es de +/- 18 dB. 6.) Lo Mid - Este es el control de medios-graves. Dicho control es activo a permite aumentar o cortar afectando a las frecuencias medias-graves, centradas sobre 350 Hz. El rango de ganancia o atenuación es de +/- 12 dB. 7.) Hi Mid - Este es el control de medios-agudos. Dicho control es activo a permite aumentar o cortar afectando a las frecuencias medias-agudas, centradas sobre 2500 Hz. El rango de ganancia o atenuación es de +/- 12 dB. 8.) High - Este es el control de agudos. Dicho control es activo a permite aumentar o cortar afectando a las frecuencias agudas, centradas sobre 8000 Hz. El rango de ganancia o atenuación es de +/- 18 dB. 9.) Reverb Level - Este control permite añadir efecto de Reverb de muelles y mezcla este con la señal del bus principal. La reverberación, simula la ejecución en el interior de una sala y hace que las notas parezcan “flotar en el aire”, dando profundidad y riqueza de matices al sonido. 10.) Headphone Jack - Salida de jack estéreo de ¼ “ para la conexión de auriculares. La señal mono de la entrada se pone en los dos auriculares para crear un efecto pseudo-estéreo. El volumen se determina ajustando el volumen del canal que se esté utilizando. Al conectar el auricular se desconectará el altavoz, esto permite practicar en silencio. 11 Ajustes sugeridos (Estos ajustes son solo sugerencias para empezar a trabajar con el amplificador. Están pensados para dar una referencia que ayude a encontrar el sonido que se esté buscando. Si un control no está sombreado, quiere decir que no tiene importancia para conseguir un sonido en particular) Ajustes estándar para utilización de una sola entrada - En este ajuste su guitarra acústica / eléctrica se enchufa a la entrada 1. (Recuerde que si está utilizando una guitarra preamplificada debe ajustar el volumen de la guitarra a la mitad antes de subir el volumen del amplificador o puede aparecer distorsión, en caso de aparecer reduzca el volumen de la guitarra). Los controles de tono afectan a las dos entradas. Por supuesto usted puede ajustar estos controles como desee, aunque nosotros sugerimos estos ajustes. Esto le dará un sonido limpio y claro. Añada graves o medios graves para un sonido con más cuerpo pero tenga en cuenta que esto puede hacer que el sonido se vuelva turbio. Ajuste la reverb a su gusto. Ajustes estándar para la utilización de dos entradas - En este ajuste se utilizan las dos entradas. La guitarra se enchufa a la entrada de guitarra, y un micrófono a la entrada de alta impedancia. Suba el volumen del amplificador lentamente para evitar acoples. Haga un balance entre las dos entradas lo que le dará un sonido de guitarra acústica mas natural. Naturalmente usted puede enchufar cualquier combinación de instrumentos como: teclados, micrófonos u otras guitarras. Esto puede ser un mini equipo de P.A. Puede ser usado para conectar un CD o un cassette y un micrófono para cantar. Puede ser usado para practicar con grabaciones ya hechas. Como se ha mencionado anteriormente usted puede ajustar los controles de tono a su gusto con total libertad, aunque este es el ajuste que nosotros sugerimos para obtener un sonido limpio, claro y natural, adecuado para instrumentos acústicos. Por supuesto que esto dependerá del entorno de escucha. Ajuste la reverb a su gusto. 12


