Reducer Bulletin - Hytrol Conveyor Co., Inc.
Anuncio
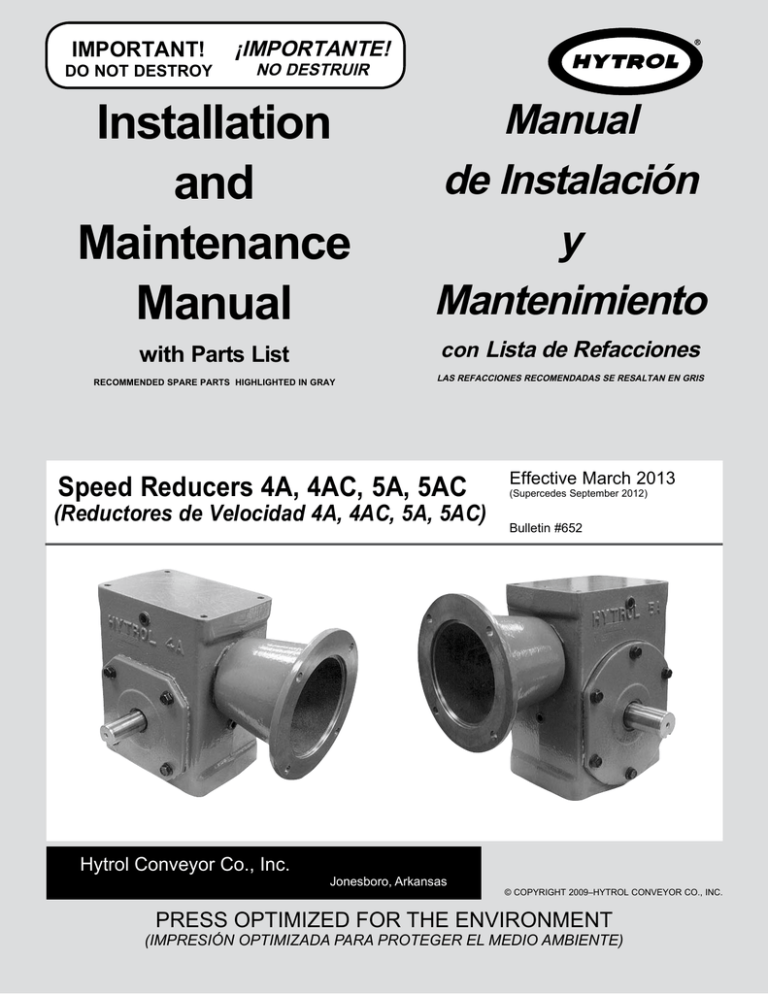
IMPORTANT! DO NOT DESTROY ¡IMPORTANTE! NO DESTRUIR Installation and Maintenance Manual with Parts List RECOMMENDED SPARE PARTS HIGHLIGHTED IN GRAY Manual de Instalación y Mantenimiento con Lista de Refacciones LAS REFACCIONES RECOMENDADAS SE RESALTAN EN GRIS Speed Reducers 4A, 4AC, 5A, 5AC (Reductores de Velocidad 4A, 4AC, 5A, 5AC) Hytrol Conveyor Co., Inc. Jonesboro, Arkansas Effective March 2013 (Supercedes September 2012) Bulletin #652 © COPYRIGHT 2009–HYTROL CONVEYOR CO., INC. Press Optimized for the Environment (Impresión Optimizada para Proteger el Medio Ambiente) Table of Contents INTRODUCTION General Information . . . . . . . . . . . . . . . . . . . . . . . . . . . . . . . . . . 2 Determining Gear Ratio . . . . . . . . . . . . . . . . . . . . . . . . . . . . . 2, 4 Determining Right or Left Hand Reducer . . . . . . . . . . . . . . . . . . 2, 4 MAINTENANCE Lubrication . . . . . . . . . . . . . . . . . . . . . . . . . . . . . . . . . . . . . . . 2, 5 Removal & Installation . . . . . . . . . . . . . . . . . . . . . . . . . . . . . . . . 2 “C” Face Motors . . . . . . . . . . . . . . . . . . . . . . . . . . . . . . . . . . . 2, 4 REPLACEMENT PARTS 4A and 4AC Parts Drawing & List . . . . . . . . . . . . . . . . . . . . . . . 6 5A and 5AC Parts Drawing & List . . . . . . . . . . . . . . . . . . . . . . . 7 SPANISH VERSION. . . . . . . . . . . . . . . . . . . . . . . . . . . . . . . . . . . . . . . . . . . . . . 3 INTRODUCTION This manual provides guidelines and procedures for installing, operating, and maintaining your conveyor. A complete parts list is provided with recommended spare parts highlighted in gray. Important safety information is also provided throughout the manual. For safety to personnel and for proper operation of your conveyor, it is recommended that you read and follow the instructions provided in this manual. • Receiving and Uncrating 1. Check the number of items received against the bill of lading. 2. Examine condition of equipment to determine if any damage occurred during shipment. 3. Move all crates to area of installation. 4. Remove crating and check for optional equipment that may be fastened to the conveyor. Make sure these parts (or any foreign pieces) are removed. NOTE: If damage has occurred or freight is missing, contact your Hytrol Integration Partner. • How to Order Replacement Parts Included in this manual are parts drawings with complete replacement parts lists. Minor fasteners, such as nuts and bolts, are not included. When ordering replacement parts: 1. Contact Dealer from whom conveyor was purchased or nearest HYTROL Integration Partner. 2. Give Conveyor Model Number and Serial Number or HYTROL Factory Order Number. 3. Give Part Number and complete description from Parts List. 4. Give type of drive. Example—8” End Drive, 8” Center Drive, etc. 5. If you are in a breakdown situation, tell us. • General Information Most HYTROL conveyor drives are supplied with the HYTROL Speed Reducer. Models 4A and 5A Speed Reducers are used with V-Belt drives, whereas the 4AC and 5AC Reducers are supplied with the “C” Face Drive. • Determining Gear Ratio To determine the ratio and/or the assembly date of a HYTROL Reducer, refer to the numbers stamped on the end of the output shaft. Figure 4A shows the location of these numbers. AVAILABLE RATIOS ARE ALSO CHARTED IN THIS FIGURE. • Determining Right or Left Hand Reducer To determine a right hand or left hand HYTROL Reducer, look into the output shaft with the input shaft on the high side. If the input is on the right side, it is a right hand reducer. If it is on the left, it is a left hand reducer. (See Figure 4B). MAINTENANCE Regular Oil Change–After initial change, in normal conditions, the oil should be changed every 2500 hours of operation, or every 6 months, whichever is first. To Refill–Determine position of Reducer from Figure 5A and refill with amount of oil shown in capacity chart (Figure 5C). • Installation Instructions for Vent Plug 1. Determine position of reducer after equipment has been installed. (See Figure 5A). 2. Remove solid pipe plugs & install vent plug in position indicated by drawings. (Other positions may cause leakage). 3. If reducer is mounted in position “C” or “D”, remove oil level plug & insure that oil is up to this hole. If not, add oil until it comes up to this level (approx. 1/4 qt in the 4A, 1/2 qt in the 5A). To add oil, remove pipe plug or vent at the uppermost part. 4. Position “F” not recommended-premature oil leakage may occur around input shaft seal. Use this position only if no other will work. • Removal & Installation If the speed reducer is removed from the conveyor for maintenance purposes, the following precautions should be taken upon reinstalling the reducer: 1. When the reducer is used in conjunction with sheaves and sprockets, care should be taken to insure that shafts are parallel and sheaves and/or sprockets are in alignment. This will prevent damage to bearings, chain and sprockets, sheaves and V-Belts. 2. Sheaves and sprockets should be properly keyed and tightened to the shafts to prevent wear to the shaft and bores. Extreme belt or chain tension should be avoided. 3. When assembling sheaves or sprockets on reducer shafts, they should be installed as close to the reducer housing as possible. Sheaves or sprockets should not be driven onto the shaft. This could result in damage to bearings and/or reducer housing. • “C” Face Motors Models 4AC and 5AC speed reducers are supplied with a “C-Face” adapter and are coupled directly to the motor by coupling gears and sleeve. To replace the coupling, refer to Figure 5D and follow the instructions listed below. 1. Install 3/4” bore coupling gear to reducer shaft using 3/16” x 1” long shaft key. Tighten set screws through hole in “C-Face” adapter. 2. Install coupling gear to motor (refer to chart for correct bore size). Locate 2-1/32” from face of motor using 3/16” x 1” long shaft key. Tighten set screws. 3. Place sleeve onto coupling gear on motor and ease motor into place (look through hole in “C-Face” adapter to see that sleeve seats onto coupling gear of reducer). 4. Align motor mounting holes to “C-Face” adapter and install mounting bolts. 5. “C” - face adapters use a plastic coupling to connect the motor shaft to the reducer input shaft. A gear is mounted to the end of each shaft. The gears nest inside the plastic coupling. It is important for these gears to be properly spaced on the shafts. Incorrect gear setting can result in excessive coupling noise and bearing failure. The Hytrol Motor Coupler Gage should be used to space coupling gears whenever the motor or reducer is changed out. The Motor Coupler Gage is a plastic template that mounts over the motor flange or the reducer adapter. This gage will accurately locate both gears to their correct setting on the shaft. The illustration on the face of the gage shows how to use it. The HYTROL Speed Reducer, if properly used, should require little maintenance except for scheduled lubrication. Instructions for changing oil and recommended lubricants are as follows. • Lubrication Initial Oil Change–Drain the oil in a new Speed Reducer after approximately 500 hours of operation and refill with recommended oil from lubrication chart (Figure 5B). 2 Tabla de Contenido • Lubricación INTRODUCCION Cambio de Aceite Inicial - Retire el aceite de un reductor de velocidad nuevo después de aproximadamente 500 horas de operación y reemplácelo con el aceite recomendado en el cuadro de lubricantes. (Figura 5B). Cambio de Aceite Regular – Después del cambio inicial del aceite, en condiciones normales, el aceite deberá cambiarse cada 2,500 horas de operación, o cada 6 meses, lo que ocurra primero. Reemplazando el Aceite – Determine la posición del reductor de acuerdo a la Figura 5A y vierta la cantidad de aceite según se indica en el cuadro de capacidades de la Figura 5C. Información General . . . . . . . . . . . . . . . . . . . . . . . . . . . . . . . . . . 3 Cómo determinar la relación Reductor . . . . . . . . . . . . . . . . . 3,4 Cómo determinar el lado del Reductor . . . . . . . . . . . . . . . . . 3,4 MANTENIMIENTO Lubricación . . . . . . . . . . . . . . . . . . . . . . . . . . . . . . . . . . . . . . . 3,5 Desmontagje e Instalación . . . . . . . . . . . . . . . . . . . . . . . . . . . . . 3 Motores con acoplamiento en “C” . . . . . . . . . . . . . . . . . . . . . 3,5 PARTES DE REPUESTO Dibujo y lista de Partes. 4A y 4AC . . . . . . . . . . . . . . . . . . . . . . . 6 Dibujo y lista de Partes. 5A y 5AC . . . . . . . . . . . . . . . . . . . . . . . 7 • Instrucciones de instalación parael Tapón de Ventilación INTRODUCCION Este manual provee información acerca del uso, lubricación, y mantenimiento de los reductores de velocidad Hytrol. Es importante seguir este manual para así asegurar una larga vida y máxima eficiencia del reductor de velocidad. • Recepción y Desembalaje 1. Verifique el número de partes recibidas con respecto al conocimiento del embarque. 2. Examine las condiciones del equipo para determinar si algún daño ha ocurrido durante el transporte. 3. Traslade todo el equipo al área de instalación. 4. Remueva todos los empaques y verifique si hay partes adicionales que puedan estar atadas al equipo. Asegúrese de que estas partes (u otras partes ajenas al equipo) sean removidas. NOTA: Si algún daño ha ocurrido o faltan partes, contácte a su Integrador Hytrol. • Cómo Ordenar Refaccionamiento En este manual encontrará dibujos de las partes con listas completas de las refacciones. Partes pequeñas como tornillería no están incluidas. Para ordenar partes de repuesto: 1. Contacte al representante que le vendió el transportador o el Integrador Hytrol mas cercano. 2. Proporcione el Modelo del Transportador y el Número de Serie o Número de la Orden de Fabricación. 3. Proporcione el Número de las partes y descripción completa que aparece en la Lista de Partes. 4. Proporcione el tipo de motor. Ejemplo- Unidad Motriz en Extremo de 8”, Unidad Motriz Central de 8”, etc. 5. Si el equipo se encuentra en una situación crítica, comuníquese con nosotros inmediatamente. • Información General La mayoría de las unidades motrices de los transportadores Hytrol están equipadas con reductores de velocidad Hytrol. Los modelos de reductores de velocidad 4A y 5A son usados en unidades motrices con acoplamiento en V (VBelt), mientras que los modelos 4AC y 5AC son usados en unidades motrices con acoplamiento en “C” (C-Face). • Cómo determinar la relación del Reductor Para determinar la relación del reductor y/o la fecha de fabricación de un reductor de Hytrol, refiérase a los números estampados en el extremo del eje de salida. La figura 4A muestra la ubicación de estos números. LAS RELACIONES DISPONIBLES TAMBIEN ESTÁN MENCIONADAS EN ESTE CUADRO. • Cómo determinar el lado del Reductor Para determinar si un reductor Hytrol es de lado derecho o izquierdo, mire el eje de salida de frente teniendo en un costado el eje de entrada en la parte alta del reductor. Si el eje de entrada esta hacia el lado derecho, este es un reductor de lado derecho. Si esta hacia el lado izquierdo, este es un reductor de lado izquierdo (ver figura 4B). MANTENIMIENTO Si el reductor de velocidad Hytrol es usado apropiadamente, deberá requerir poco mantenimiento a excepción del programa de lubricación. Las instrucciones para el cambio de aceite así como los lubricantes recomendados son descritos a continuación. 3 1. Determine la posición del reductor después de que el equipo haya sido instalado. (Figura 5A) 2. Remueva el tapón sellado e instale el tapón de ventilación en la posición indicada por los dibujos. (Otras posiciones pueden causar goteo). 3. Si el reductor está montado en la posición “C” o “D”, remueva el tapón del nivel de aceite y asegúrese que el nivel de aceite llega hasta este orificio. Si no es así, adicione aceite hasta que suba al nivel necesario (apróx. 1/4 qt. en el 4A, 1/2 qt. en el 5A). Para adicionar aceite, remueva el tapón a la parte más alta del reductor. 4. La posición F no es recomendada ya que podría ocasionar goteo prematuro alrededor del sello del eje de entrada. Utilice esta posición solamente si no funciona con ninguna otra posición. • Desmontaje e Instalación Si el reductor de velocidad es desmontado del transportador para fines de mantenimiento, las siguientes precauciones deben ser tomadas en cuenta durante la reinstalación del reductor: 1. Cuando el reductor es usado en conjunto con poleas y catarinas, se debe asegurar que las catarinas estén paralelas, y las poleas y/o catarinas estén alineadas. Esto prevendrá que ocurran daños a los rodamientos, cadenas y catarinas, poleas y bandas-V. 2. Las poleas y las catarinas deben ser aseguradas apropiadamente a los ejes para prevenir desgaste en el eje y los sellos. Se debe evitar tensionar demasiado la banda o la cadena. 3. Cuando se estén ensamblado las poleas o las catarinas en los ejes del reductor, éstas deben ser instaladas tan cerca de la caja del reductor como sea posible. Las poleas y las catarinas no deben ser forzadas en el eje. Esto podría resultar en daño a los rodamientos y/o la caja del reductor. • Motores con acoplamiento en “C” Los modelos de reductores de velocidad 4AC y 5AC son proveídos con un adaptador “C-Face” el cual está unido directamente al motor mediante coples y sellos. Para reemplazar el tubo de acoplamiento, refiérase a la Figura 5D y siga las instrucciones de la lista de abajo. 1. Instale el engranaje de unión de 3/4” al eje del reductor usando la llave del eje de 3/16” x 1” de largo. Apriete los tornillos a través del orificio en el adaptador “C-Face”. 2. Instale el engranaje de acoplamiento al motor (refiérase al cuadro para el tamaño correcto del diámetro). Localícelo a 2-1/32” de la cara del motor usando una llave para el eje de 3/16” x 1” de largo. Apriete los tornillos de fijación. 3. Coloque el tubo en el engranaje de acoplamiento del motor y coloque el motor en su posición adecuada (mire a través del orificio del adaptador “C-Face” para ver que el tubo este adecuadamente posicionado en el engranaje de acoplamiento del reductor). 4. Alinee los orificios de montaje del motor al adaptador “C-Face” e instale los tornillos de montaje. 5. Los adaptadores “C-Face” utilizan una unión plástica para conectar el eje del motor al eje de entrada del reductor. Un engranaje es colocado al extremo de cada eje. Los engranajes se ubican dentro de la unión plástica. Es importante que estos engranajes estén apropiadamente espaciados en los ejes. El posicionamiento incorrecto de los engranajes puede resultar en ruido excesivo y fallas de los rodamientos. La plantilla acopladora del motor Hytrol debe ser usada para fijar el espacio adecuado en los engranajes de unión cada vez que el motor o el reductor sean reemplazados. El calibrador para acople del motor es una pieza plástica que se monta sobre el borde del motor o el adaptador del reductor. Esta plantilla ubicará con exactitud ambos engranajes en la posición correcta sobre el eje. La ilustración sobre la plantilla muestra como usarla. • Determining Gear Ratio Cómo determinar la relación del Reductor FIGURE 4A AVAILABLE RATIOS (PROPORCIONES DISPONIBLES) MODEL 5A & 5AC (MODELO 5A Y 5AC) MODEL 4A & 4AC (MODELO 4A Y 4AC) GEAR RATIO (PROPORCION PARA EL ENGRANAJE) COLOR CODE (CODIGO DE COLOR) GEAR RATIO (PROPORCION PARA EL ENGRANAJE) COLOR CODE (CODIGO DE COLOR) 10:1 White (Blanco) 10:1 White (Blanco) 20:1 Blue (Azul) 20:1 Blue (Azul) 30:1 Green (Verde) 30:1 Green (Verde) 40:1 Yellow (Amarillo) 40:1 Yellow (Amarillo) 60:1 Black (Negro) 50:1 Red (Rojo) 83: 1 Black (Negro) ASSEMBLY DATE 5/94 (FECHA DE ENSAMBLE 5/94) OUTPUT SHAFT (EJE DE SALIDA) RATIO 30:1 (RELACIÓN 30:1) YEAR (AÑO) 3 5 4 • Determining Right or Left Hand Reducer Cómo determinar el lado del Reductor FIGURE 4B INPUT SHAFT (EJE DE ENTRADA) LEFT HAND ASSEMBLY (ENSAMBLE DE LADO IZQUIERDO) INPUT SHAFT (EJE DE ENTRADA) MODELS 4A & 4AC SPEED REDUCERS (MODELOS DE REDUCTORES DE VELOCIDAD 4A & 4AC) OUTPUT SHAFT (EJE DE SALIDA) “C” FACE ADAPTER (ADAPTADOR A MOTOR “C” FACE) RIGHT HAND ASSEMBLY (ENSAMBLE DE LADO DERECHO) MODELS 5A & 5AC SPEED REDUCERS “C” FACE ADAPTER (MODELOS DE REDUCTORES DE VELOCIDAD 5A & 5AC)(ADAPTADOR A MOTOR “C” FACE) OUTPUT SHAFT (EJE DE SALIDA) RIGHT HAND ASSEMBLY (ENSAMBLE DE LADO DERECHO) LEFT HAND ASSEMBLY (ENSAMBLE DE LADO IZQUIERDO) 4 MONTH (MES) • Lubrication Lubricación (FIGURA 5A - POSICIONES DE MONTAJE) FIGURE 5A - MOUNTING POSITIONS POSITION A (POSICIÓN A) OIL LEVEL POSITION C (POSICIÓN C) VENT PLUG POSITION E (POSICIÓN E) OUTPUT SHAFT (NIVEL DE ACEITE) (EJE DE SALIDA) VENT PLUG (TAPON DE VENTILACION) INPUT SHAFT (EJE DE ENTRADA) (TAPÓN DE VENTILACIÓN) VENT PLUG (TAPON DE VENTILACION) OIL LEVEL (NIVEL DE ACEITE) DRAIN (DESAGÜE) OUTPUT SHAFT DRAIN (EJE DE SALIDA) INPUT SHAFT (DESAGÜE) INPUT SHAFT (EJE DE ENTRADA) (EJE DE ENTRADA) OUTPUT SHAFT (EJE DE SALIDA) POSITION B (POSICIÓN B) POSITION D (POSICIÓN D) OIL LEVEL APPROX. 1/2” BELOW HOLE DRAIN (DESAGÜE) (NIVEL DE ACEITE POR DEBAJO DEL ORIFICIO EN APROX. 1/2”) POSITION F (POSICIÓN F) OUTPUT SHAFT OIL LEVEL (NIVEL DE ACEITE) OUTPUT SHAFT (EJE DE SALIDA) VENT PLUG (EJE DE SALIDA) VENT PLUG (TAPÓN DE VENTILACIÓN) (TAPÓN DE VENTILACIÓN) VENT PLUG OIL LEVEL (TAPÓN DE VENTILACIÓN) (NIVEL DE ACEITE) OIL LEVEL BELOW HOLE DRAIN APPROX. 1/2” ON 4A/4AC (DESAGÜE) APPROX. 3/4” ON 5A/5AC (NIVEL DE ACEITE POR DEBAJO INPUT SHAFT DEL ORIFICIO EN APROX. 1/2” EN 4A/4AC (EJE DE ENTRADA) APROX. 3/4” EN 5A/5AC) DRAIN (DESAGÜE) INPUT SHAFT INPUT SHAFT OUTPUT SHAFT DRAIN (EJE DE ENTRADA) (EJE DE ENTRADA) (EJE DE SALIDA) (DESAGÜE) FIGURE 5B–LUBRICANT (FIGURA 5B–LUBRICANTE) AMBIENT TEMPERATURE (TEMPERATURA AMBIENTE) FIGURE 5C–REFILL CAPACITY (FIGURA 5C–CAPACIDAD TOTAL) RECOMMENDED OIL OR EQUIVALENT (ACEITE RECOMENDADO O EQUIVALENTE) +10° F to +125° F -12° C to + 52° C STANDARD 095.100 Citgo EP - 680 +10° F to +125° F -12° C to + 52° C SYNTHETIC 095.098 Citgo Citgear Synthetic HT - 680 -30° F to +10° F -34° C to -12° C LOW TEMP 095.099 Coastal Dex Merc ATF REDUCER MODEL (MODELO DE REDUCTOR) MOUNTING POSITION (POSICIÓN DE MONTAJE) A B C D 1-1/4 QT. 1,183 ML. 1-1/2 QT. 1,419 ML. 1-1/4 QT. 1,183 ML. 5A & 5AC 1-1/4 QT. 1,183 ML. 1-3/4 QT. 1,656 ML. 1-1/4 QT. 1,183 ML. SPEED REDUCER SHAFT (INPUT) SET SCREW (CALIBRADOR PARA ACOPLE DEL MOTOR) MOTOR REDUCER (reductor) SHAFT KEY (Llave del eje) “A” “C” FACE MOTOR MOTOR COUPLING GAGE (tornillo DE FIJACION) MOTOR COUPLING GAGE (eje de entrada del reductor de velocidad) (MOUNT NEAR END OF SHAFT) SEE INSET FOR DIMENSION PASO 1 Engranaje de acoplamiento (Montarlo cerca del eXtremo del eje) Ver el cuadro para las dimensiones 2-1/32” (MOTOR CON ACOPLAMIENTO EN “C”) 2-1/4” COUPLER SLEEVE (tubo de acoplamiento) “C” FACE ADAPTER HOUSING (caja del adaptador “c” face) STEP 2 COUPLING GEAR (MOUNT NEAR END OF SHAFT) SEE INSET FOR DIMENSION PASO 2 Engranaje de acoplamiento (Montarlo cerca del extremo del eje) Ver el cuadro para las dimensiones SET SCREW INSERT IN COUPLING GEAR THROUGH HOLE IN SIDE OF ADAPTER HOUSING (TORNILLO DE FIJACION INSERTAR EN EL ENGRANAJE DE ACOPLAMIENTO A TRAVÉS DEL ORIfICIO EN EL LADO DE LA CAJA DEL ADAPTADOR) 5 F 4A & 4AC • “C” Face Motors Motores con acoplamiento en “C” FIGURE 5D STEP 1 COUPLING GEAR E MOTOR HORSEPOWER (caballos de fuerza del motor) HYTROL KIT NO. “A” 1/2 - 1 B-09179-B 5/8” DIA. 1-1/2 - 2 B-09179-C 7/8” DIA. 1 3 24 21 11 • Model 4A and 4AC Parts Drawing & List 18 17 Partes Dibujo y Lista de del Modelo 4A y 4AC 20 7 14 18 11 8 22 2 13 *For models shipped prior 9 to April 2005, please contact factory. 21 *Para modelos embarcados antes de abril de 2005, por favor 12 10 contáctenos 4 8 9 16 18 10 21 11 20 1 3 24 20 18 15 21 11 8 17 18 20 17 65 22 14 7 21 10 2 9 13 12 4 8 9 16 18 14 26 17 5 18 20 25 15 20 Ref. No. Part No. Description 1 2 3 4 5 R-00145 R-00035 R-00150 R-00040 R-00147 Speed Reducer Housing - 4A & 4AC Worm Gear (Specify Ratio) Worm Shaft - V-Belt Drive (Specify Ratio) Output Shaft Front Cover 6 7 8 9 10 R-00148 R-00149 012.102 012.103 012.106 Side Cover Side Cover (Input) V-Belt Drive Only Bearing Cone - 1 in. I.D. Bearing Cup - 1.9687 in. O.D. Bearing Cone - .84375 in. I.D. 11 12 13 14 15 012.107 051.114 R-00154 26 015.101 015.102 Bearing Cup - 1.96875 in. O.D. Spacer - 1 in I.D. x 1.25 in. O.D. x 1.215 in. Long Reducer Splash Shield 14 Seal - Double Lip, 3/4 in Shaft x 1.375 in. Bore Seal - Double Lip, 1 in Shaft x 1.625 in. Bore 16 --------- --052.118 052.1181 052.1182 052.1183 Gasket - Front Cover .004 in Thick .010 in Thick .016 in Thick .031 in Thick 17 18 25 Important! Manufacturing advancements necessitates changes in parts. 20 Always contact the Integration Partner when replacement parts are needed. Some replacement parts may effect other parts required. Please have the conveyor serial number when ordering. 17 18 19 20 21 052.1192 096.1111 095.100 049.539 092.0372 Gasket - Side Cover - .016 in Thick Gasket Sealing Paste (Not Shown) Gear Reducer Oil (Not Shown) 5/16-18 x 3/4 in. Lg Flange Lockbolt 3/8 in NPT Steel Pipe Plug w/C’sunk Hex 22 23 24* 25* 26* 090.201 R-00122 R-00151 R-00146 --- Shaft Key - #807 Woodruff Vent Plug Kit (Not Shown) Worm Shaft - C-Face Drive (Specify Ratio) C-Face Motor Adapter - 56,143/145T Frames Flexible Coupling Kit - Motor to Reducer ----27 28 29 B-09179-B B-09179-C R-00152 R-00153 R-00157 5/8 in. to 3/4 in. (1/2 thru 1 HP) 3/4 in. to 7/8 in. (2 HP) 4A Reducer - Complete (Specify Ratio and Hand) 4AC Reducer - Complete (Specify Ratio and Hand) 4A Reducer - Complete, Timing Belt Drive (Specify Ratio and Hand) 30 R-00158 31 R-00155 32 R-00156 4AC Reducer - Complete. Timing Belt Drive (Specify Ratio and Hand) 4A Reducer - Complete Double Sprocket Drive (Specify Ratio and Hand) 4A Reducer - 6:1 Variable Speed Drive (Specify Hand) * FOR 4AC REDUCER ONLY ¡Importante! Los avances en fabricación demandan cambios de partes. Contacte siempre al Integrador cuando necesite refaccionamiento. Algunas refacciones pueden afectar las otras partes requeridas. Por favor tenga el número de serie del transportador cuando realice sus órdenes. 6 11 21 10 8 • Model 5A and 5AC Parts Drawing & List 17 18del Modelo 5A y 5AC Dibujo y Lista de Partes 20 7 14 22 2 *For models shipped prior to April 2005, please contact factory. 21 9 de abril de 2005, por favor *Para modelos embarcados antes 1 contáctenos 4 21 3 24 11 10 20 17 20 16 18 18 21 10 5 8 17 18 7 11 6 22 14 20 13 2 21 9 1 12 4 8 9 16 18 26 14 17 18 5 20 15 25 20 26 Ref. No. 1 2 3 4 ------5 6 7 8 9 10 11 12 13 14 15 16 --------17 Part No. R-00161 R-00025 R-00165 --R-00167 R-00168 R-00169 R-00162 R-00148 R-00149 012.104 012.105 012.106 012.107 051.115 R-00154 015.101 015.103 20 --052.115 052.1153 052.116 052.1163 052.1192 Description Speed Reducer Housing - 5A & 5AC Worm Gear (Specify Ratio) Worm Shaft - V-Belt Drive (Specify Ratio) Output Shaft 5A & 5AC 5A & 5AC - Double Sprocket Drive 5A & 5AC - Timing Belt Drive Front Cover 14 Side Cover 17 Side Cover (Input) V-Belt Drive Only Bearing Cone - 1.250 in. I.D. 18 Bearing Cup - 2.89593 in. O.D. Bearing Cone - .84375 in. I.D. Bearing Cup - 1.96875 in. O.D. 25in I.D. x 1.75 in. O.D. x .267 in. Long Spacer - 1.260 Reducer Splash Shield Seal - Double Lip, 3/4 in Shaft x 1.375 in. Bore Seal - Double Lip, 1-1/4 in Shaft x 2 in. Bore Gasket - Front Cover .004 in Thick .010 in Thick .016 in Thick .031 in Thick Gasket - Side Cover - .016 in Thick 18 19 20 21 22 23 24* 25* 26* ----27 28 29 30 31 096.1111 095.100 049.539 092.0372 090.2012 R-00122 R-00166 R-00146 --B-09179-B B-09179-C R-00163 R-00164 R-00170 R-00171 R-00172 32 R-00173 Gasket Sealing Paste (Not Shown) Gear Reducer Oil (Not Shown) 5/16-18 x 7/8 in. Lg Flange Lockbolt 3/8 in. NPT Steel Pipe Plug w/C’sunk Hex Shaft Key - #810 Woodruff Vent Plug Kit - 3/8 in. NPT (Not Shown) Worm Shaft - C-Face Drive (Specify Ratio) C-Face Motor Adapter - 56,143/145T Frames Flexible Coupling Kit - Motor to Reducer 5/8 in. to 3/4 in. (1/2 thru 1 HP) 3/4 in. to 7/8 in. (2 HP) 5A Reducer - Complete (Specify Ratio and Hand) 5AC Reducer - Complete (Specify Ratio and Hand) 5A Reducer - Complete, Timing Belt Drive 5AC Reducer - Complete. Timing Belt Drive 5A Reducer - Complete, Double Sprocket Drive (Specify Ratio and Hand) 5AC Reducer - Complete, Double Sprocket Drive (Specify Ratio and Hand) * FOR 5AC REDUCER ONLY Important! Manufacturing advancements necessitates changes in parts. Always contact the Integration Partner when replacement parts are needed. Some replacement parts may effect other parts required. Please have the conveyor serial number when ordering. ¡Importante! Los avances en fabricación demandan cambios de partes. Contacte siempre al Integrador cuando necesite refaccionamiento. Algunas refacciones pueden afectar las otras partes requeridas. Por favor tenga el número de serie del transportador cuando realice sus órdenes. 7 We know conveyor. A: 2020 HYTROL STREET T: (870) 935.3700 JONESBORO, ARKANSAS 72401 F: (870) 931.1877 W: W W W. H Y T R O L . C O M
