MANUAL BREVE DE INSTRUCCIONES PARA INSTALAR EL BLOQUE DE
Anuncio

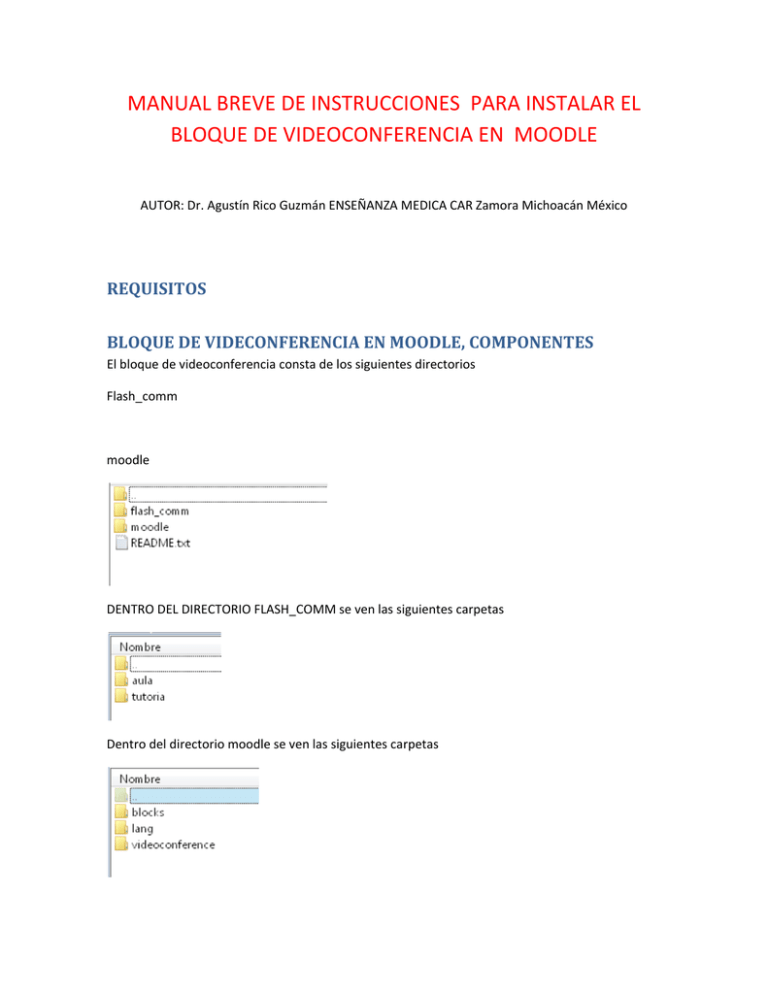
MANUAL BREVE DE INSTRUCCIONES PARA INSTALAR EL BLOQUE DE VIDEOCONFERENCIA EN MOODLE AUTOR: Dr. Agustín Rico Guzmán ENSEÑANZA MEDICA CAR Zamora Michoacán México REQUISITOS BLOQUE DE VIDECONFERENCIA EN MOODLE, COMPONENTES El bloque de videoconferencia consta de los siguientes directorios Flash_comm moodle DENTRO DEL DIRECTORIO FLASH_COMM se ven las siguientes carpetas Dentro del directorio moodle se ven las siguientes carpetas En la carpeta BLOCKS INSTALACION DEL BLOQUE Para instalar el bloque de videconferencia hay que hacer lo siguiente: (tomado del archivo readme.txt que viene dentro de mismo bloque de videoconferencia, y traducido por agustin rico) Created by: Alfredo Artiles Larralde (aartiles) Francisco Javier Burón (javierburon) Descripción: con este bloque de videoconferencia, los usuarios de moodle puede iniciar y ofertar una clase o tutoría mediante videoconferencia Instalación 1. Copiar las 3 carpetas (lang, block y videoconferencia) dentro del directorio raíz de MOODLE, pero deben ir en el siguiente orden: a. La carpeta lang contiene las instrucciones del archivo de idioma, asi que el archivo block_videoconference.php, debe colocarse dentro de la carpeta \lang\en_utf8 posteriomente podrá traducirlo. b. La carpeta “block” contiene la carpeta “videoconference” que debe colocarse dentro de la carpeta \block debajo del moodle c. La carpeta “videoconference” (NO CONFUNDIR CON EL BLOQUE) debe colocarse debajo de un directorio Flash_comm que crearemos más adelante, asi que esta nos dira como debe funcionar nuestro bloque moodle de videoconferencia, volveremos a el más tarde 2. TODAVIA NO CORRA EL ADMIN DE MOODLE, hasta que hayamos instalado el flash server. 3. Cuando haya instalado el flash server, las carpetas que se encuentran debajo de “videoconference” se instalan en las siguientes carpetas: ‐/flash_comm/aula ‐/flash_comm/tutoria ‐/Flash Media Server 2/applications (donde la aplicación haya sido instalado VAMOS A PROCEDER A INSTALAR EL FLASH SERVER DE MANERA LOCAL (es como lo tengo ahora). INSTALACION DEL FLASH SERVER Es conveniente instalar el flash server en un directorio debajo de moodle, para que tengamos la oportunidad de correr C:\mimoodle\moodle\flashserver En lugar de c:\archivos de programa\flashserver Ya que si es necesario, es más fácil accesar a él en este directorio c:\mimoodle\flashserver Estas son las instrucciones de instalación (sin traducir aún) System configuration You can set up your software in one of a few configurations: • You can install the Flash Communication Server software on the same computer that is running Flash MX and the Flash Player. • You can install the Flash Communication Server software on one computer and use another computer for Flash MX and the Flash Player. To install Flash Communication Server: 1 Locate the FlashComInstaller.exe file. This file is on your installation CD, or you may have downloaded it. 2 Double-click the installer icon. The installer launches. 3 Enter your name and serial number in the dialog box that appears. Click OK. 4 Read the license agreement and click Yes to accept the agreement. 5 The installer suggests a default location for the server installation. The default location is C:\Program Files\Macromedia\Flash Communication Server MX. Click Next to accept the default location or Browse to choose another location. 6 Choose either the typical installation or a custom installation. (A typical installation is recommended.) Click Next. 7 Enter the user name and password you have chosen. You must enter a password. The server does not accept administrators with empty passwords. The installer copies your user name and password into the server’s XML configuration files. You can edit or add administrators later using the Administration Console. For more information, see “Adding and editing administrators” in Managing Flash Communication Server. 8 Choose Developer Install or Production Install. If you choose Production Install, you will be asked to provide two directories: a directory for the Flash SWF files and accompanying HTML files, and another directory for server-side files that should not be accessible to users browsing your site. If you choose Developer Install, both types of files will be installed in the same location. 9 Next, the installer suggests a location for the server administration tools and sample files, including the Administration Console. If you have a web server installed on the same computer, the installer asks if you want to install these files into the web server’s publishing directory. You can install these files into the web server’s publishing directory or click Browse to choose another location. Click Next when you are satisfied with the installation location. 10 Click Next to accept the new program icons. 11 Click Next to accept the installer settings and install Flash Communication Server. 12 Click Finish. The Flash Communication Server service starts up. The server runs as a service, which means it runs in the background and starts automatically when the computer is started up. The installation is complete. If you choose not to start the Flash Communication Server service right away, you can start it later. See “Starting and stopping the server” in Managing Flash Communication Server. About the installed files When the server has been installed, you’ll find several files together with it in the installation directory. If you chose the default directory in the installer, these files are located in C:\Program Files\Macromedia\Flash Communication Server MX\. It’s a good idea to familiarize yourself with the contents of the Flash Communication Server MX directory before continuing with this chapter. The Flash Communication Server MX directory contains these items: • FlashCom.exe is the server application. • FlashComAdmin.exe is the server’s administration controller. • License.htm contains the text of the Flash Communication Server license agreement. • Js32.dll contains the server’s Server-Side Communication ActionScript engine. • TcSrvMsg.dll, xmlparse.dll, and xmltok.dll are additional components of the server. • The conf directory contains the server’s hierarchy of XML configuration files. • The Tools directory contains BAT files that can be used to start and stop the server. • The flashcom application directory contains sample client applications you can use to experiment with the server and get an idea of the kinds of things that can be done with it. Also included is the Administration Console (admin.swf ) that you can use to connect to the server to monitor and control its activity remotely. • The admin directory contains the Administration Console (admin.swf ), which you can use to connect to the server to monitor and control its activity remotely. • You can find running samples in \flashcom\applications and additional documentation samples in flashcom_help\help_collateral, both of which can serve as templates for your own applications. COMO CORRER EL FLASH SERVER PARA CORRER el flash server, abra el navegador de internet y ponga el URL siguiente: Hay que correr las siguientes aplicaciones FMSmasterÆ Flashmedia maestro, para el streaming de archivos FmsEdge Æ flasmedia de intercambio FMSCore Æ Flash media de gestión FMSadmin Æ Administración del flash server Cada aplicación requiere que sea activado, para que el flash server pueda correr, C:\flashserver\fms2_console.htm Esto abrirá la consola de flashserver En la misma observará los siguientes campos, que debe llenarse con los datos de su server Server name: MI MOODLE (EMCAR) Server address: http://midominio.com/flashserver (recuerde que el flash server debe haberse instalado dentro de la carpeta moodle) Username: nombre del admin Password: contraseña del admin COMO UTILIZAR EL BLOQUE EN EL SITIO MOODLE LIMITACIONES


